Free shipping from 1 999 Kč
Fast shipping
Verified store
Thousands of customers




Free shipping from 1 999 Kč
Bambu Studio is software based on PrusaSlicer by Prusa Research, which is based on Slic3r created by Alessandro Ranellucci and the RepRap community.
Bambu Studio is modern, feature-rich software for preparing files for 3D printing, developed by Bambu Lab. It includes project-oriented workflows, systematically optimized slicing algorithms, and a user-friendly graphical interface, ensuring users a smooth printing process.
System requirements
• Operating system: Windows 10 or later / Mac OS X v10.15 or later / Linux Ubuntu 20.02 or later, Fedora 36 or later (the Linux version is available for download on GitHub).
• Processor: Intel® Core 2 or AMD Athlon® 64, 2 GHz or faster.
• Graphics system: OpenGL 2.0 support.
• Memory: 8 GB RAM recommended, 4 GB minimum.
• Storage: 2 GB of free disk space.
Download and installation
1. Downloading Bambu Studio
Download the software from the official website.
2. Installing Bambu Studio
Follow the installation wizard.
Setup wizard
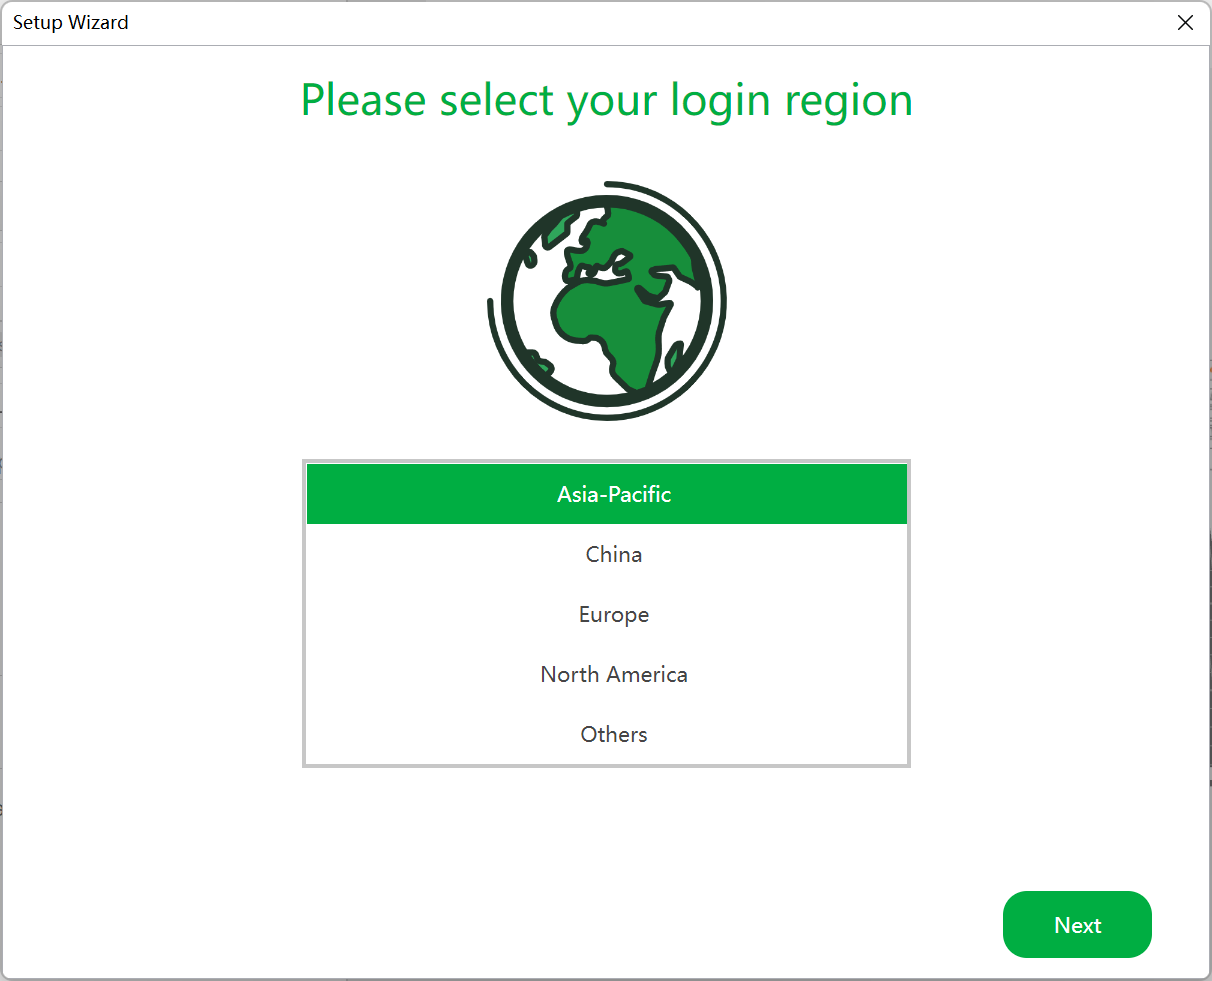
1. Selecting the login region
Select the region where you are located. For example, an account registered in North America cannot log in if the region is set to China.
2. Selecting a printer
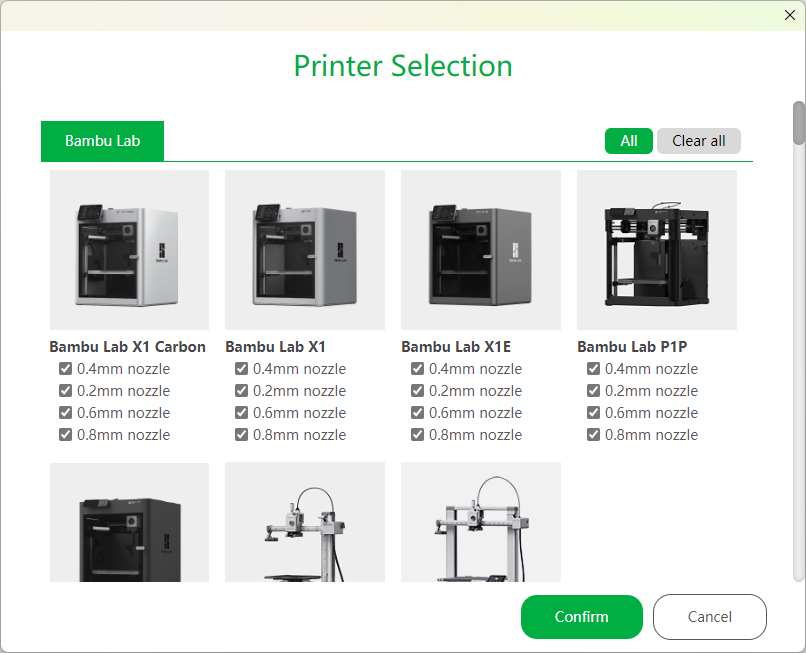
Choose the printers and nozzles you want to display in the slicer menu. The settings can be changed at any time later.
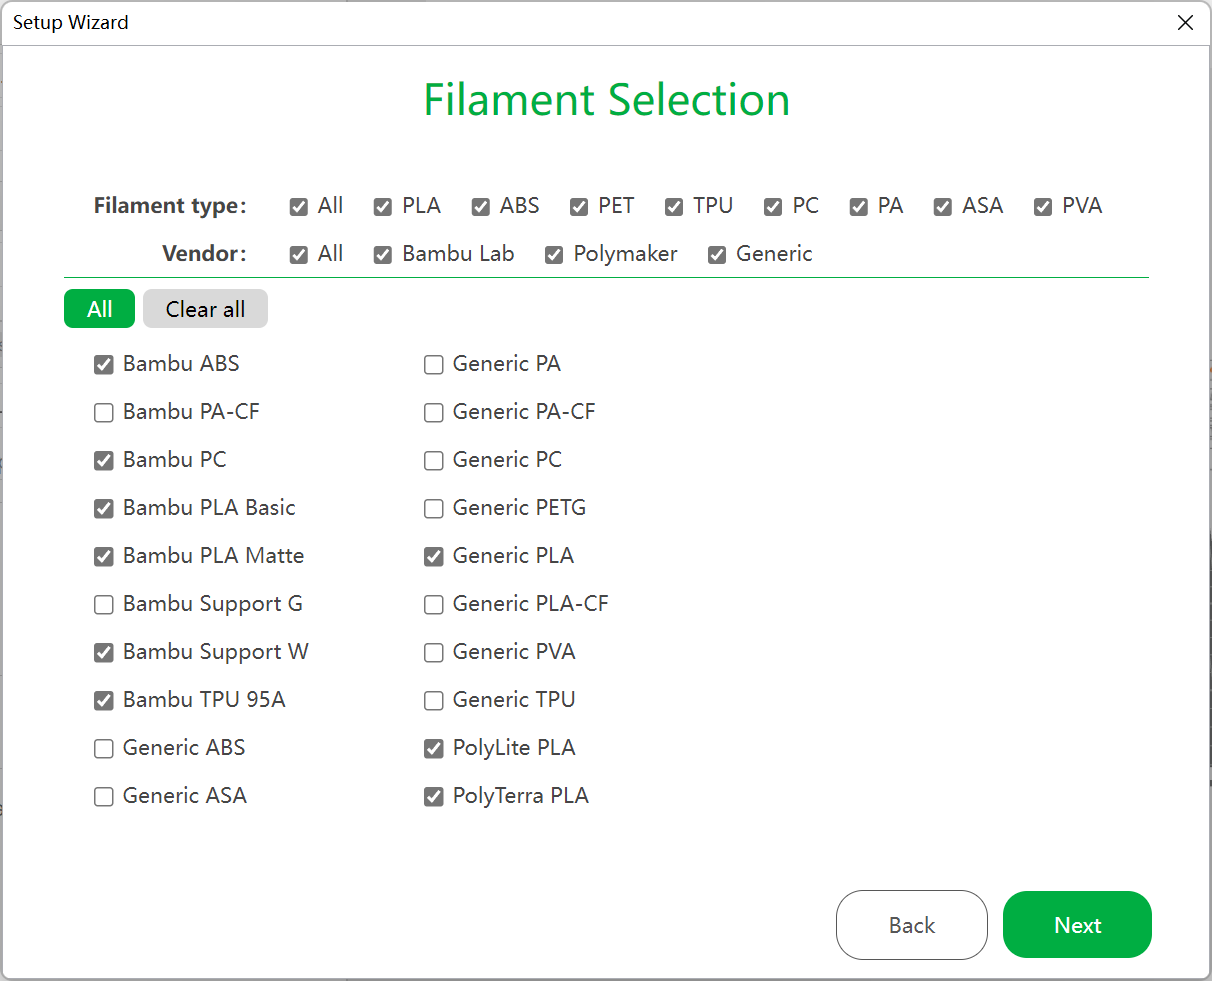
3. Selecting filament
Select the filaments you want to display in the filament presets.
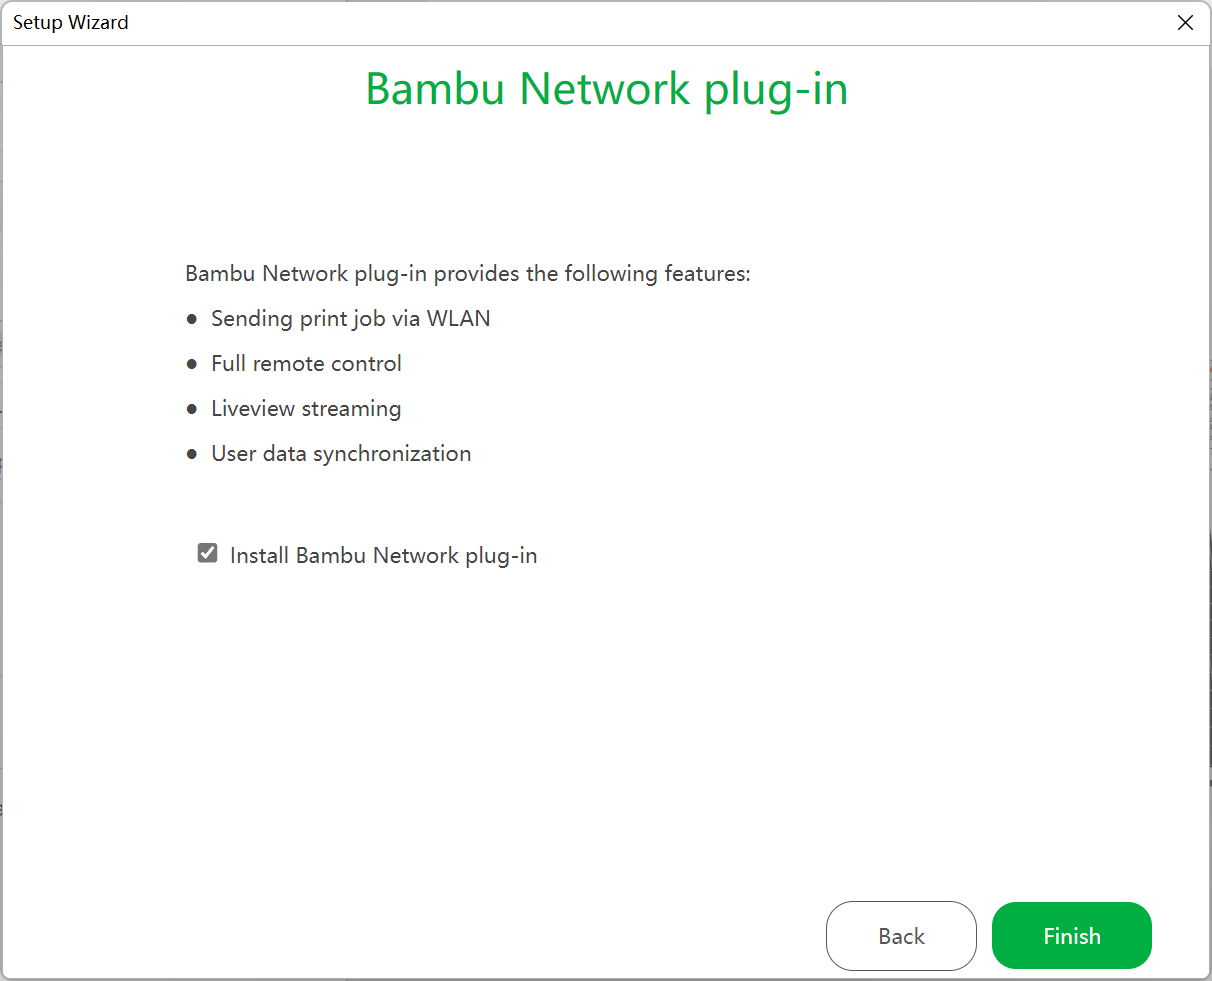
4. Installing the Bambu Network plugin
This plugin enables network functions such as WAN/LAN printing, remote control, and data synchronization. Installation requires an internet connection and takes place automatically after the wizard is completed.
First print
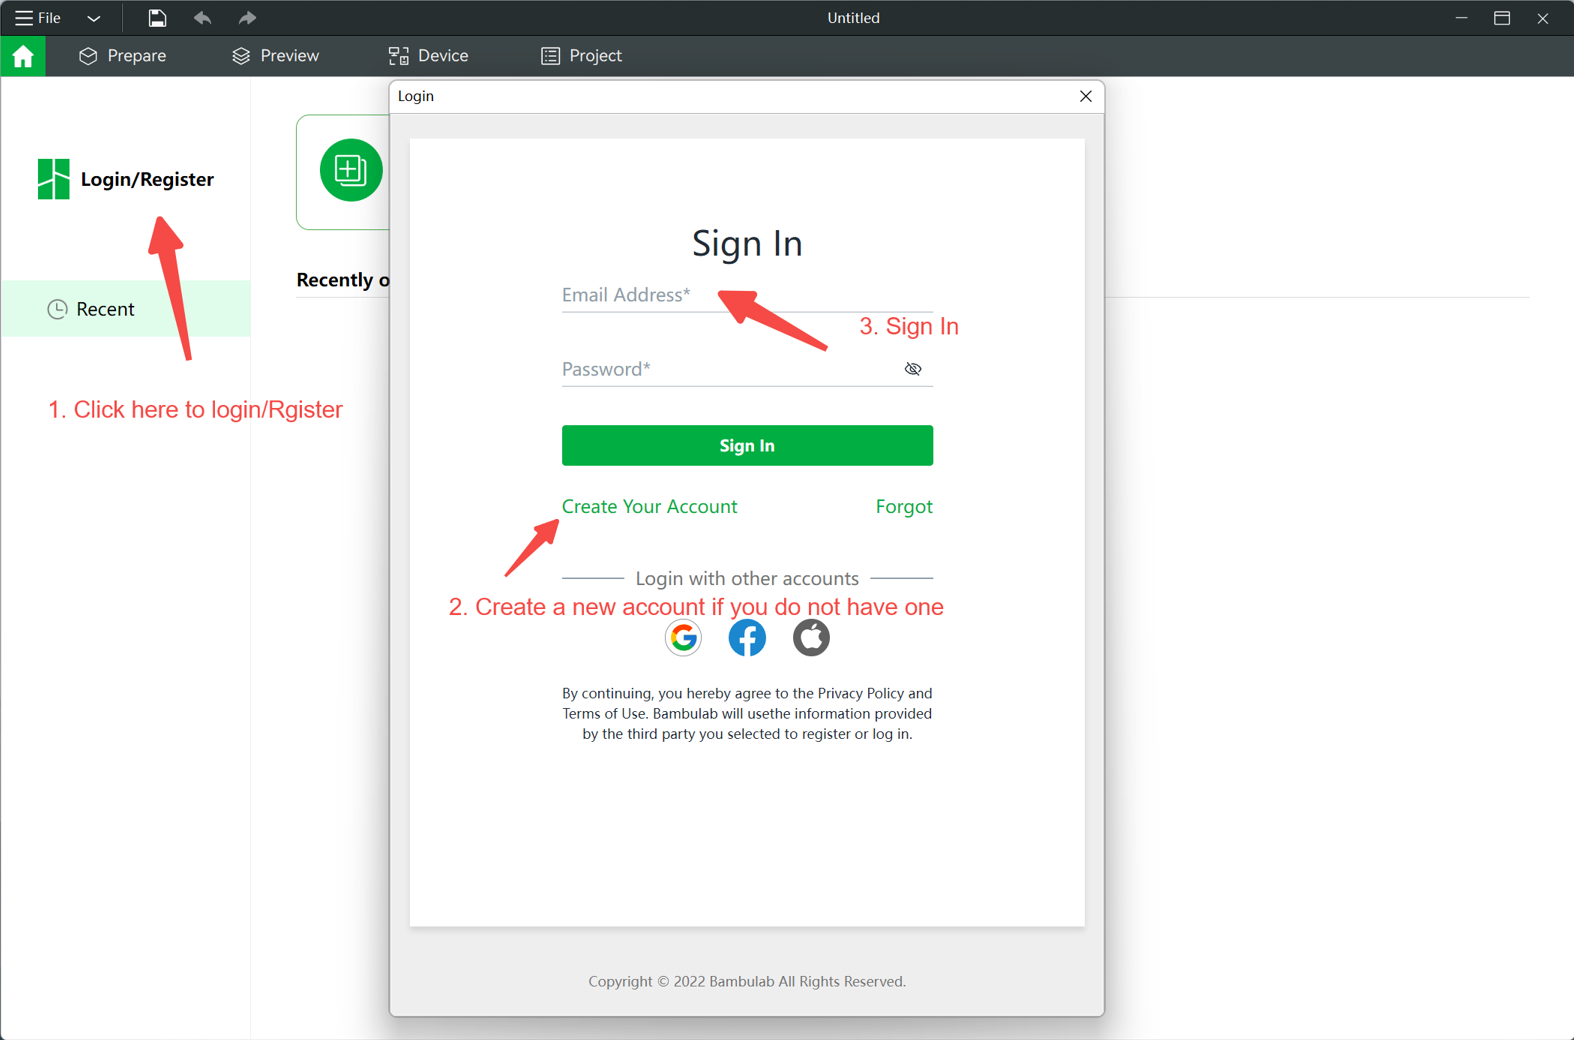
1. Logging in
Logging in is not required, but it is recommended for data synchronization and print history.
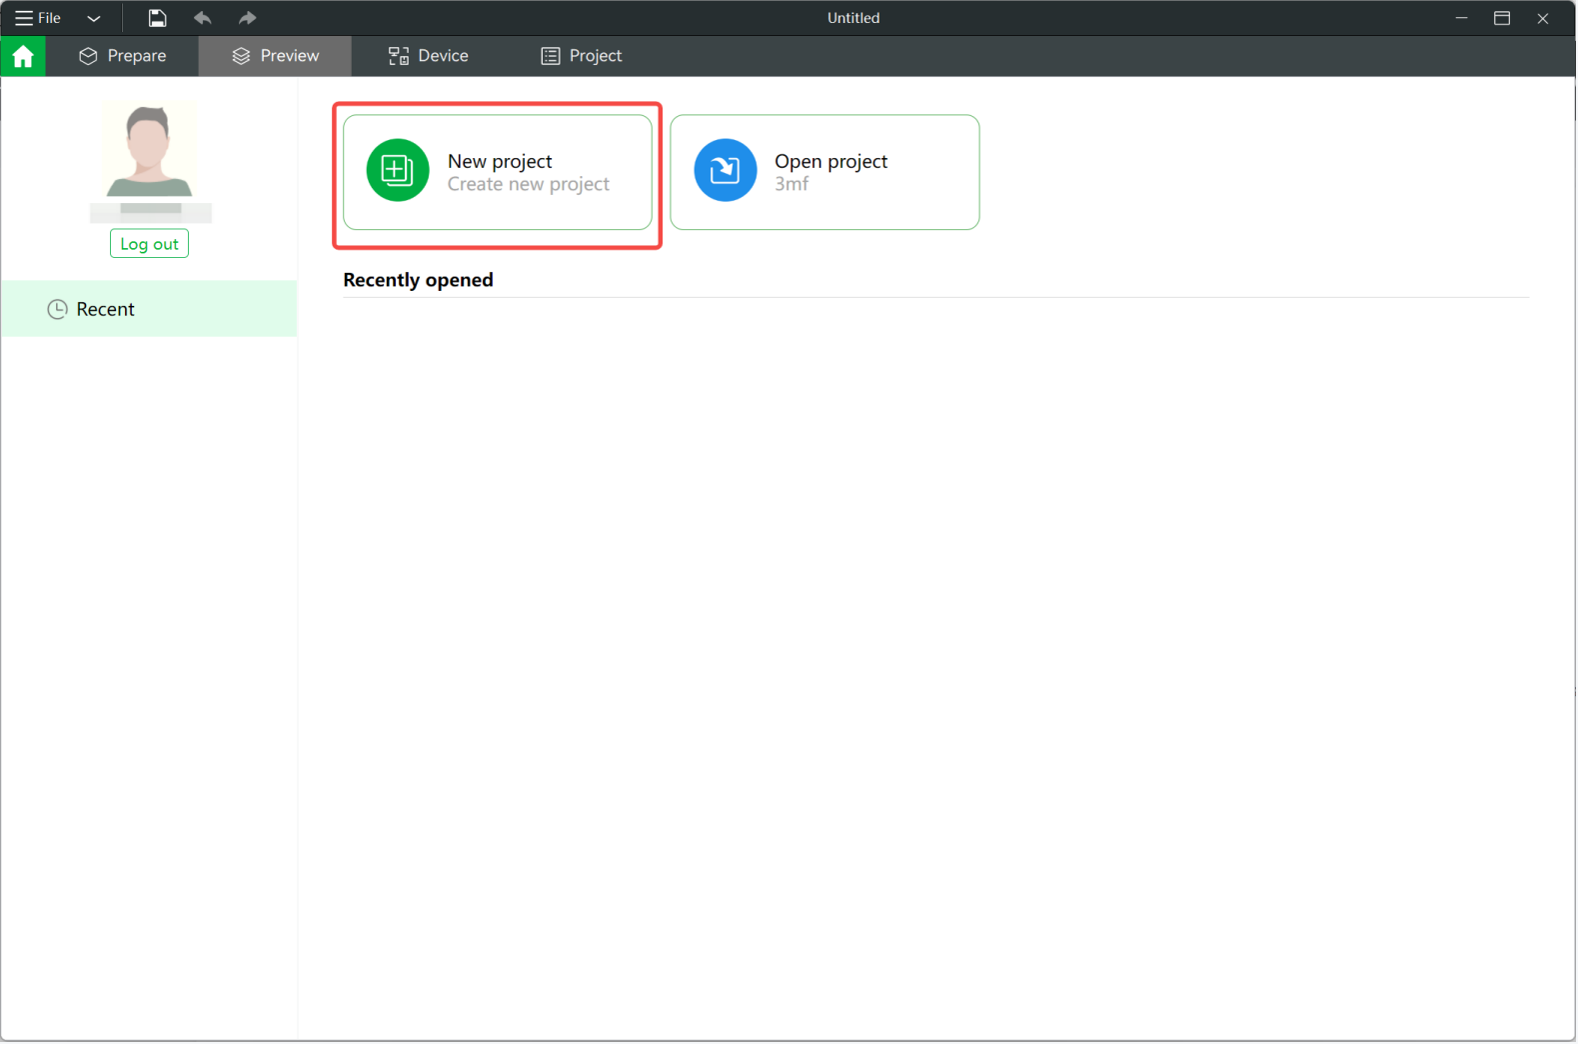
2. Creating a new project
Click New Project to start preparing the model.
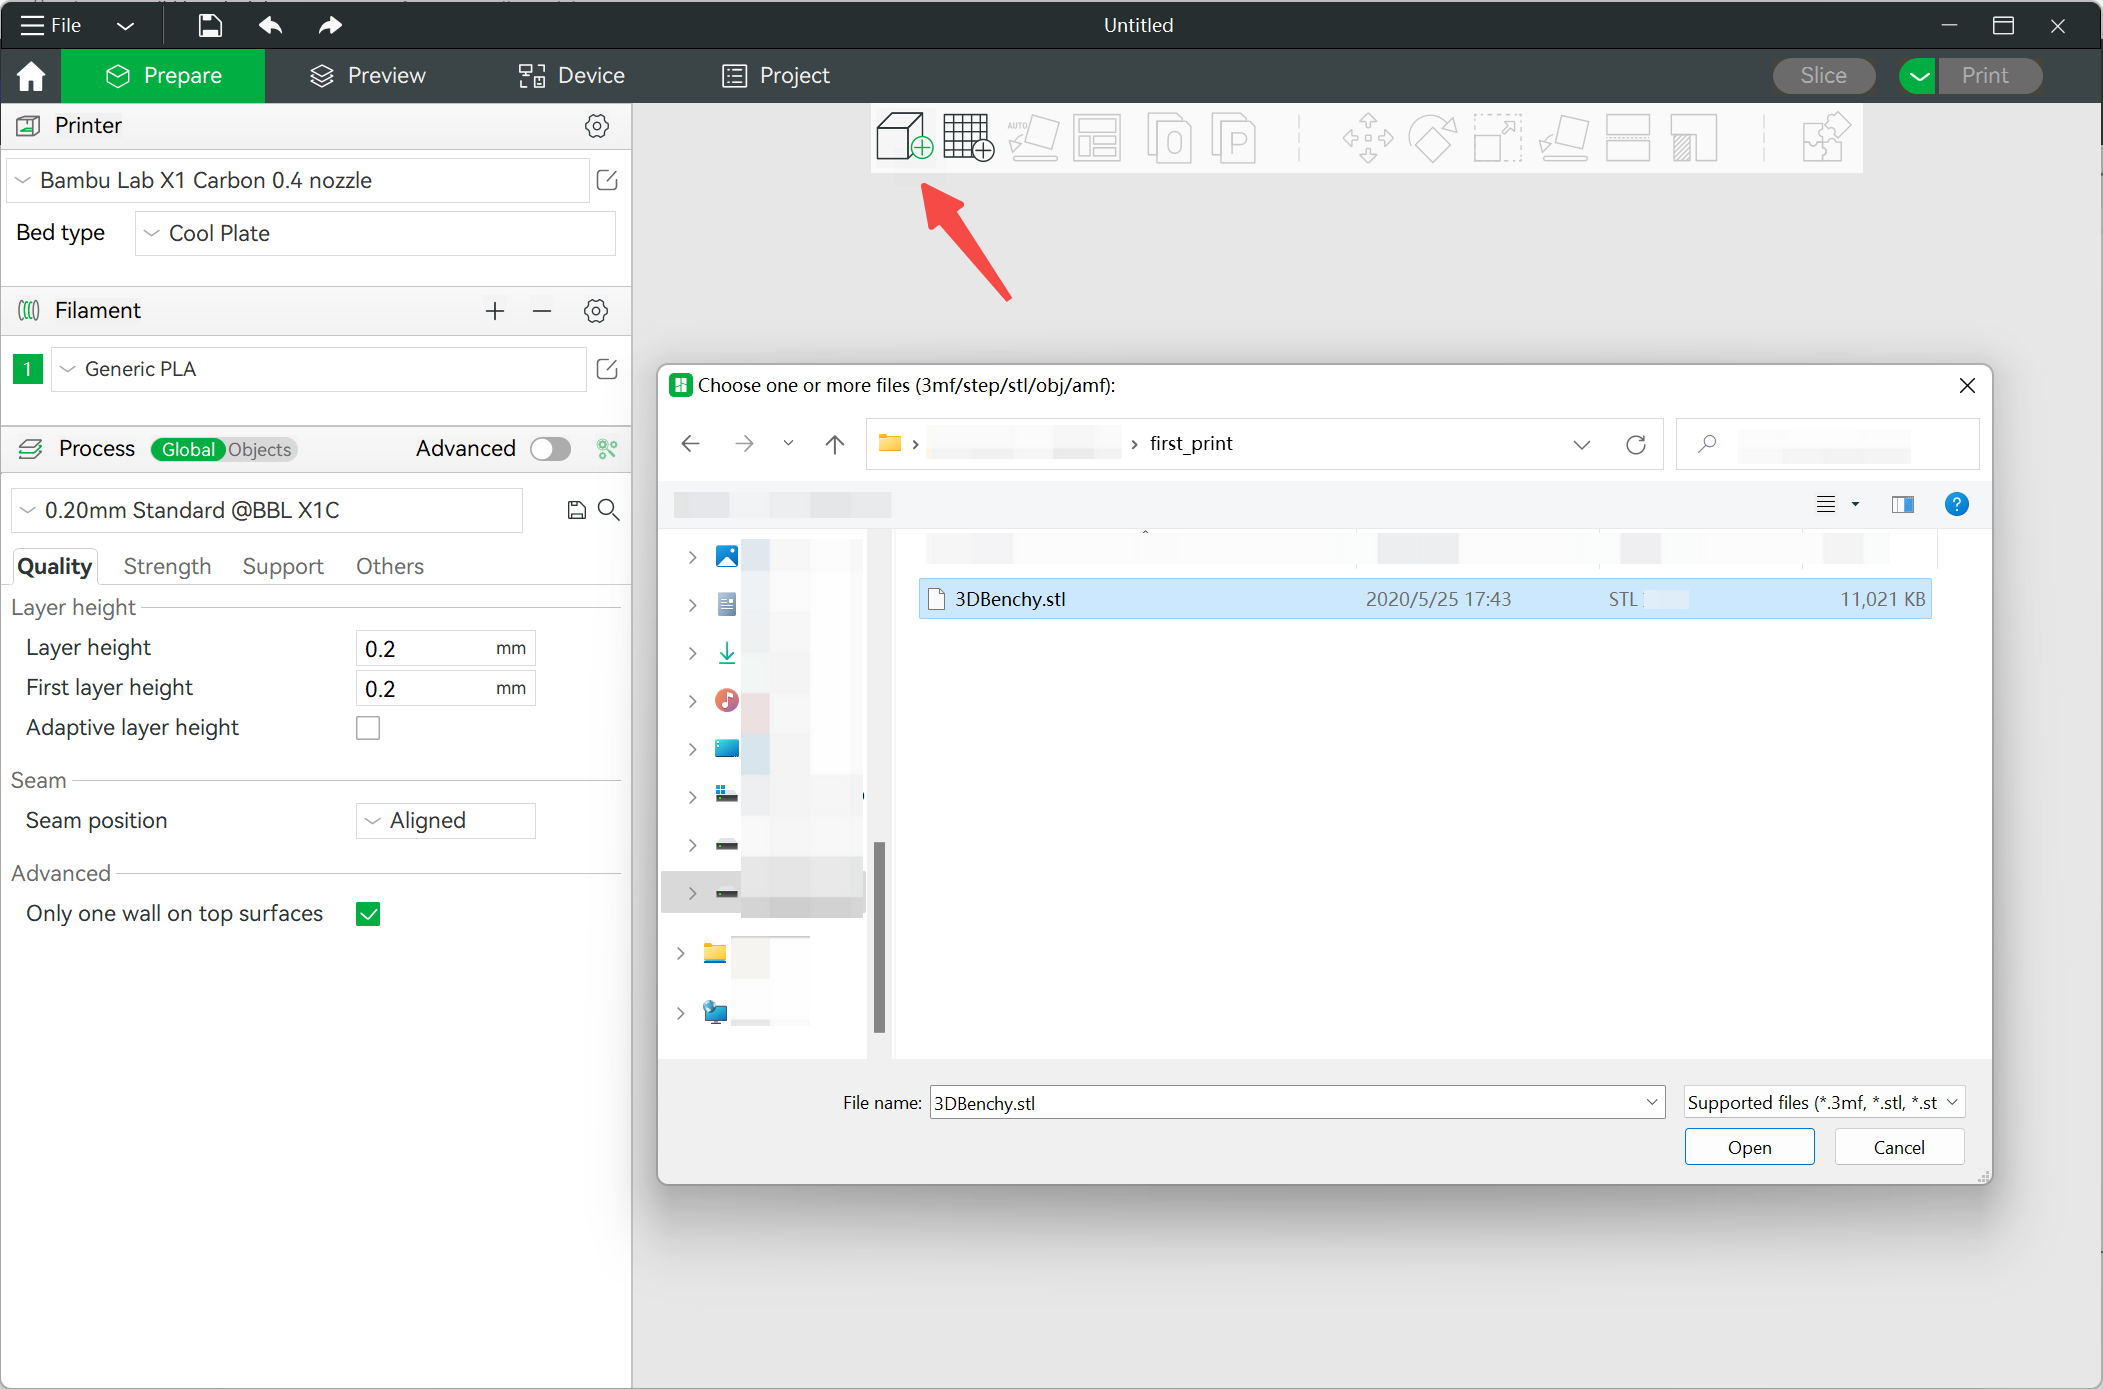
3. Adding a model
Click the model-add icon on the toolbar or drag a file into the window. Supported formats: .3mf, .stl, .stp, .step, .amf, .obj.
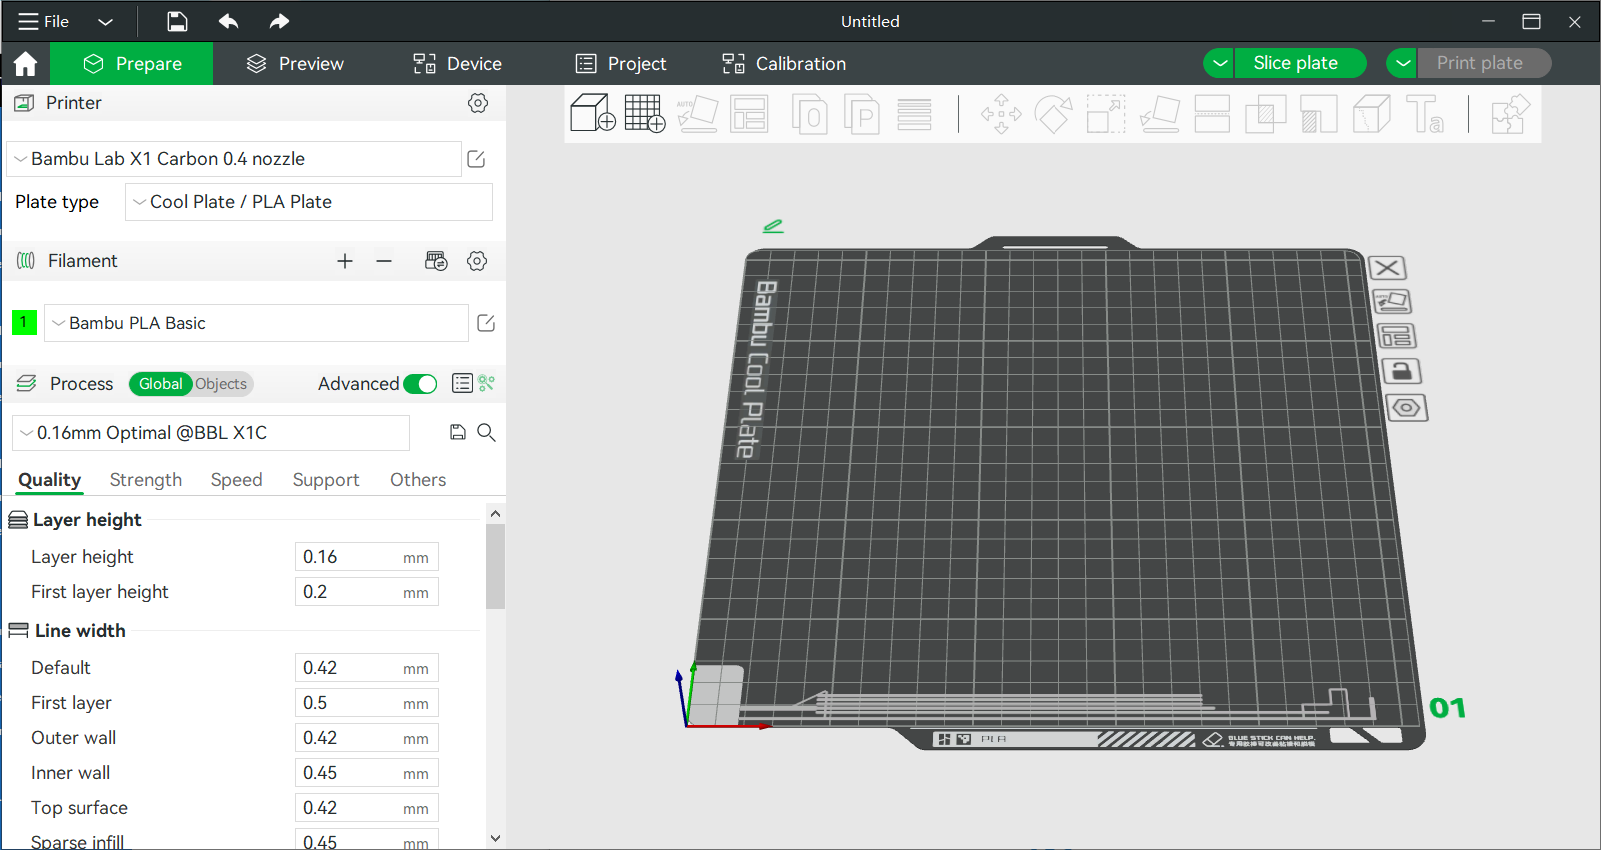
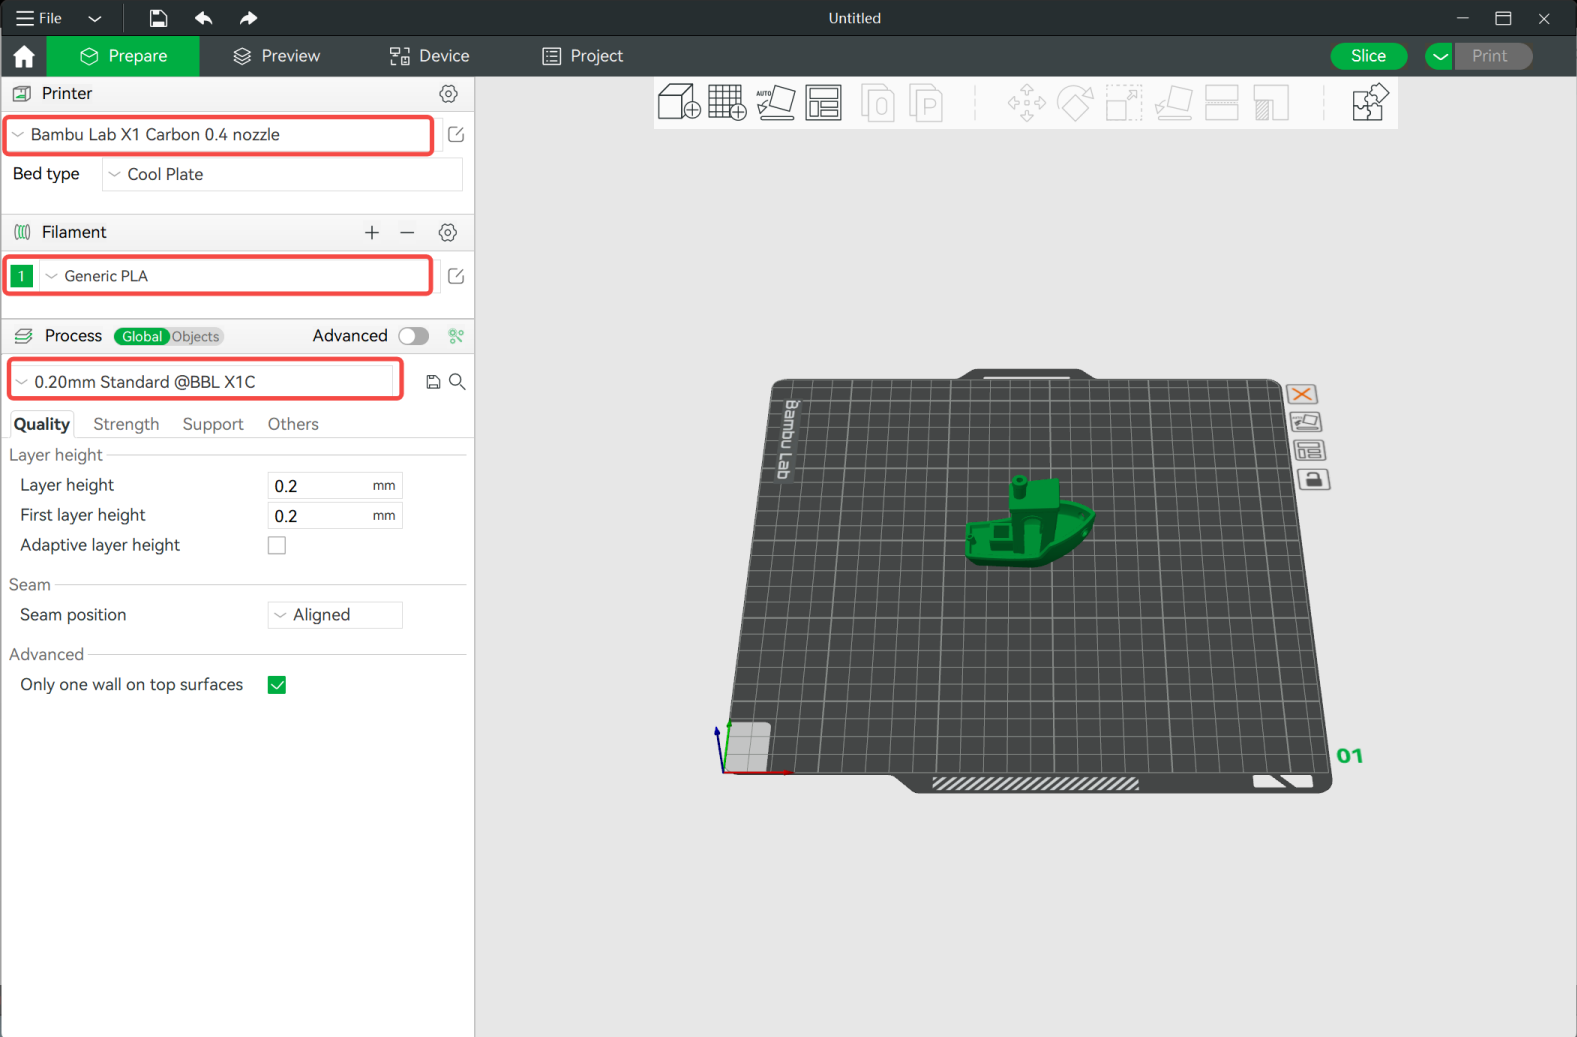
4. Selecting the printer, filament, and process settings
To start preparing the model, you must select presets for the printer, the filament you will use, and the settings with which you want to print the model.
Select the printer you are using from the drop-down list under the Printer tab. This selection will also include the nozzle size with which you will print.
In the Filament section, select the type of filament you intend to use from the drop-down list.
Choose the layer height at which you want to print the model from the Process drop-down menu. Always remember that the smaller the layer height, the longer the print will take. For most prints, a layer height of 0,20 mm is standard.
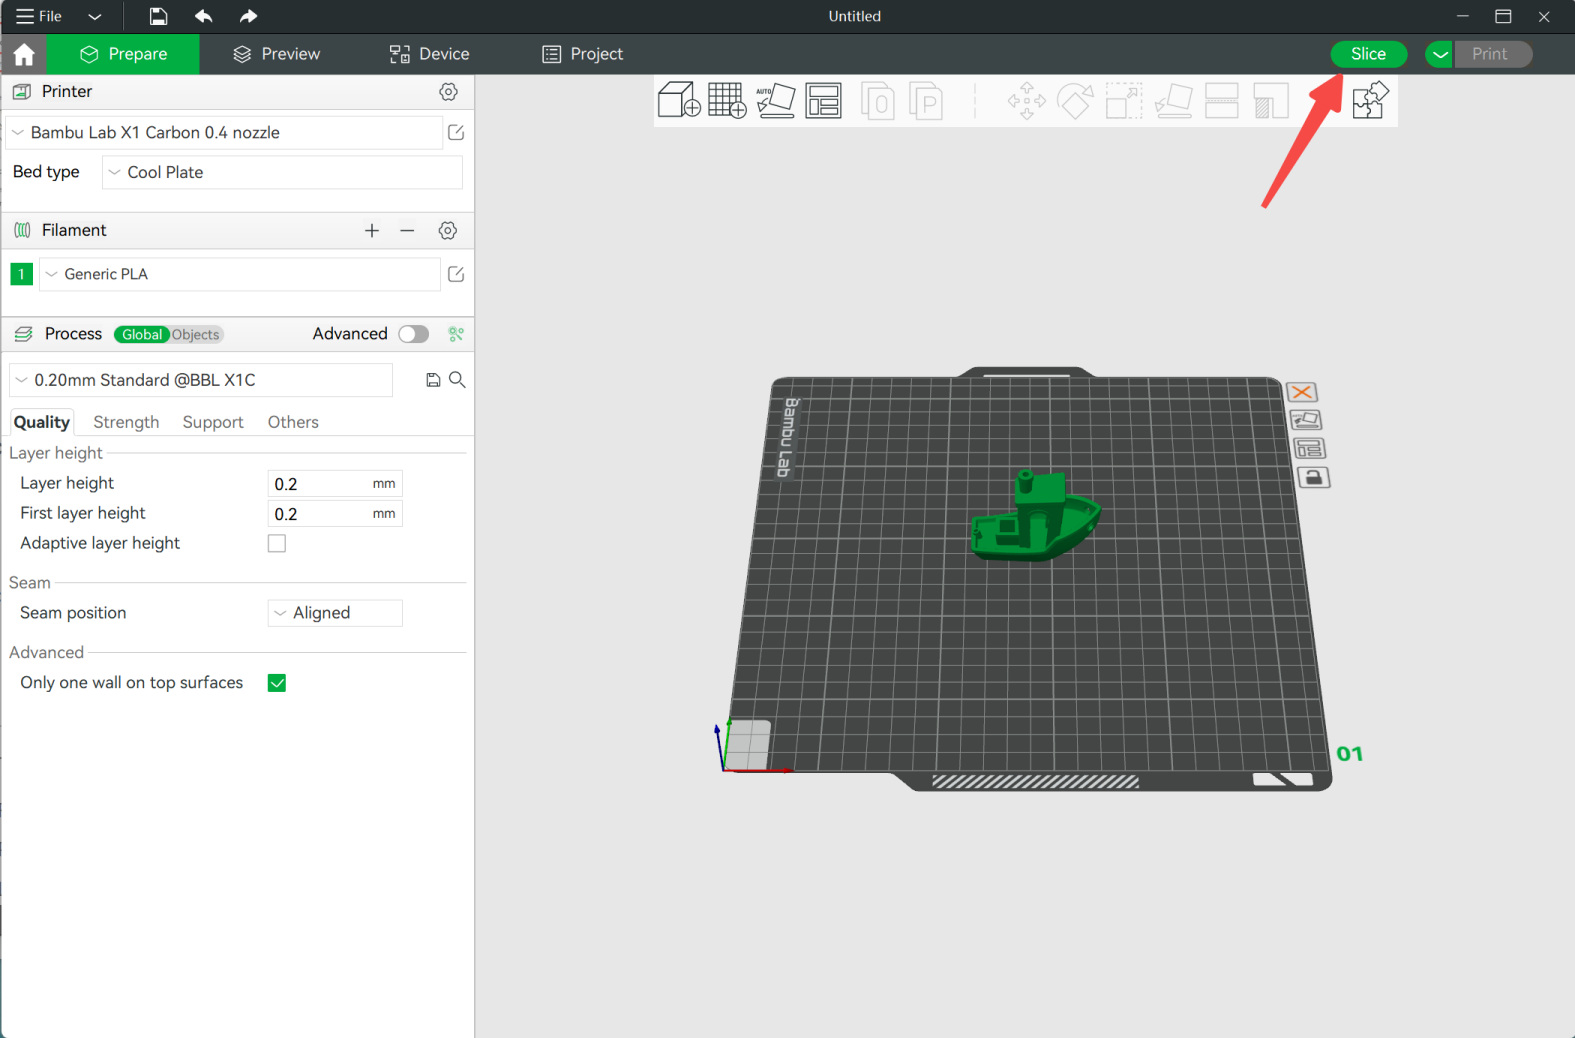
5. Slicing the model
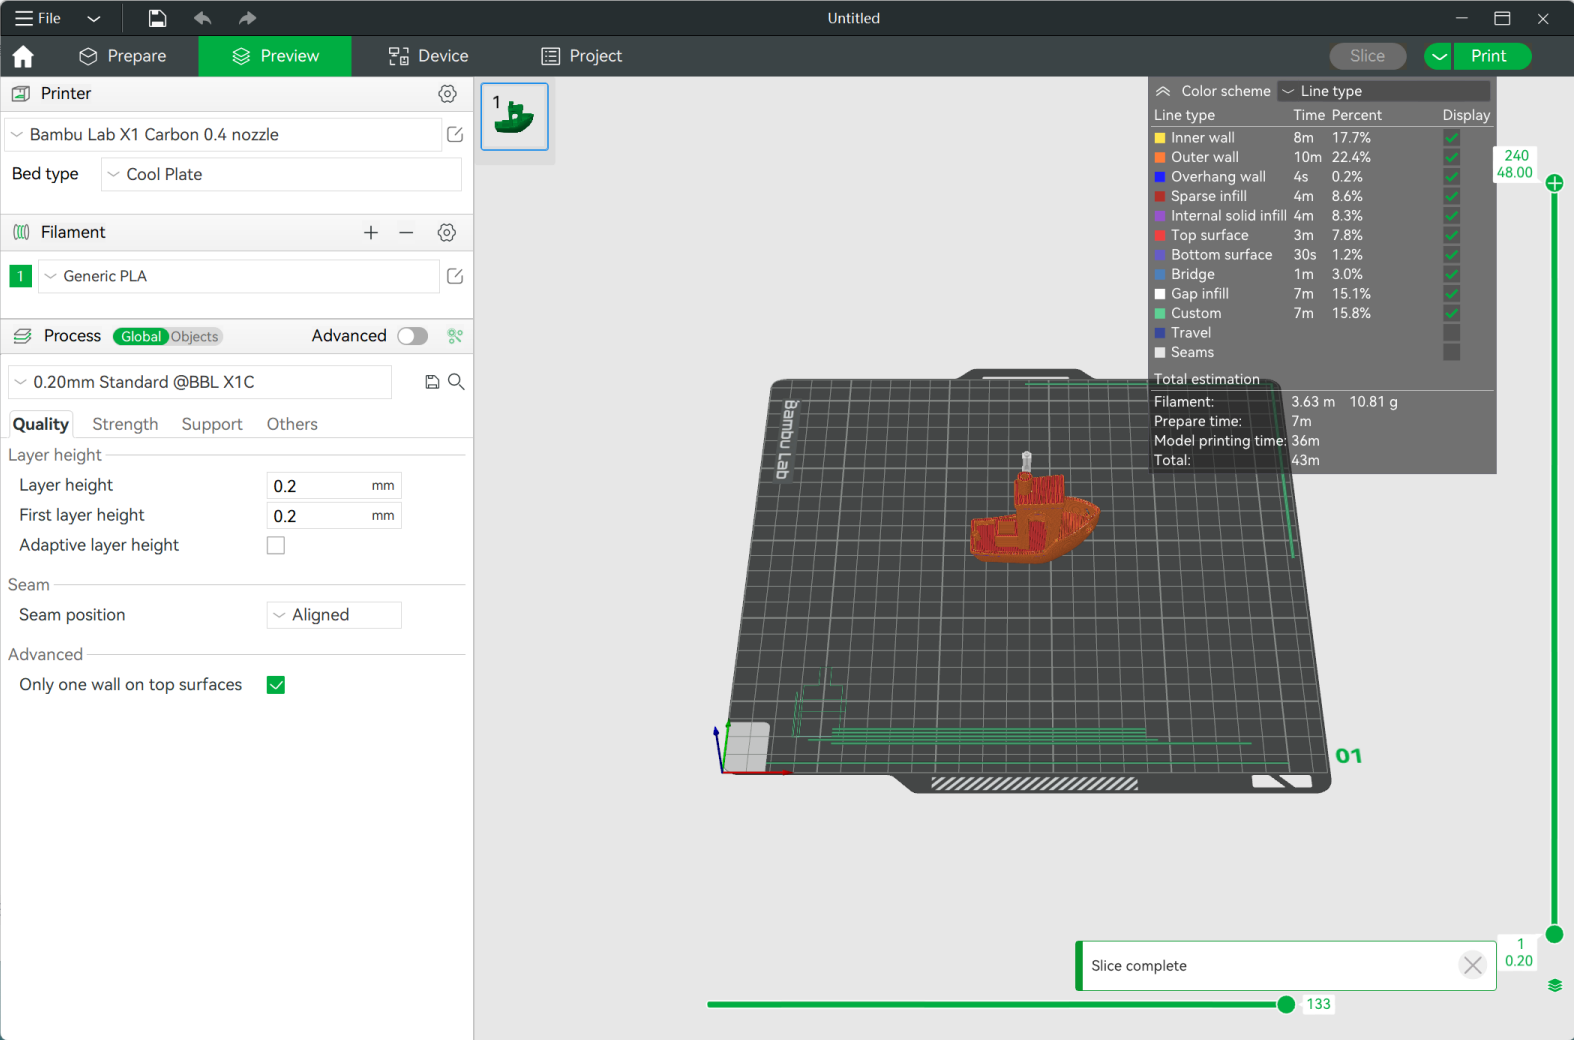
Once everything is ready, click the Slice button in the upper-right corner of Bambu Studio.
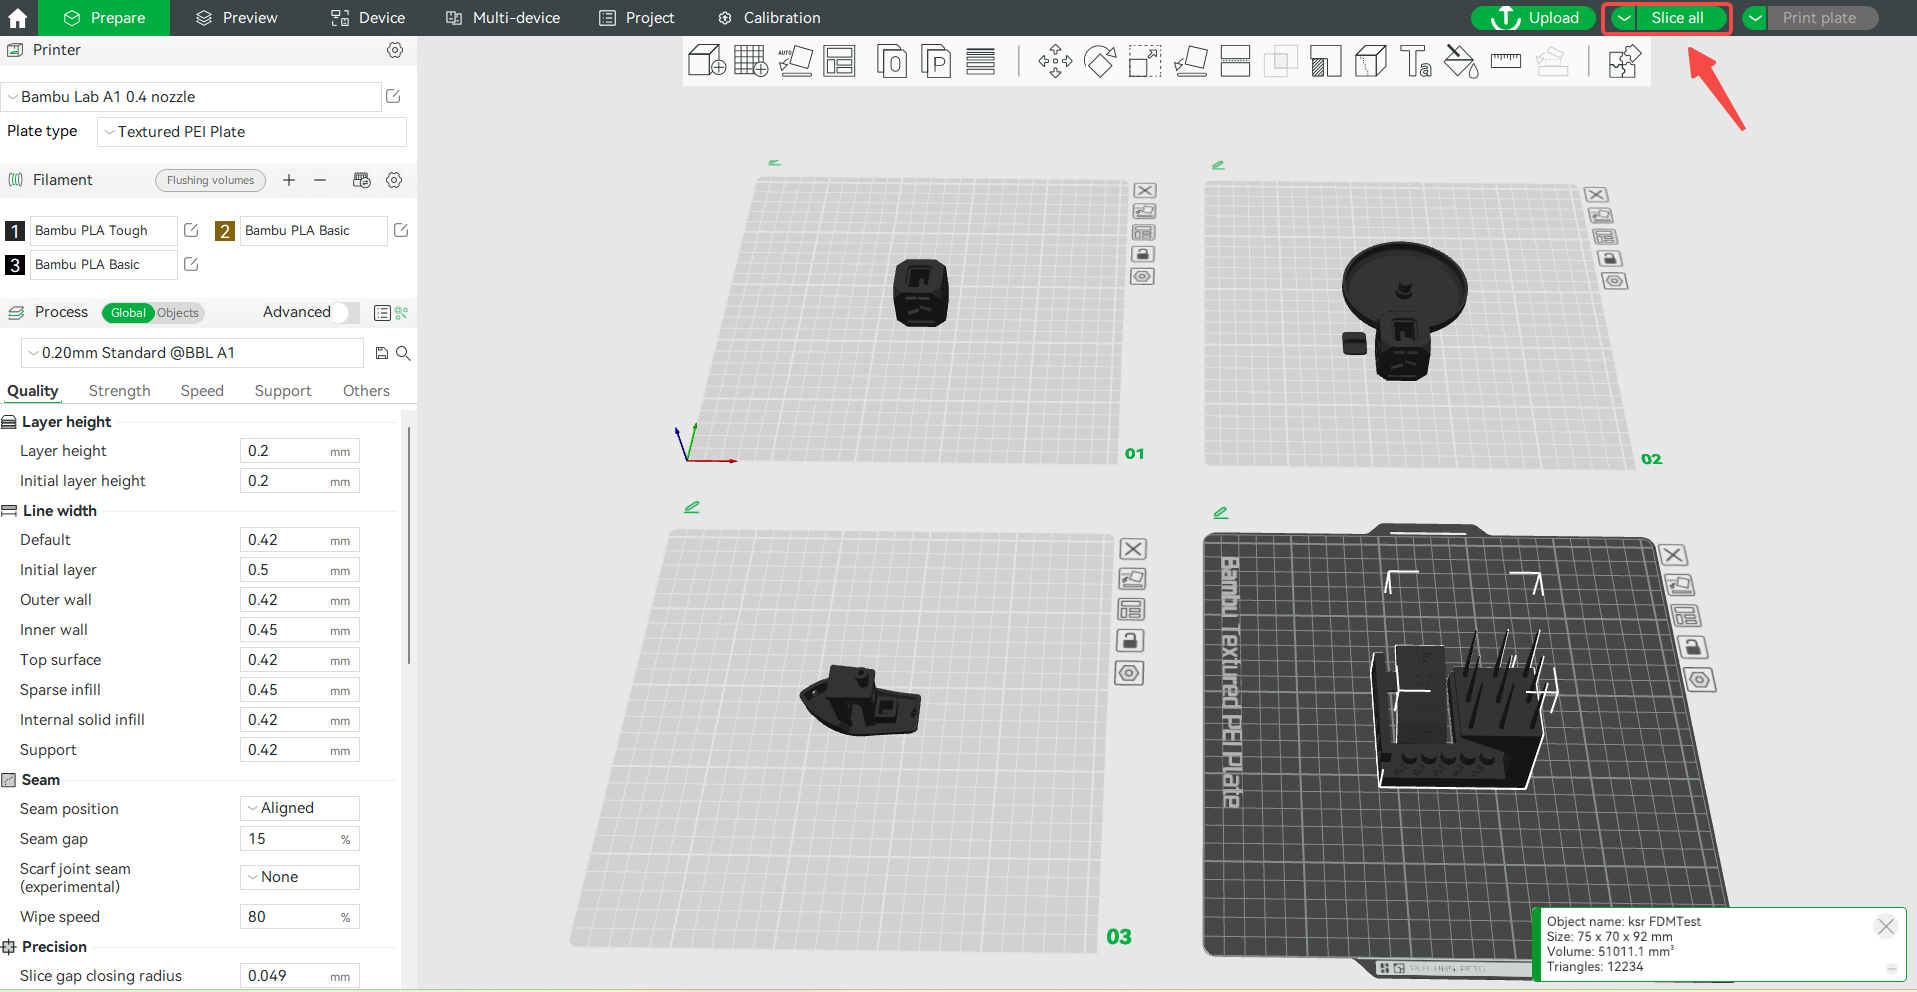
If the model file contains multiple plates, click Slice All in the upper-right corner of the screen.
Once complete, the slicer will take you to the preview panel (Preview Pane), where you can see what the sliced model looks like after processing the .3mf file. The histogram on the right will also display print-time information for the individual print parameters.
Sending a print job (Send print job)
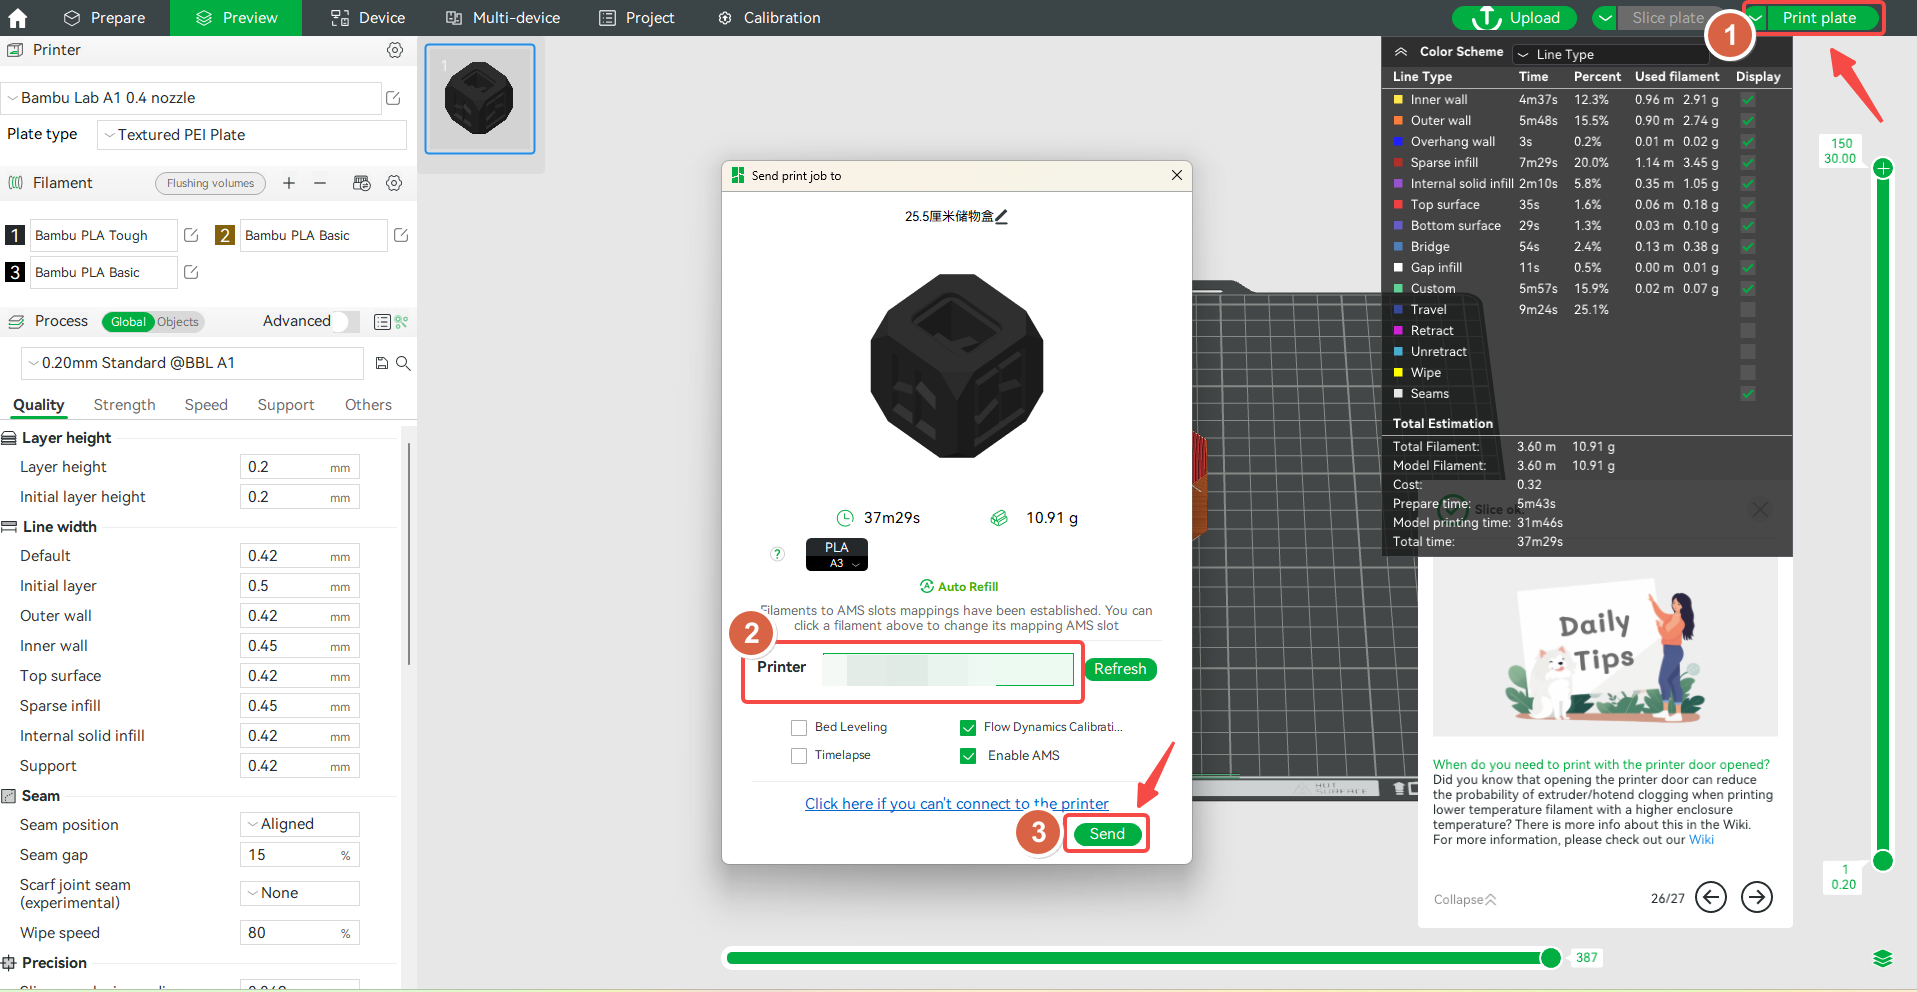
Printing a plate (Print plate)
Click the Print button in the upper-right corner. A pop-up window with a quick preview of the model will open. You will be asked to select the printer to which you want to send the file from the drop-down list. You can also choose whether to perform certain functions before printing, such as bed leveling (Bed Leveling) or flow calibration (Flow Calibration). Once complete, click Send to send the file to the printer and start printing.
Printing all models (Print all)
Note: You must have the Bambu Network plugin installed to send files over WLAN, and make sure that Bambu Studio and the printer are on the same LAN network.
Send/Send all
Click the arrow to the left of the Print plate option in the upper-right corner of the screen and select Send.
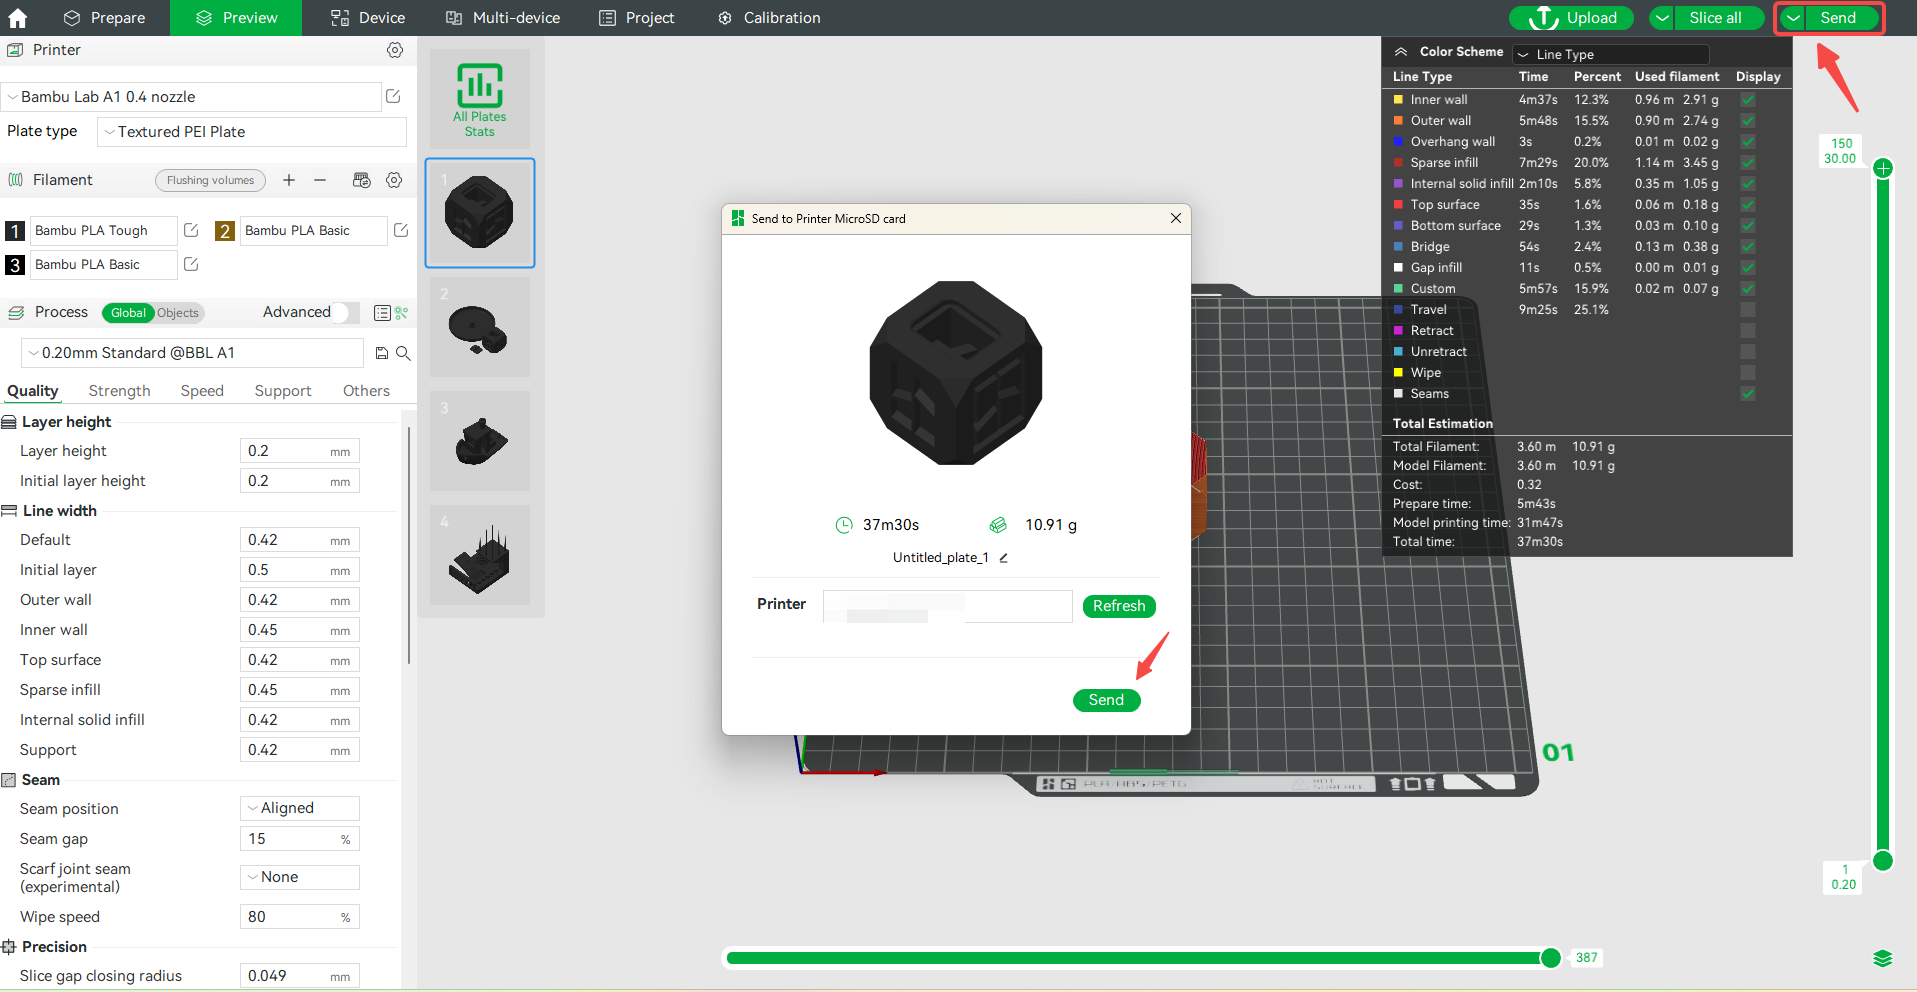
If the model file contains multiple plates, click the arrow to the left of the Print plate option in the upper-right corner of the screen and select Send all. The Send to Printer MicroSD card window will appear, where you can select the printer to which you want to send the file. The model file will be sent to the printer's SD card.
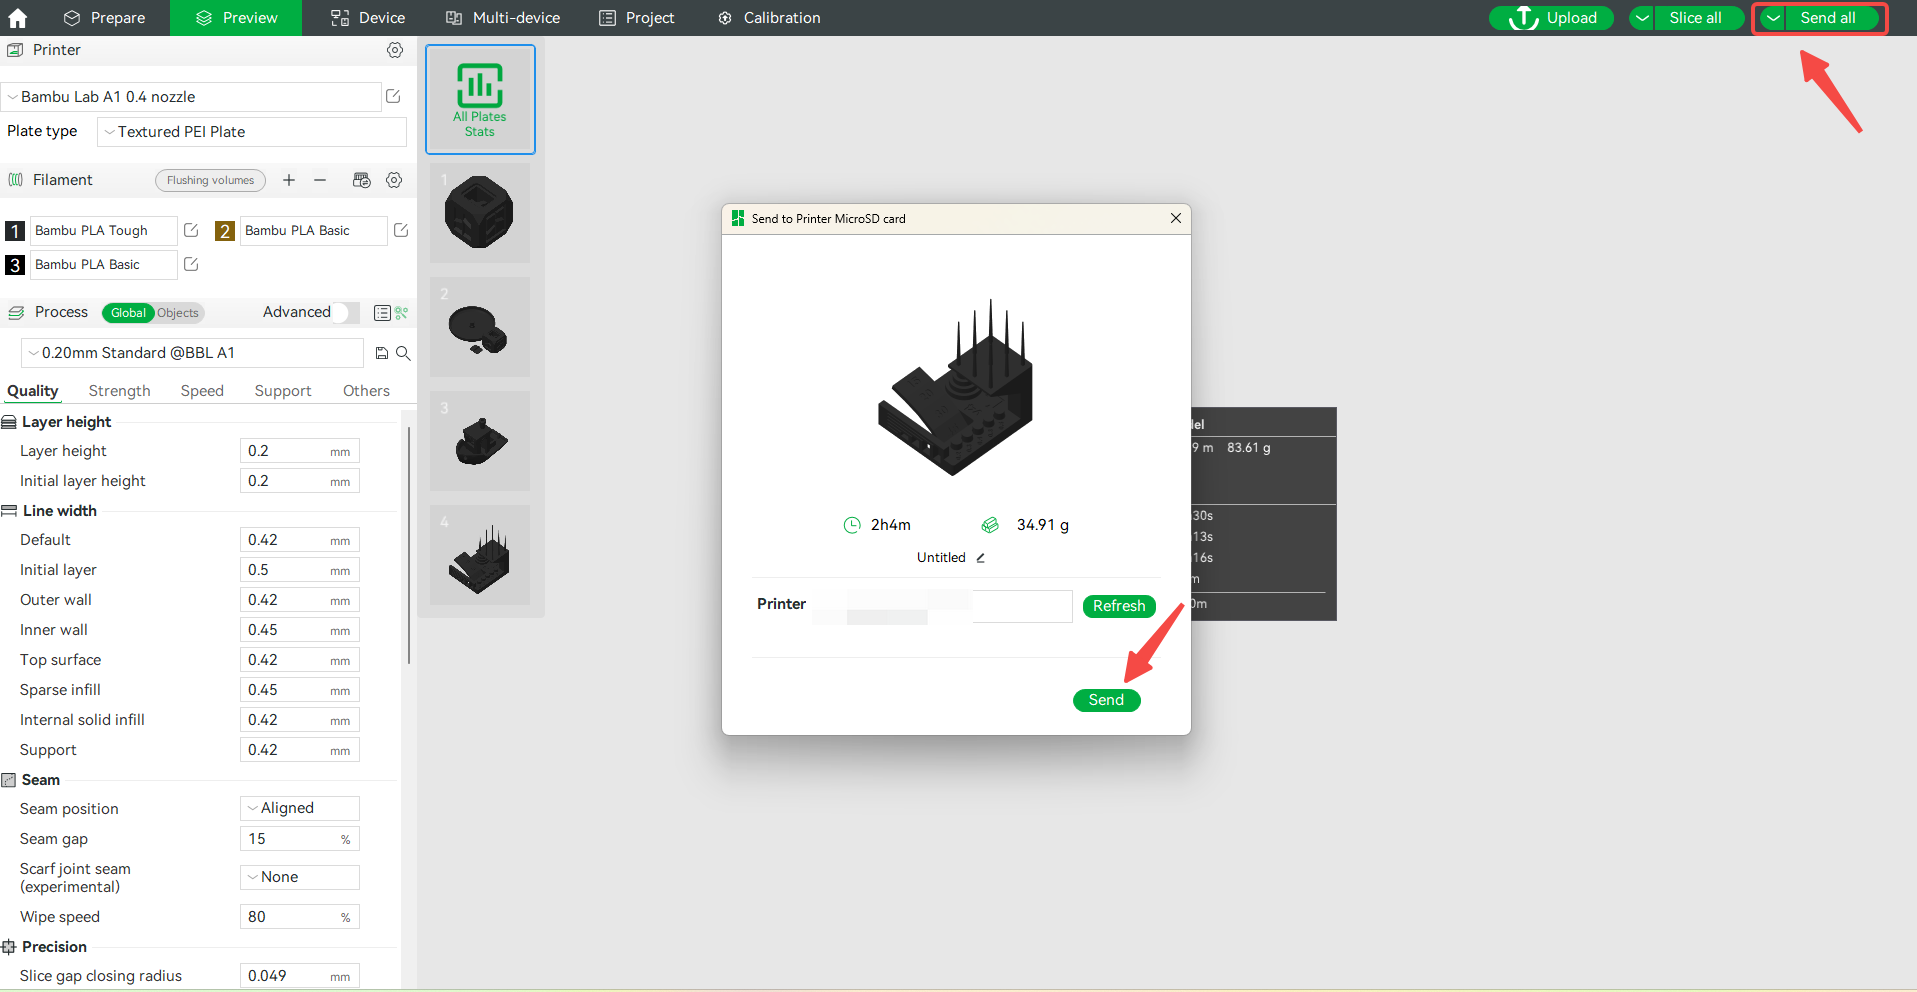
Note: Make sure that Bambu Studio and the printer are on the same LAN network.
Exporting a plate/all sliced files (Export plate/all sliced file)
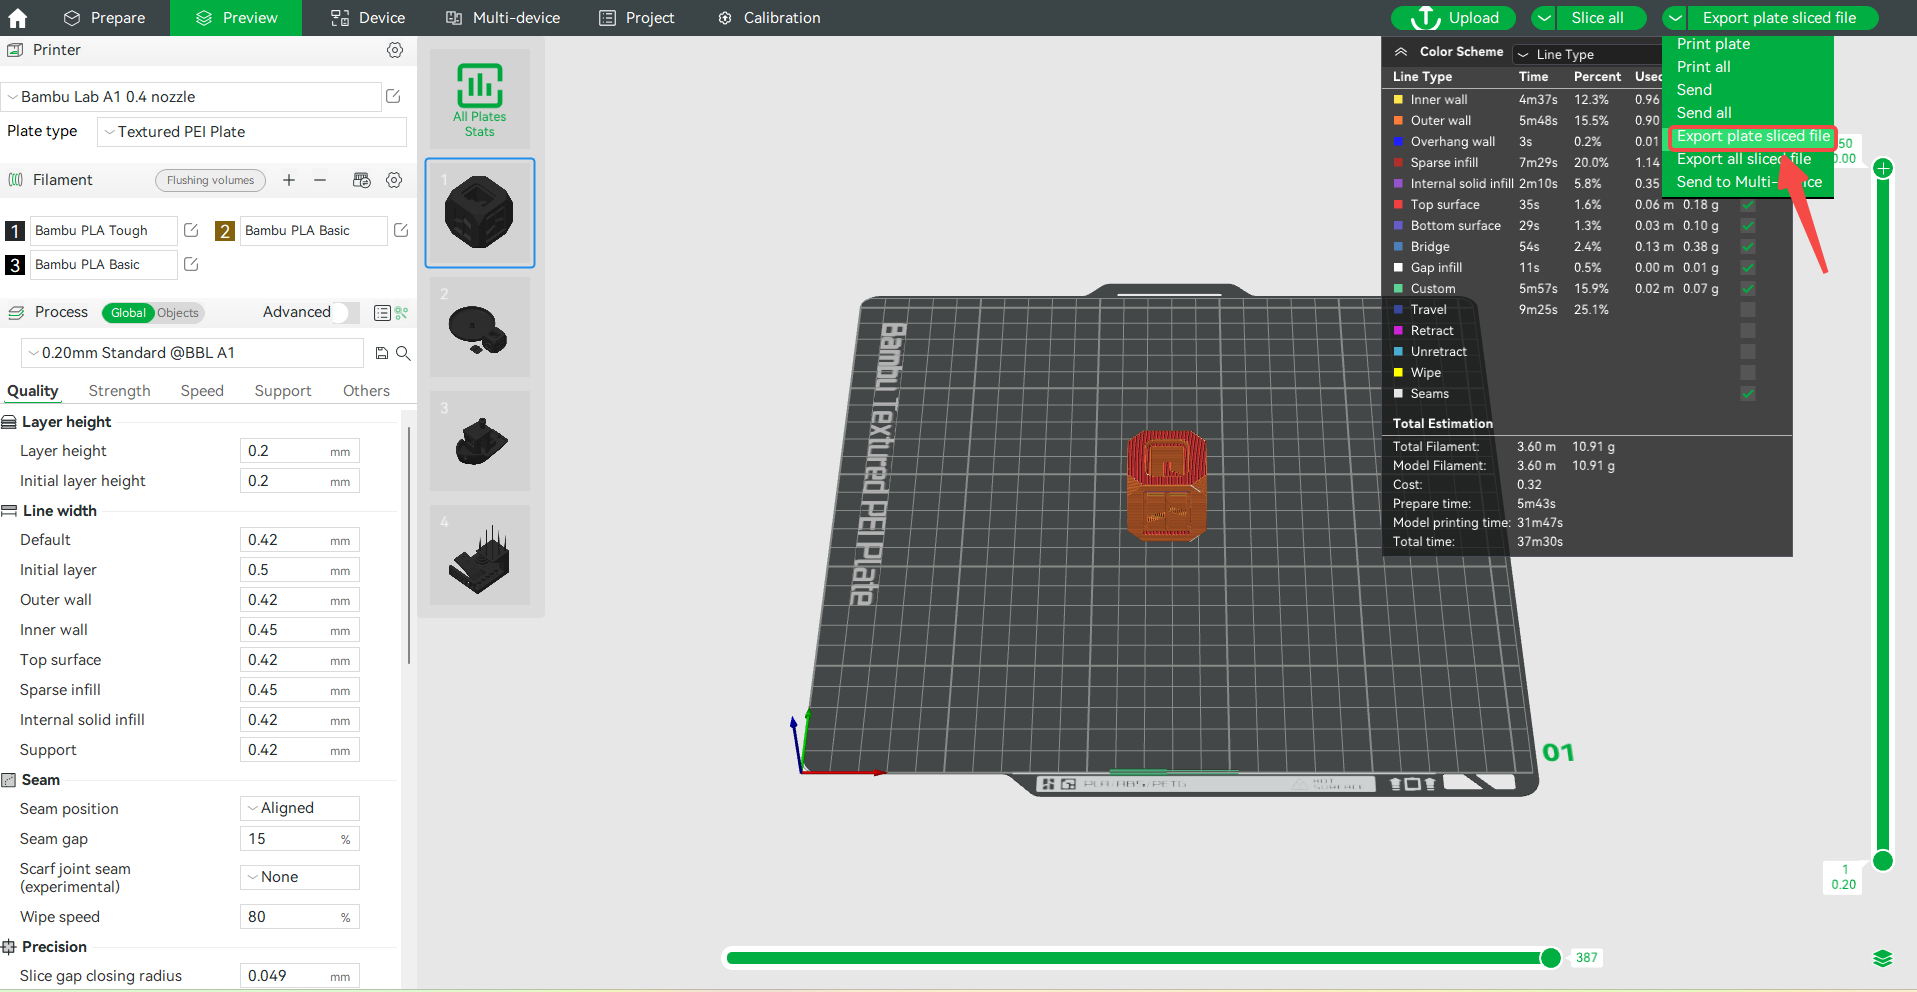
Remove the printer's SD card and insert it into the computer. Click the arrow to the left of Print plate in the upper-right corner of the screen and select Export plate sliced file. Then click the selected option and confirm.
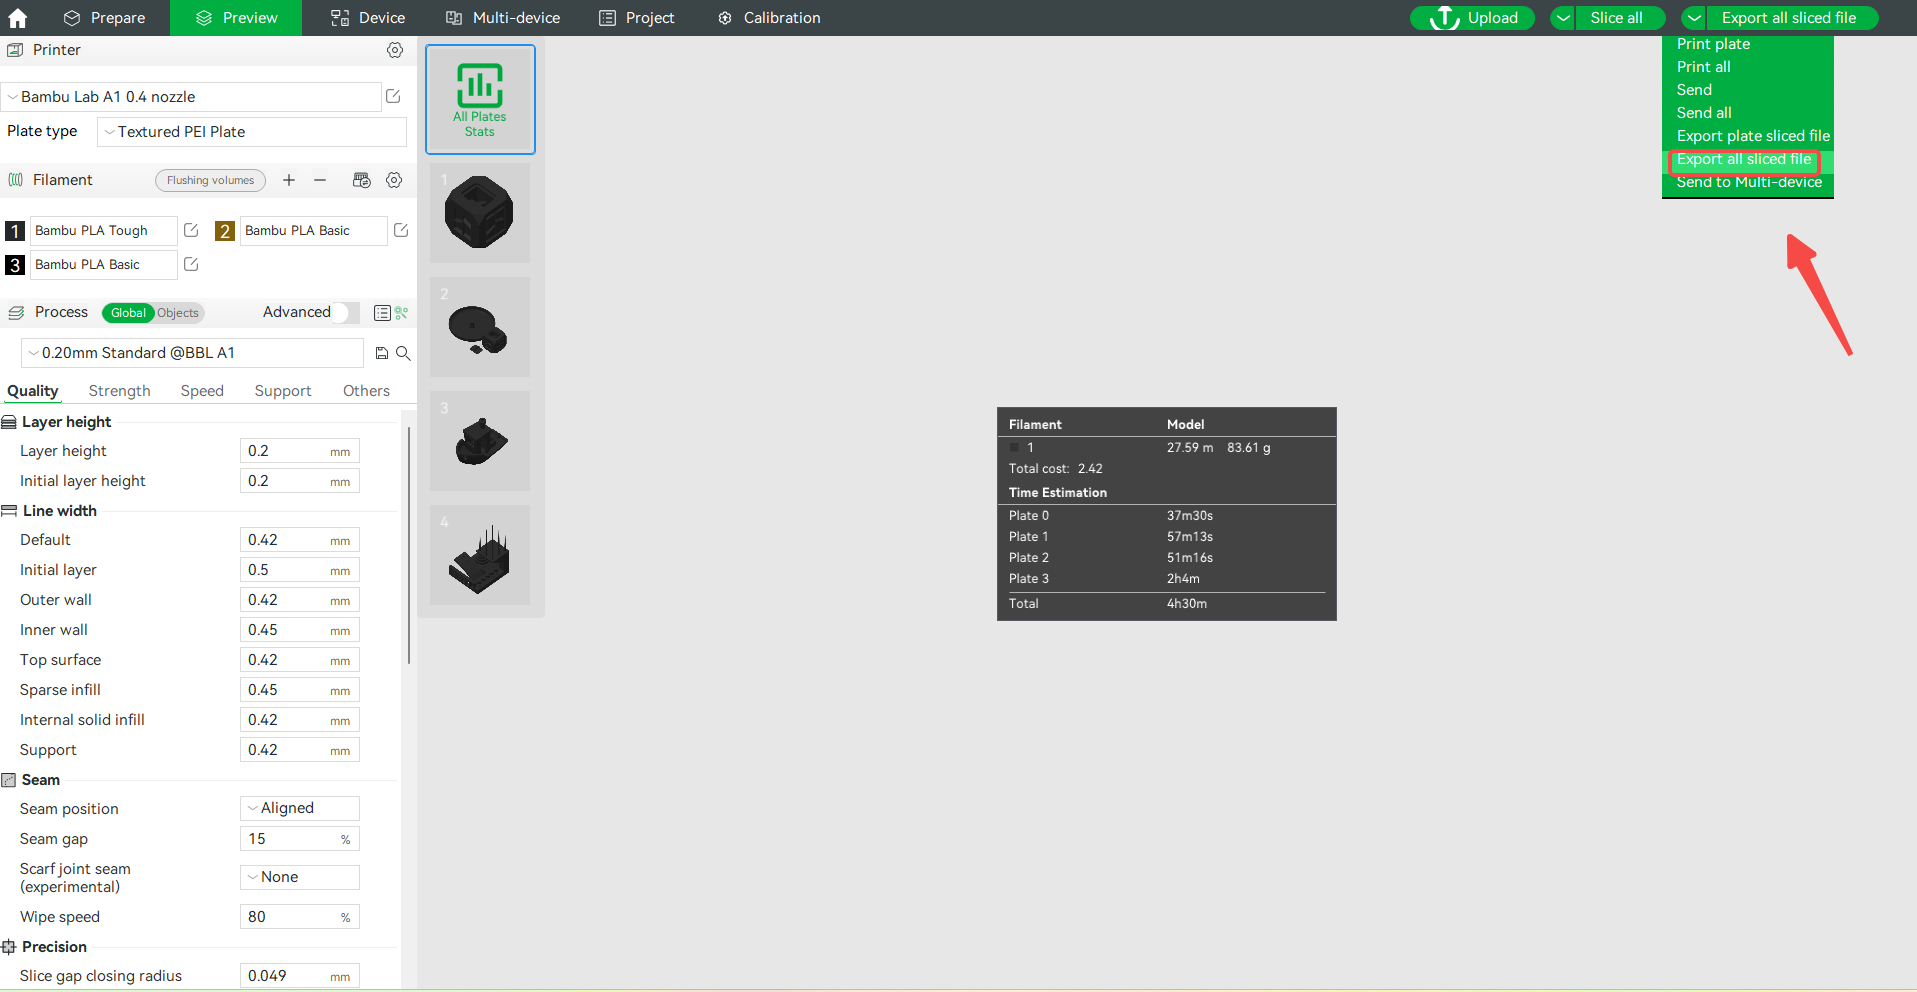
If the model file contains multiple plates, click the arrow to the left of Print plate in the upper-right corner of the screen and select Export all sliced file.
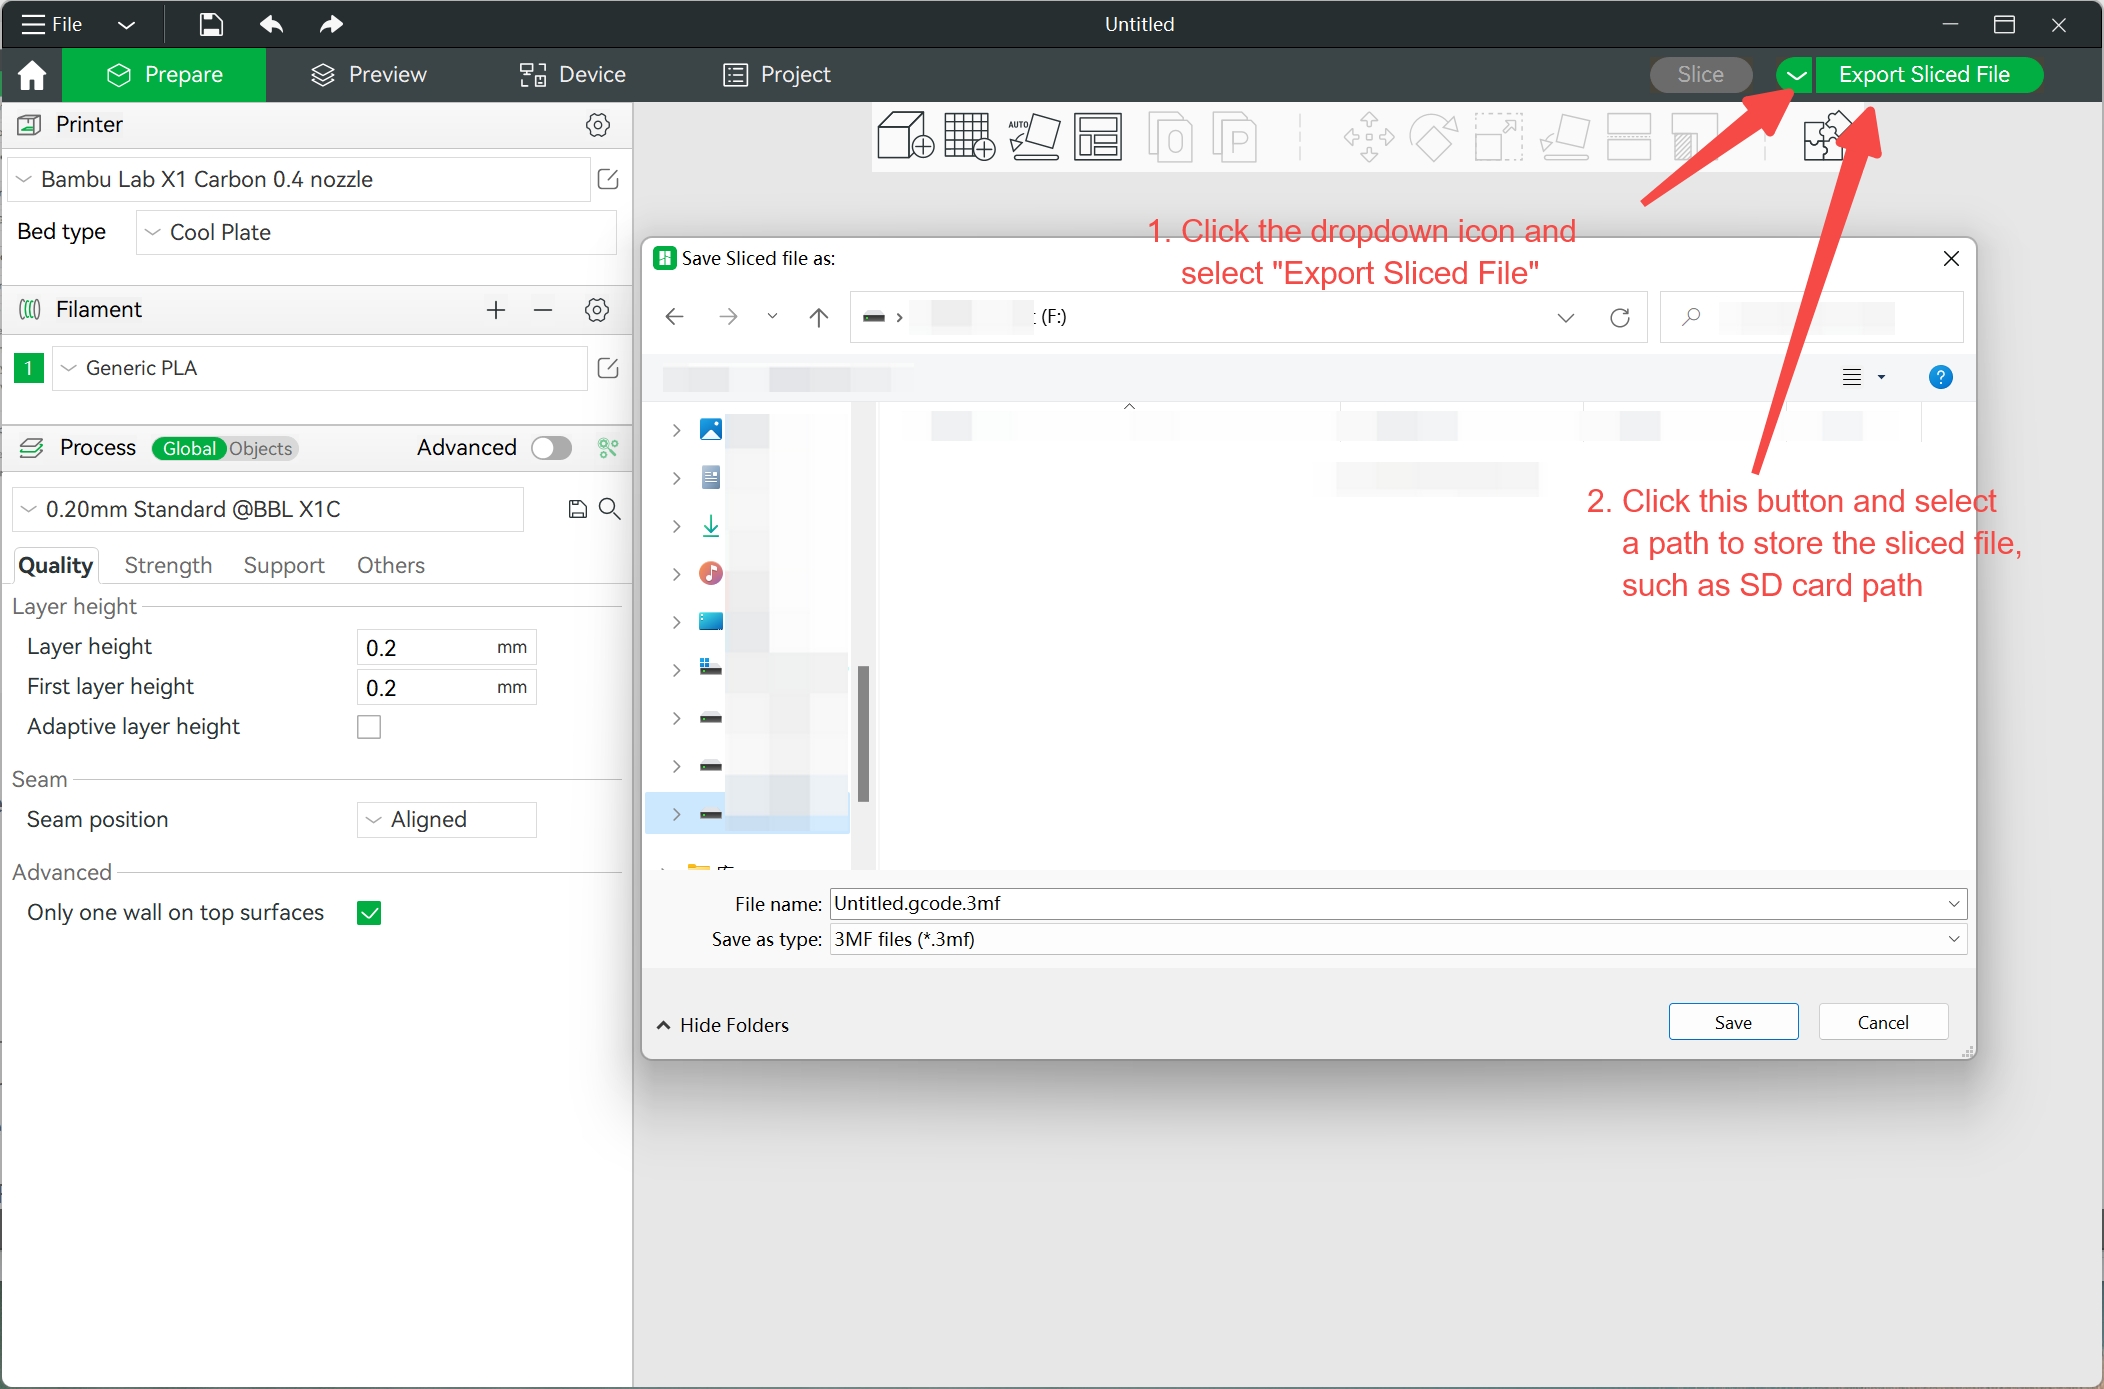
A file explorer window will appear, where you can select the SD card location. Click Save and the file will be exported to the SD card.
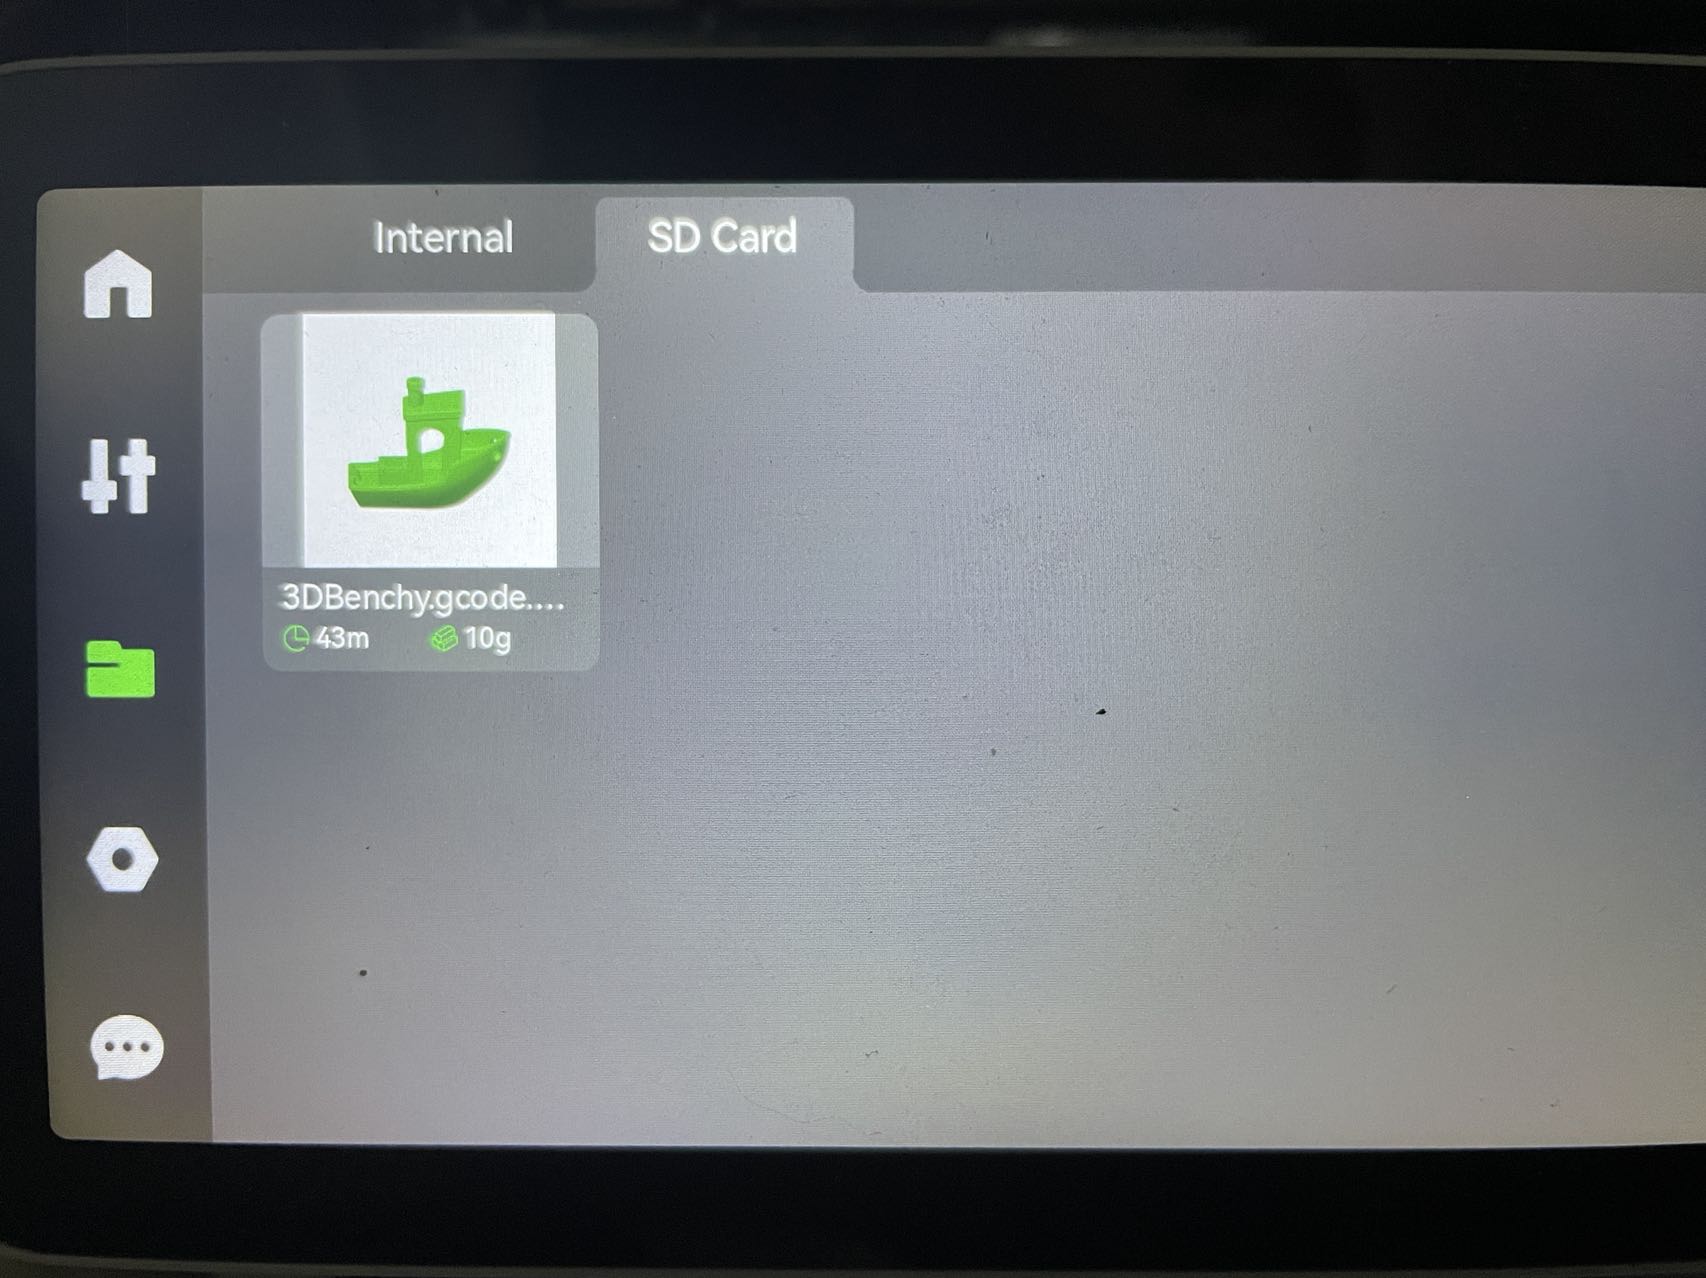
After saving, insert the SD card into the small slot on the right side of the printer's screen. Press the folder icon in the left menu and then select SD Card from the top menu. Click the file you just exported to start printing.
Remote control (Remote Control)
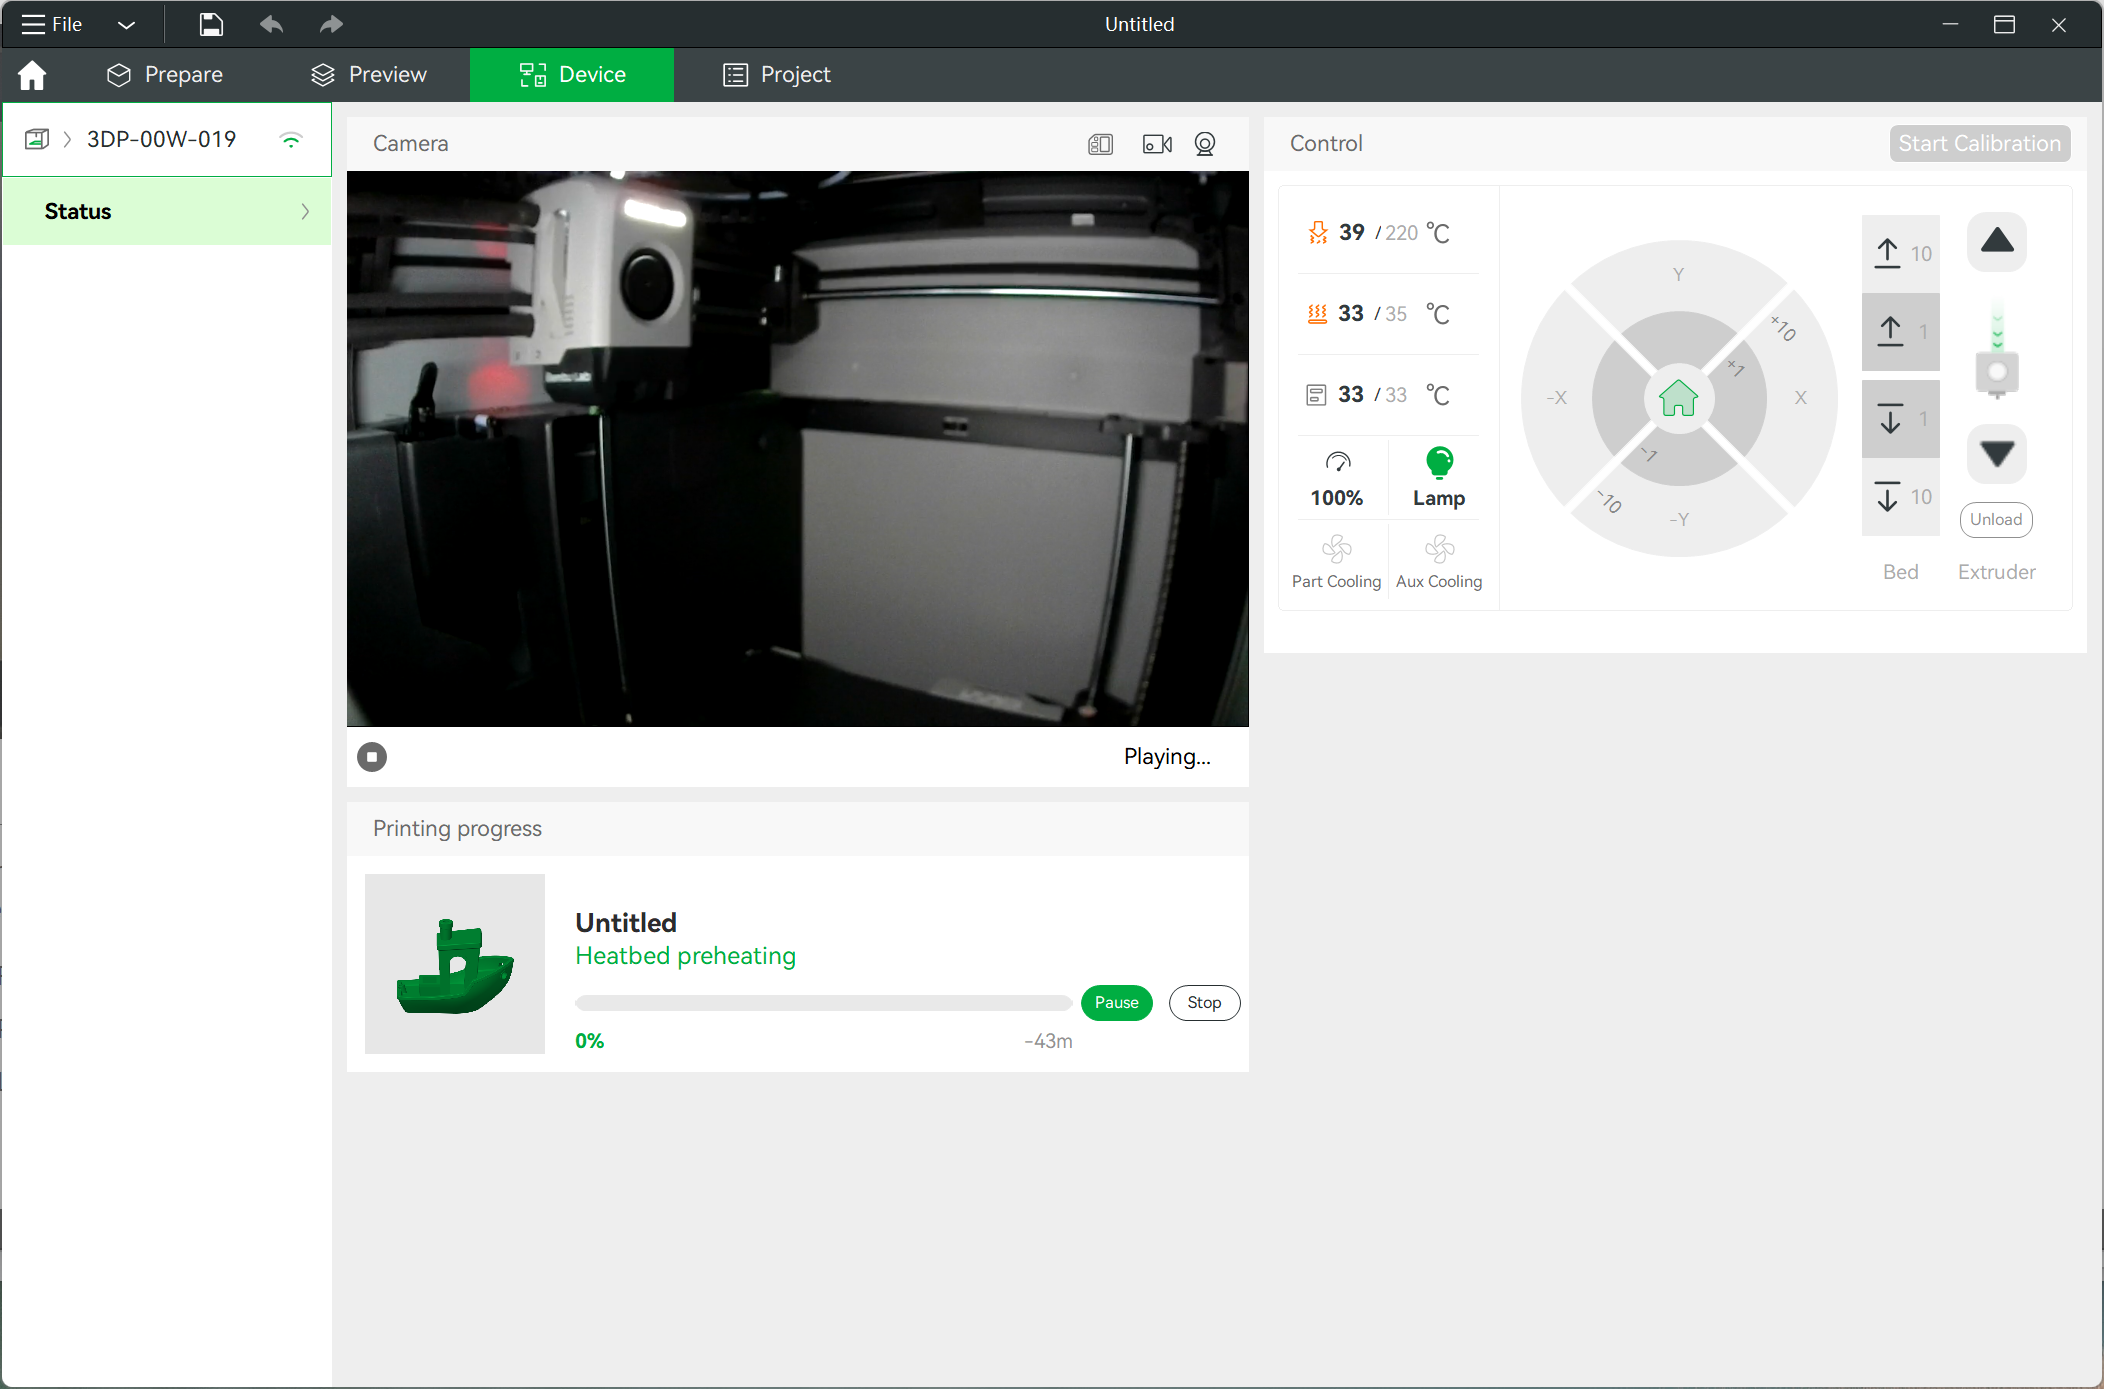
Go to the device in the Studio interface, where you can monitor and control the print in real time. If a camera is installed in your printer (standard on the X1C), you can remotely watch a live stream of the print.
Note: To access the device this way, you must have the Bambu Network plugin installed.