Free shipping from €82.00
Fast shipping
Verified store
Thousands of customers


Free shipping from €82.00
Basic printing instructions
This chapter focuses on how to print 3D models using the Bambu Handy app. As an example, we will use a typical model consisting of multiple parts and cover various aspects of the printing process.
Step 1. Find an interesting 3D model
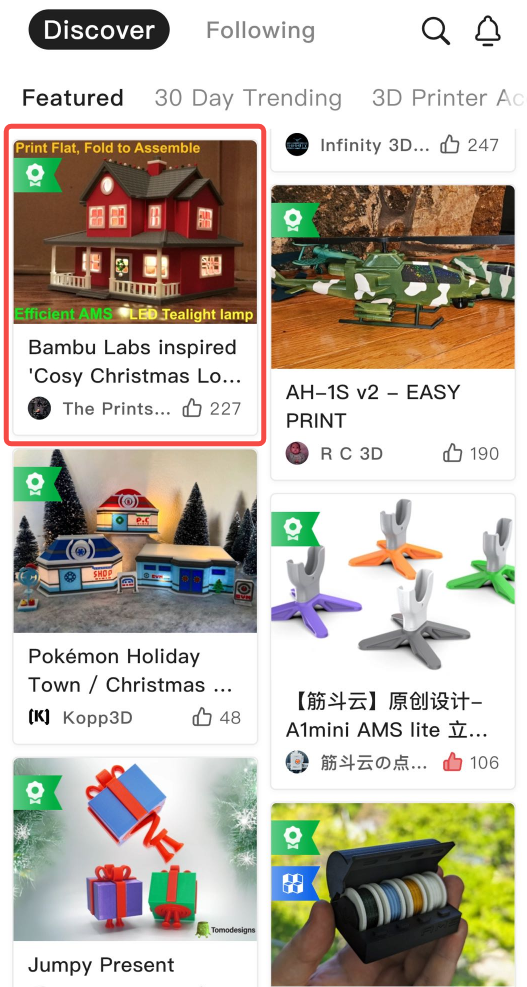
You can browse the list of models or use the search function to find models you like.
Step 2. Select a print profile
A print profile contains both the 3D data and the model's print settings. A model usually has several print profiles available. You can choose which print profile to use based on the type of printer, its specifications and features (such as multicolor printing).
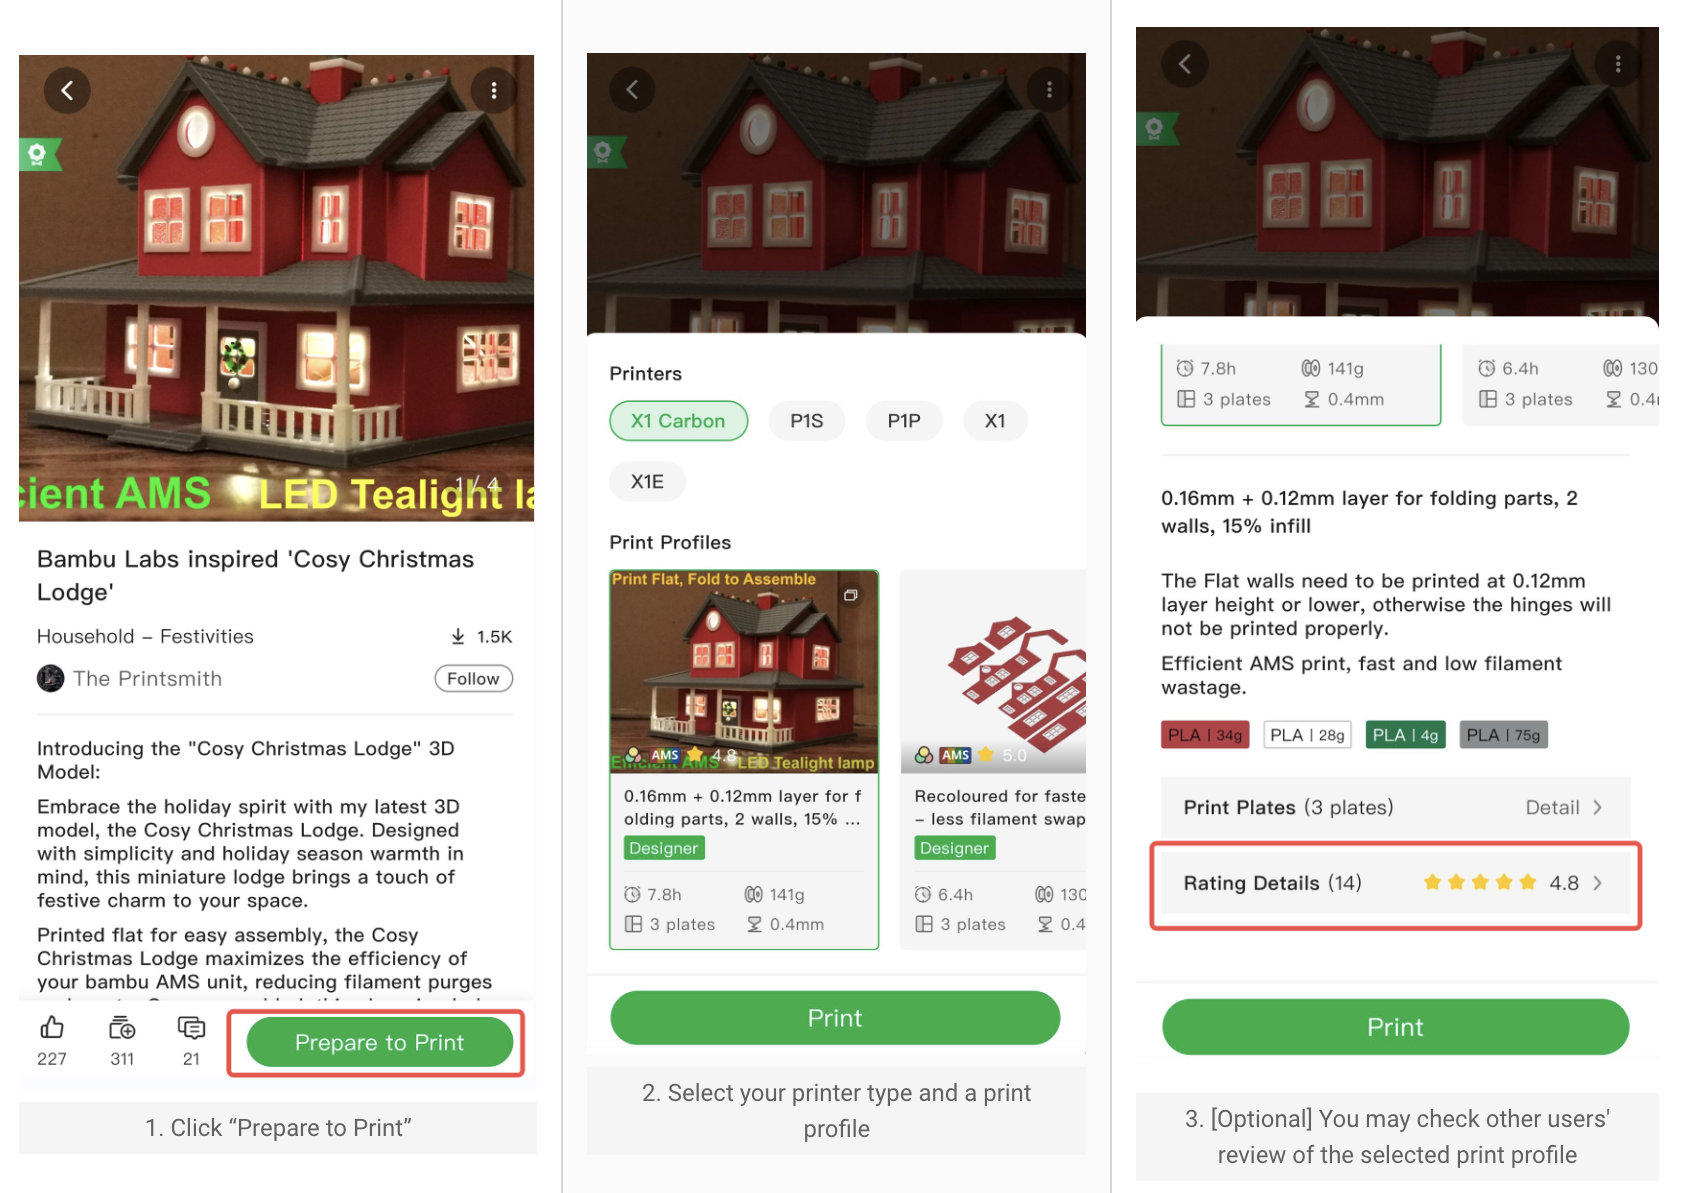
Step 3. Print the first plate
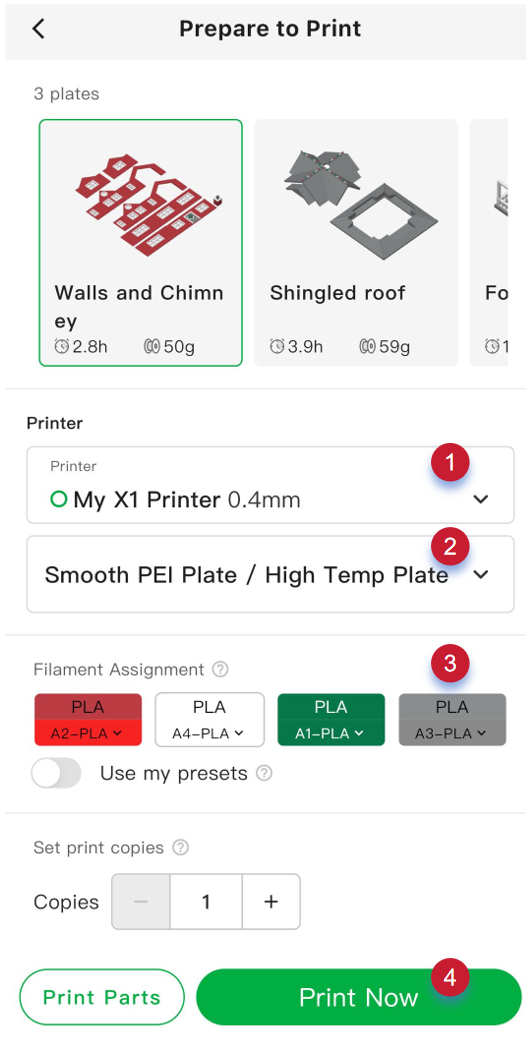
Here are several settings that need to be checked/set:
After sending the print job, the app will automatically redirect to the device page, where you can monitor the printing progress.
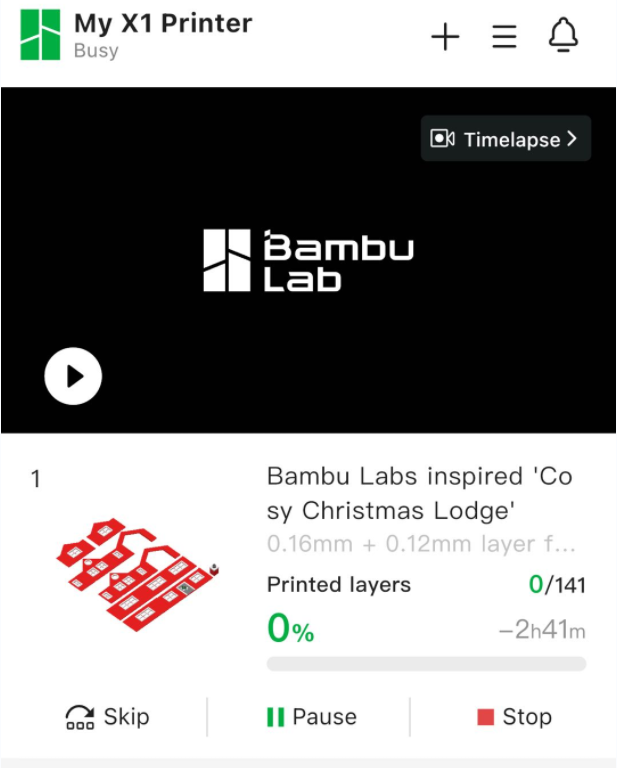
Note:
If you have AMS installed and find that the slots in the Filament assignment section display “?”, you must first configure the material types and colors for each AMS slot on the device page. AMS can automatically recognize Bambu Lab materials, so manual configuration is not necessary.
You may also notice other settings that will be explained in more detail in the Advanced features section.
Step 4. Print additional plates
If the model contains more than one plate, you can click the “Next plate” button to continue printing the next plate.
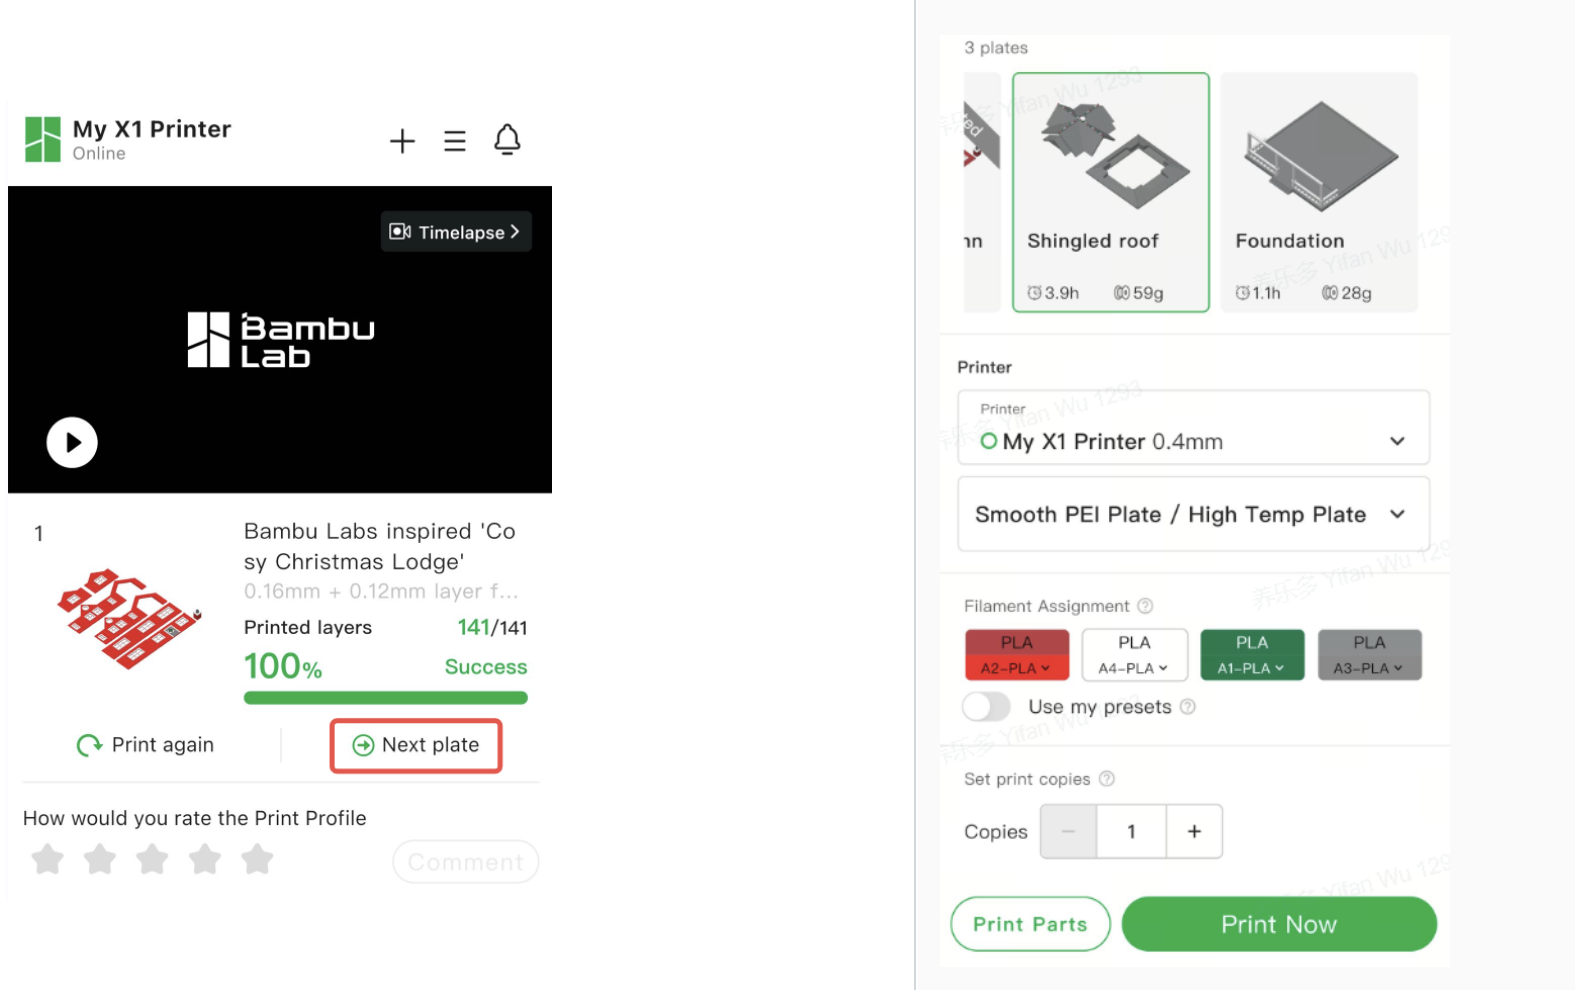
Alternatively, you can also quickly switch to the next plate from this model's print history.
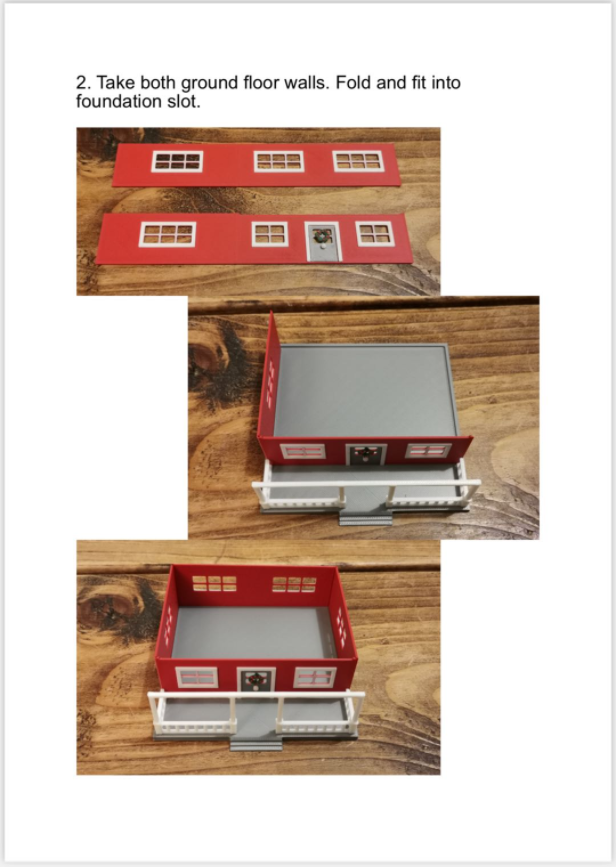
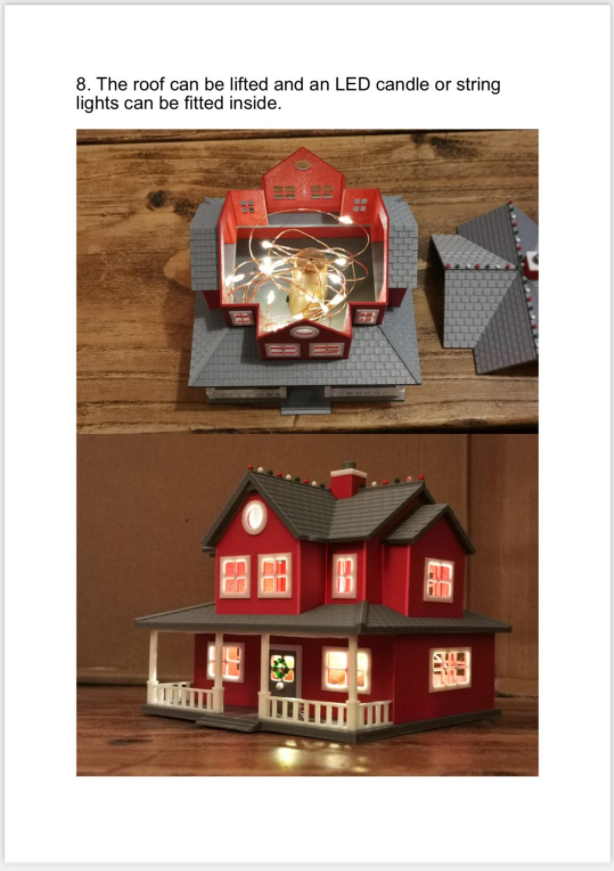
Step 5. Assemble the parts
After all the parts have been printed, the next step is to assemble them.
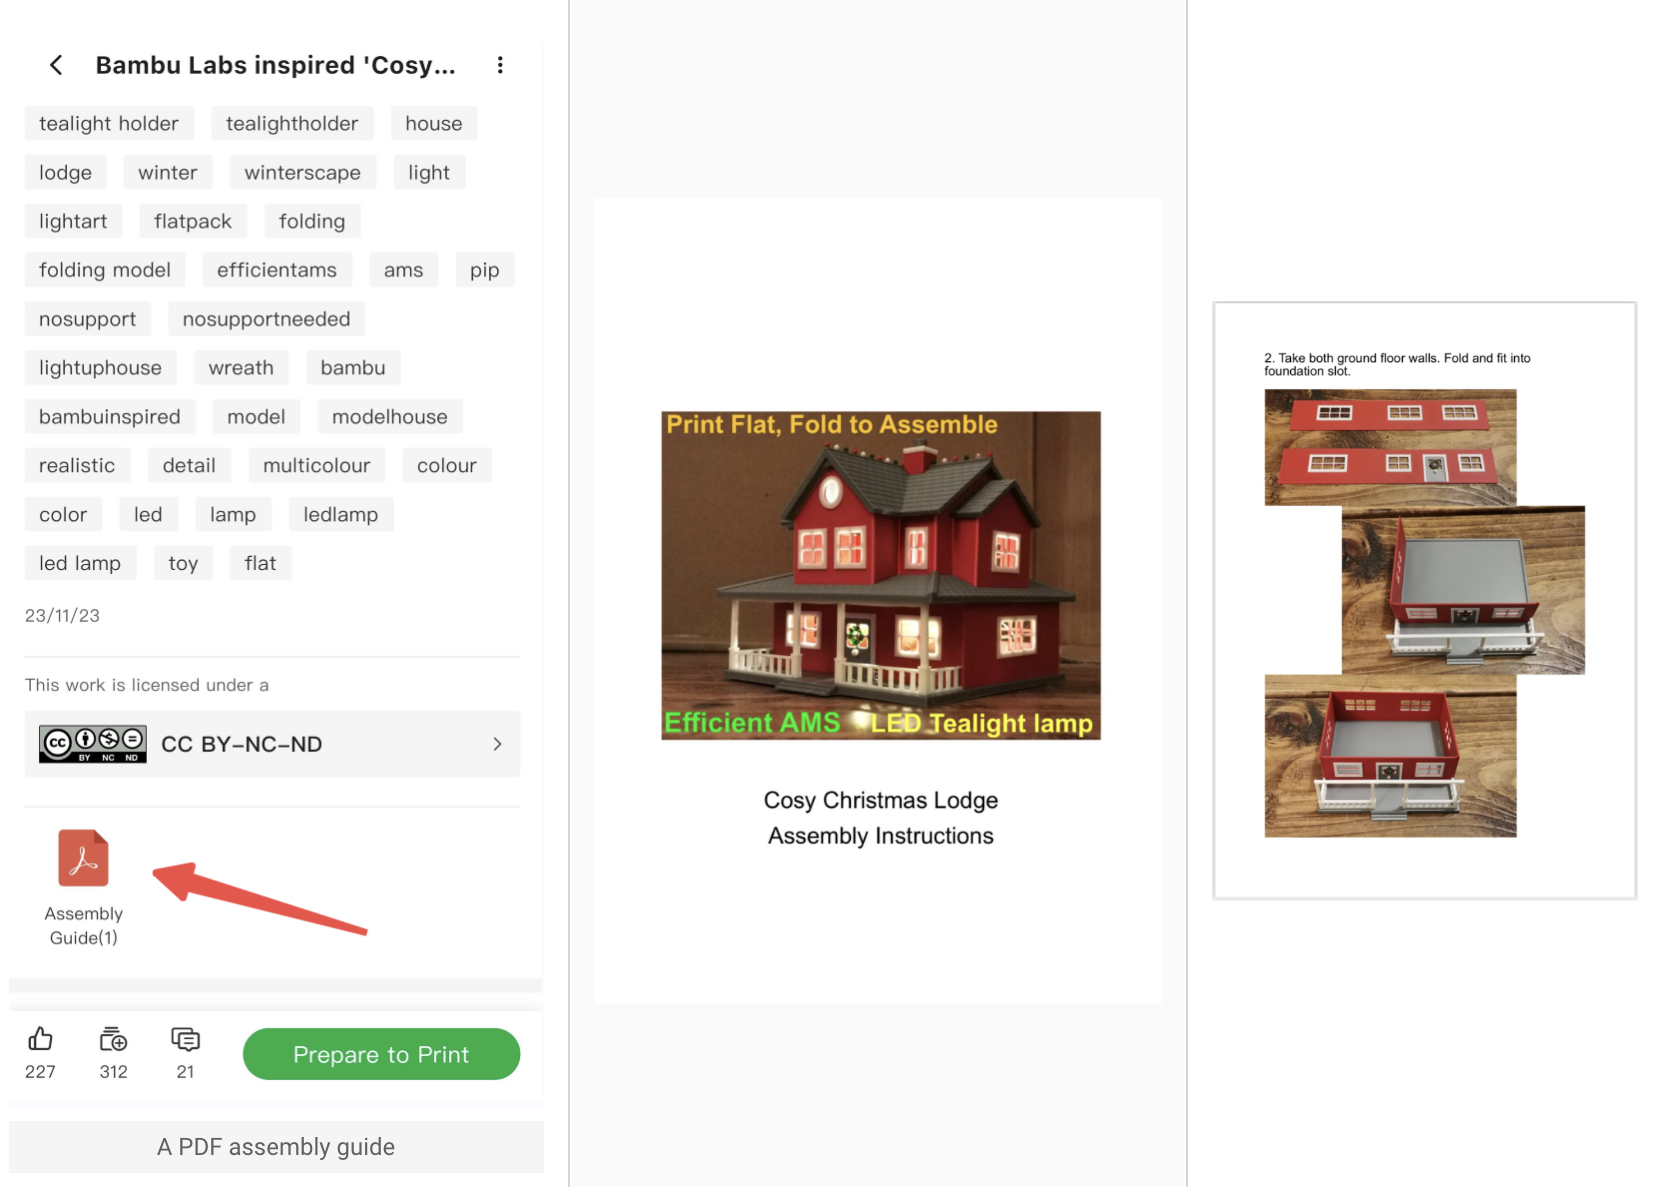
For models that contain dozens of parts, assembly instructions usually exist. These instructions may take the form of videos, PDF files or images, which can be found on the model page.
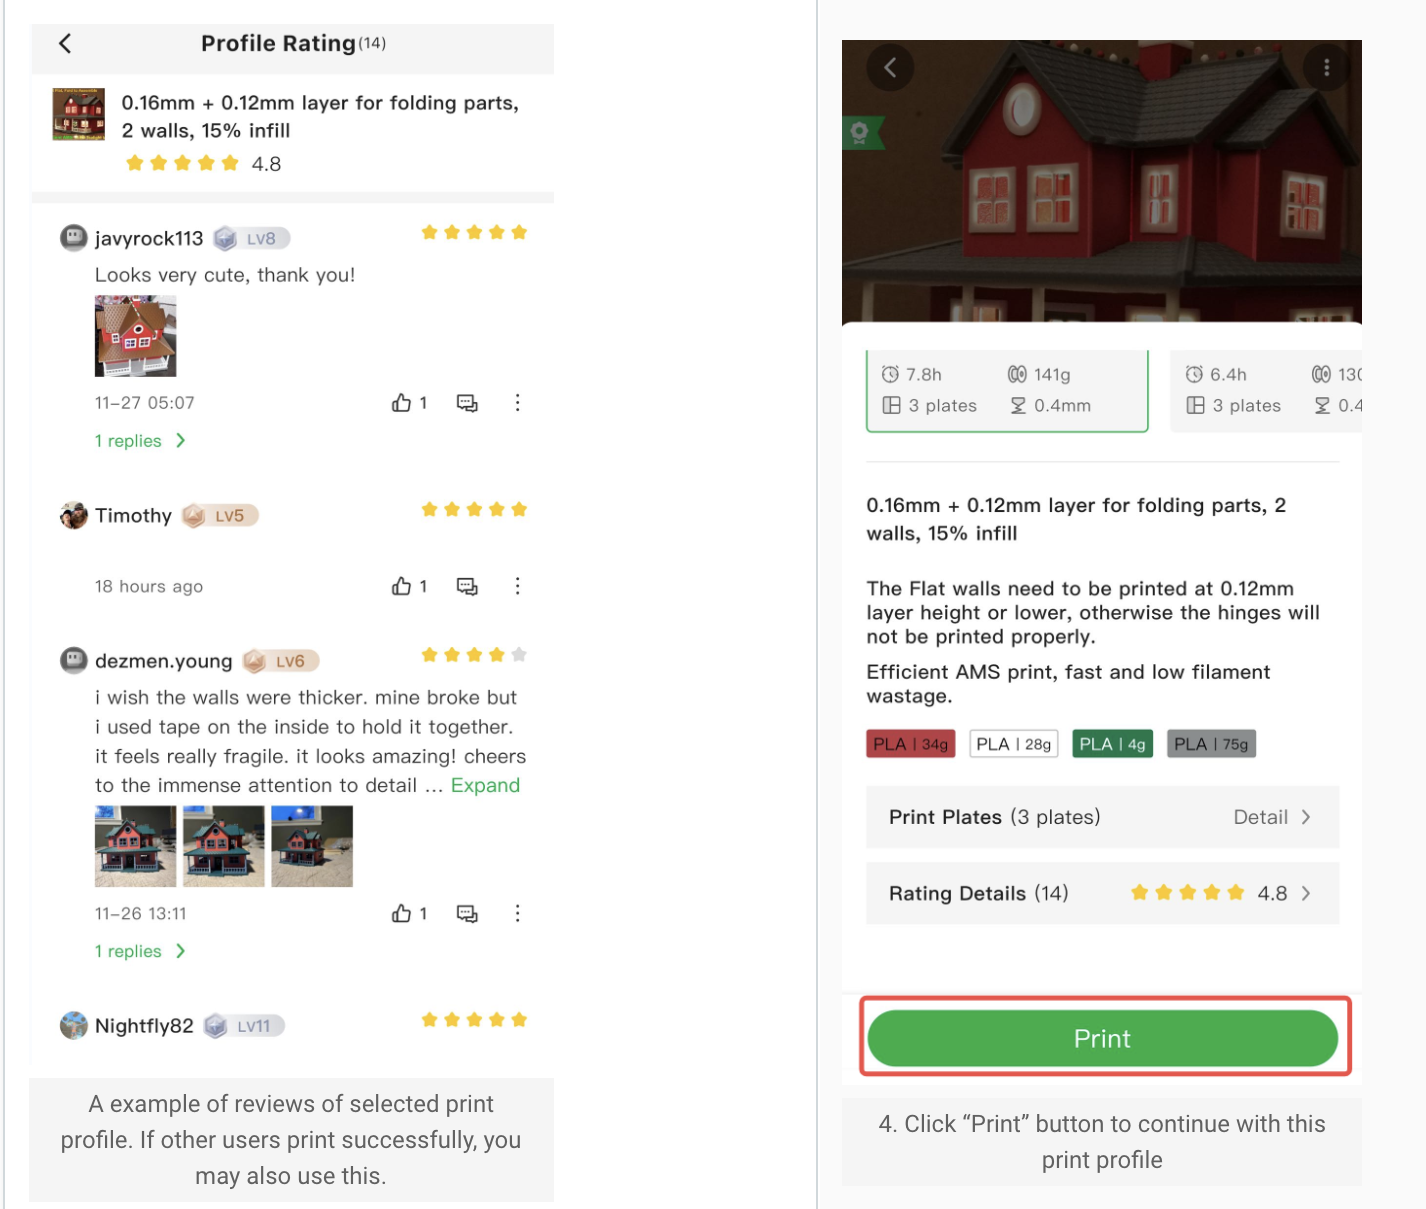
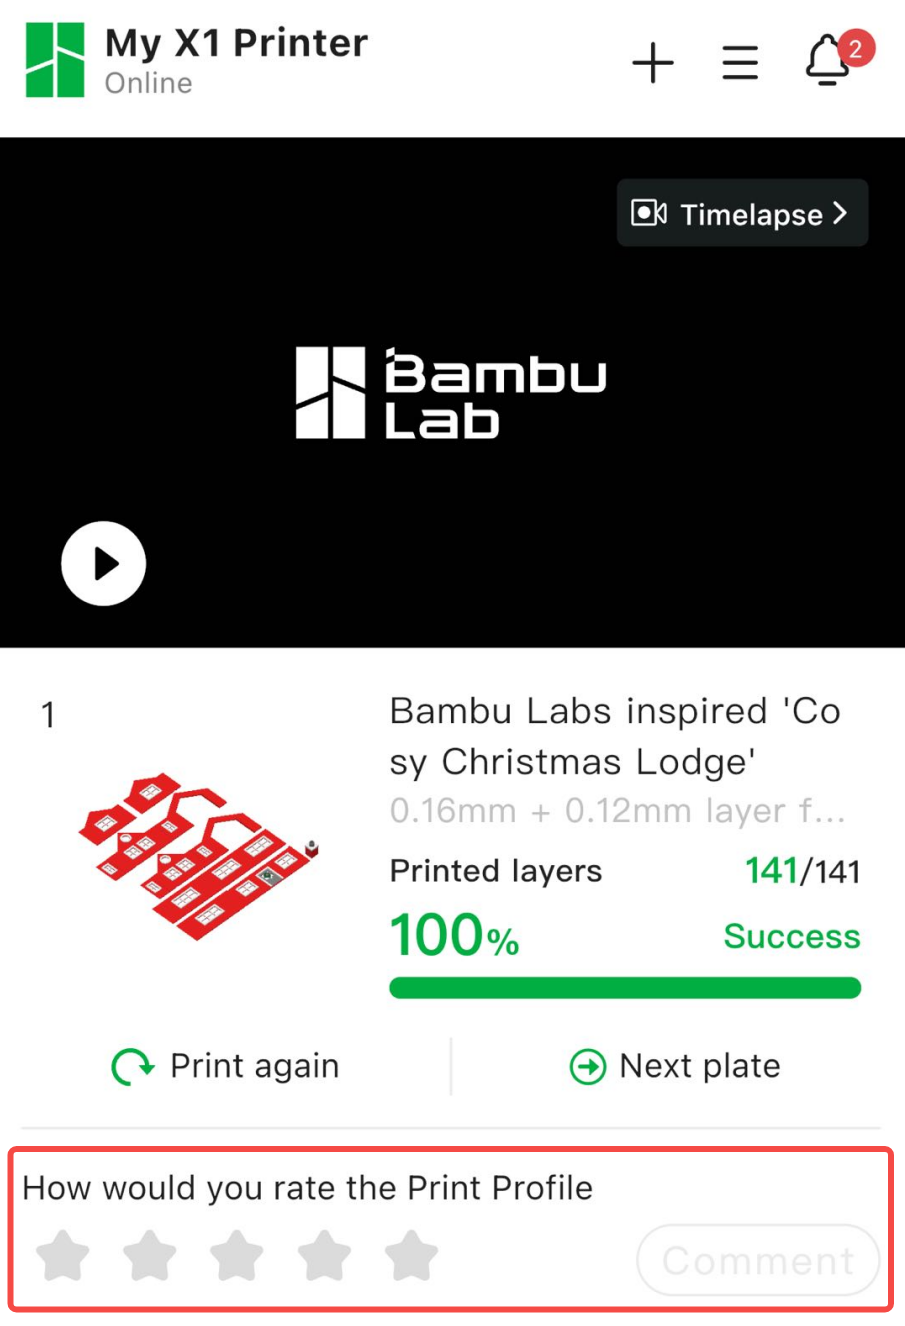
Step 6. Rate the model's print profile (optional)
After printing and assembling the model, we invite you to rate the printed model. Your feedback can help the author improve the model and give other users a better idea of its quality.
Advanced features
This chapter introduces some practical advanced features that can meet your needs in specific scenarios.
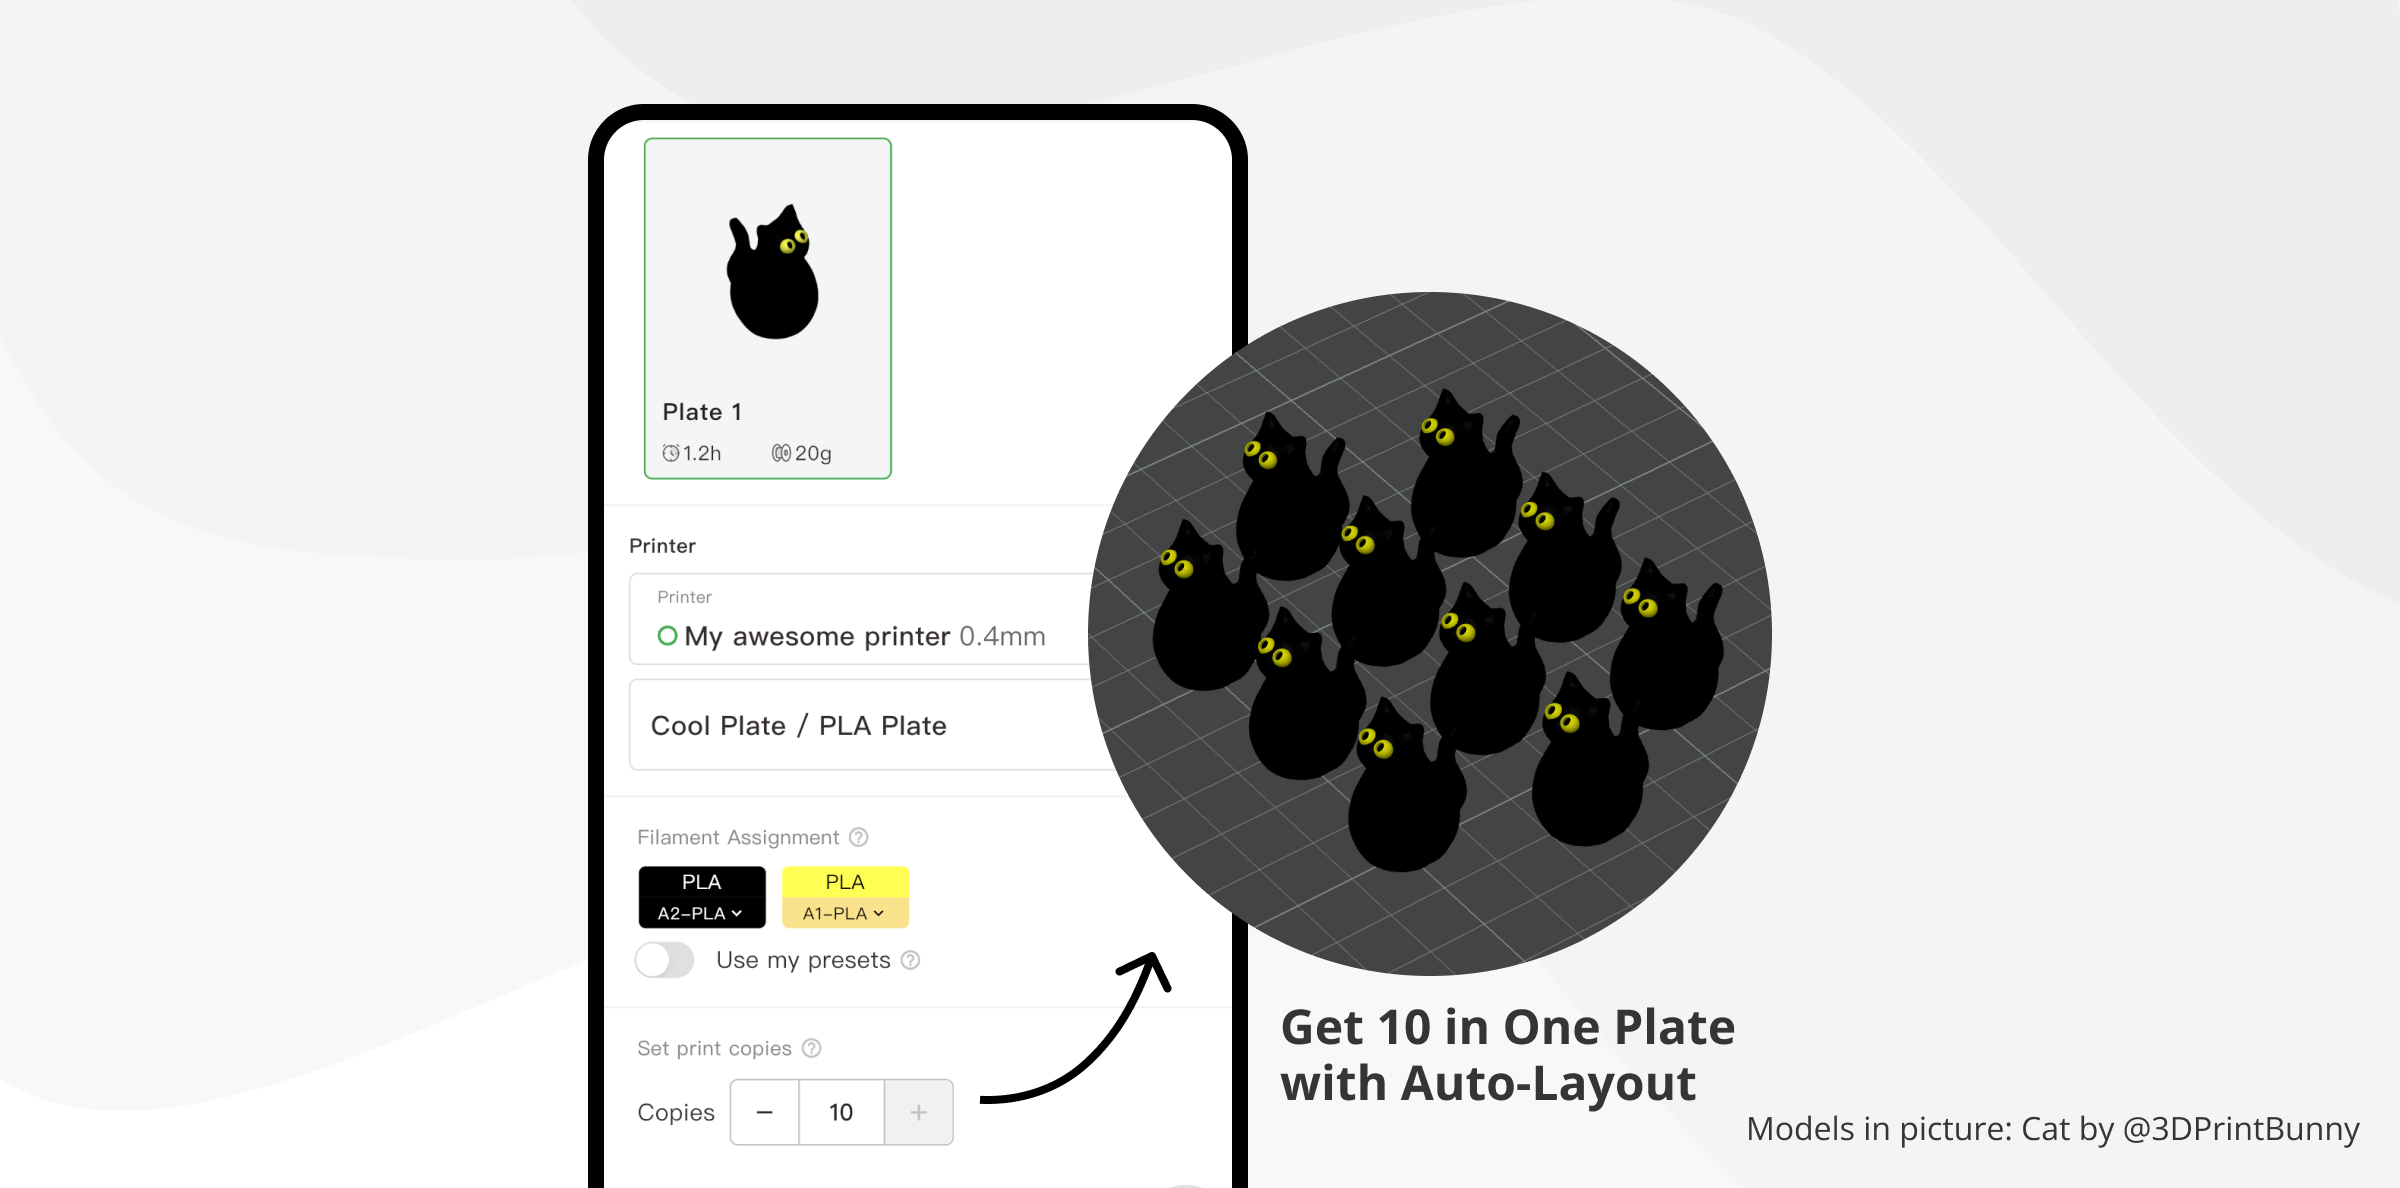
Copy settings
For models that require multiple copies, we have made this very simple. Just enter the desired number of print copies, and our cloud slicing will automatically find the ideal placement for each copy.
Printing parts
You can choose to print specific parts from a plate. Some common scenarios are:
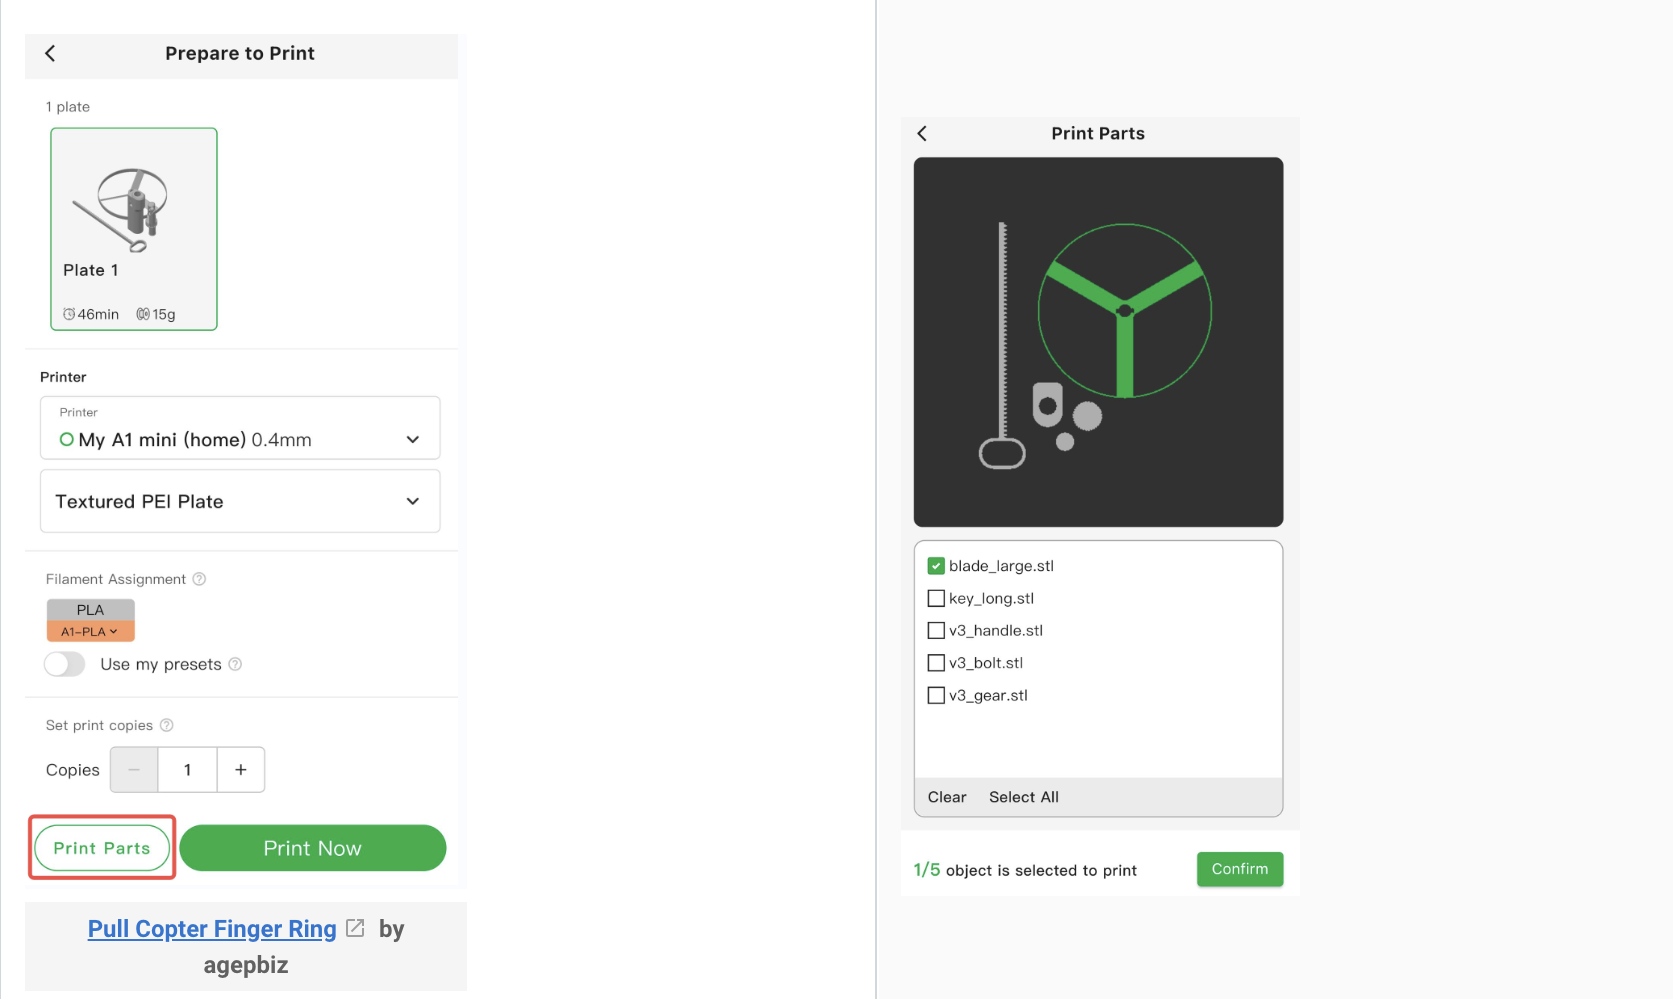
Furthermore, this feature can also be used in combination with the “Copy settings” feature to print multiple copies of selected parts.
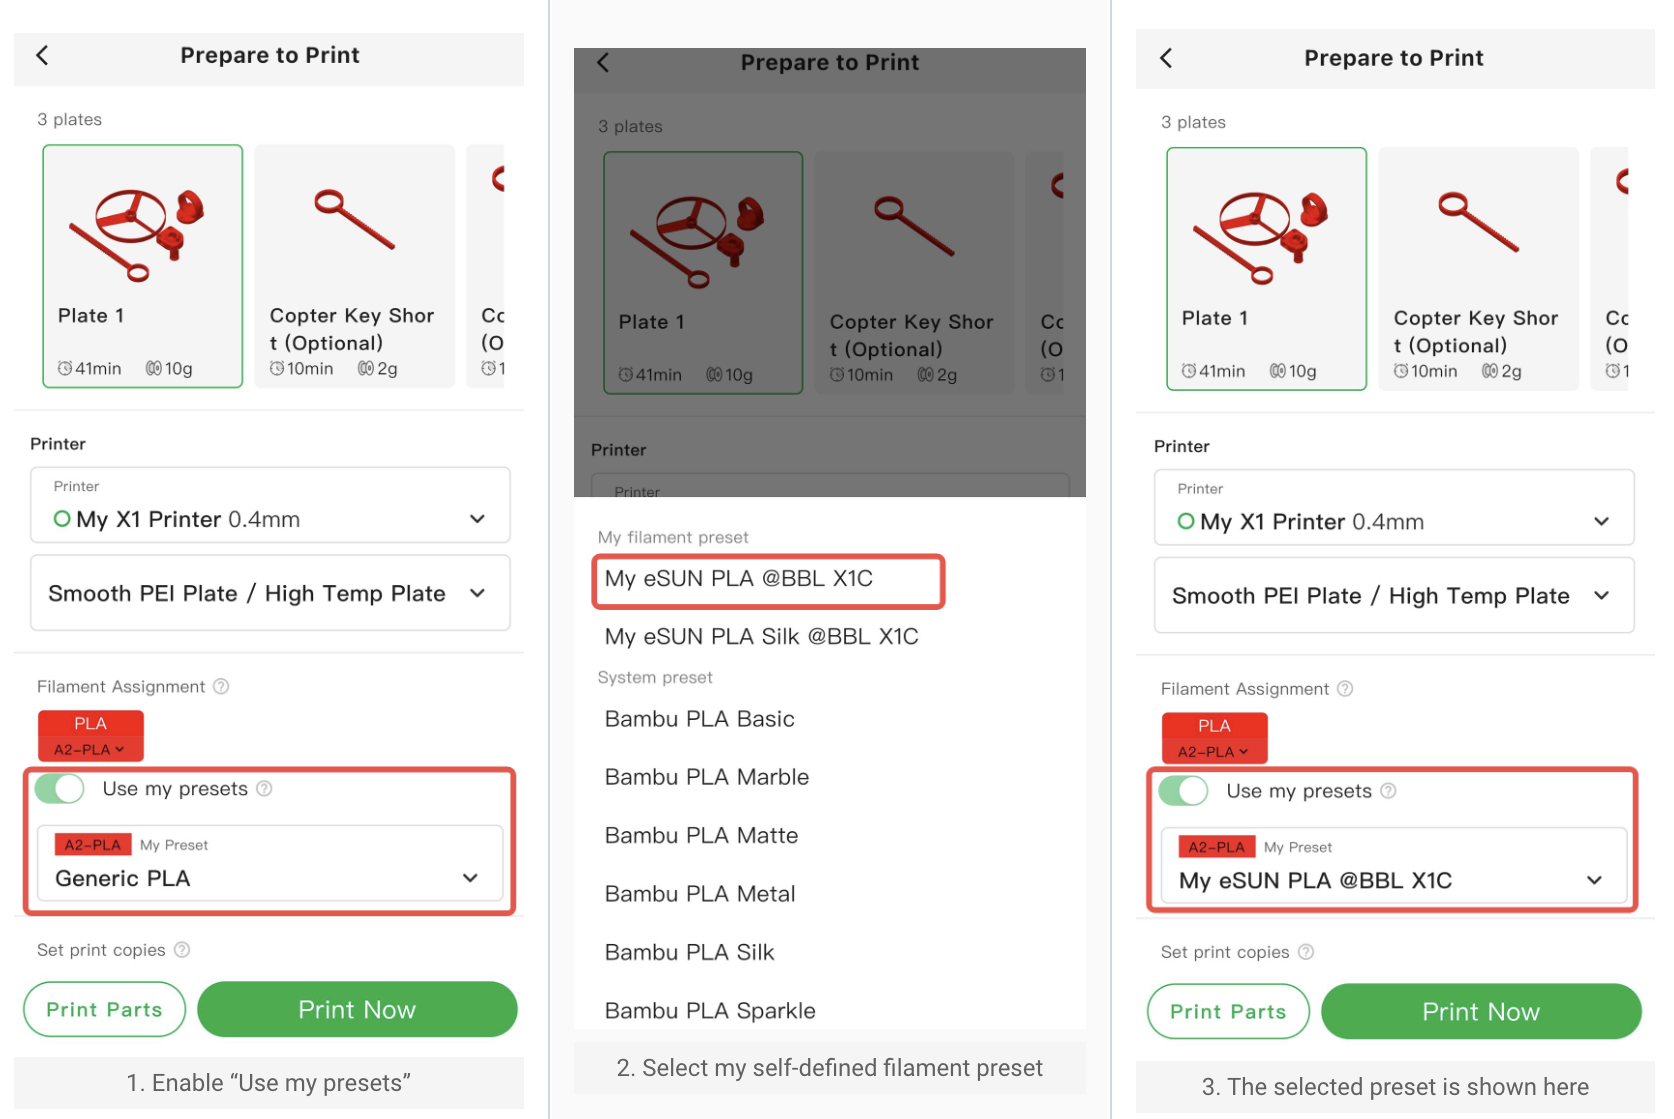
Use custom filament and presets
When you do not have the same material that was used in the print profile, do not despair. You can select a suitable substitute from the materials you have available. For example, if PETG was used, you can choose PLA, ABS or any other material. Our cloud slicing services will adapt to the selected material parameters to ensure accurate printing.
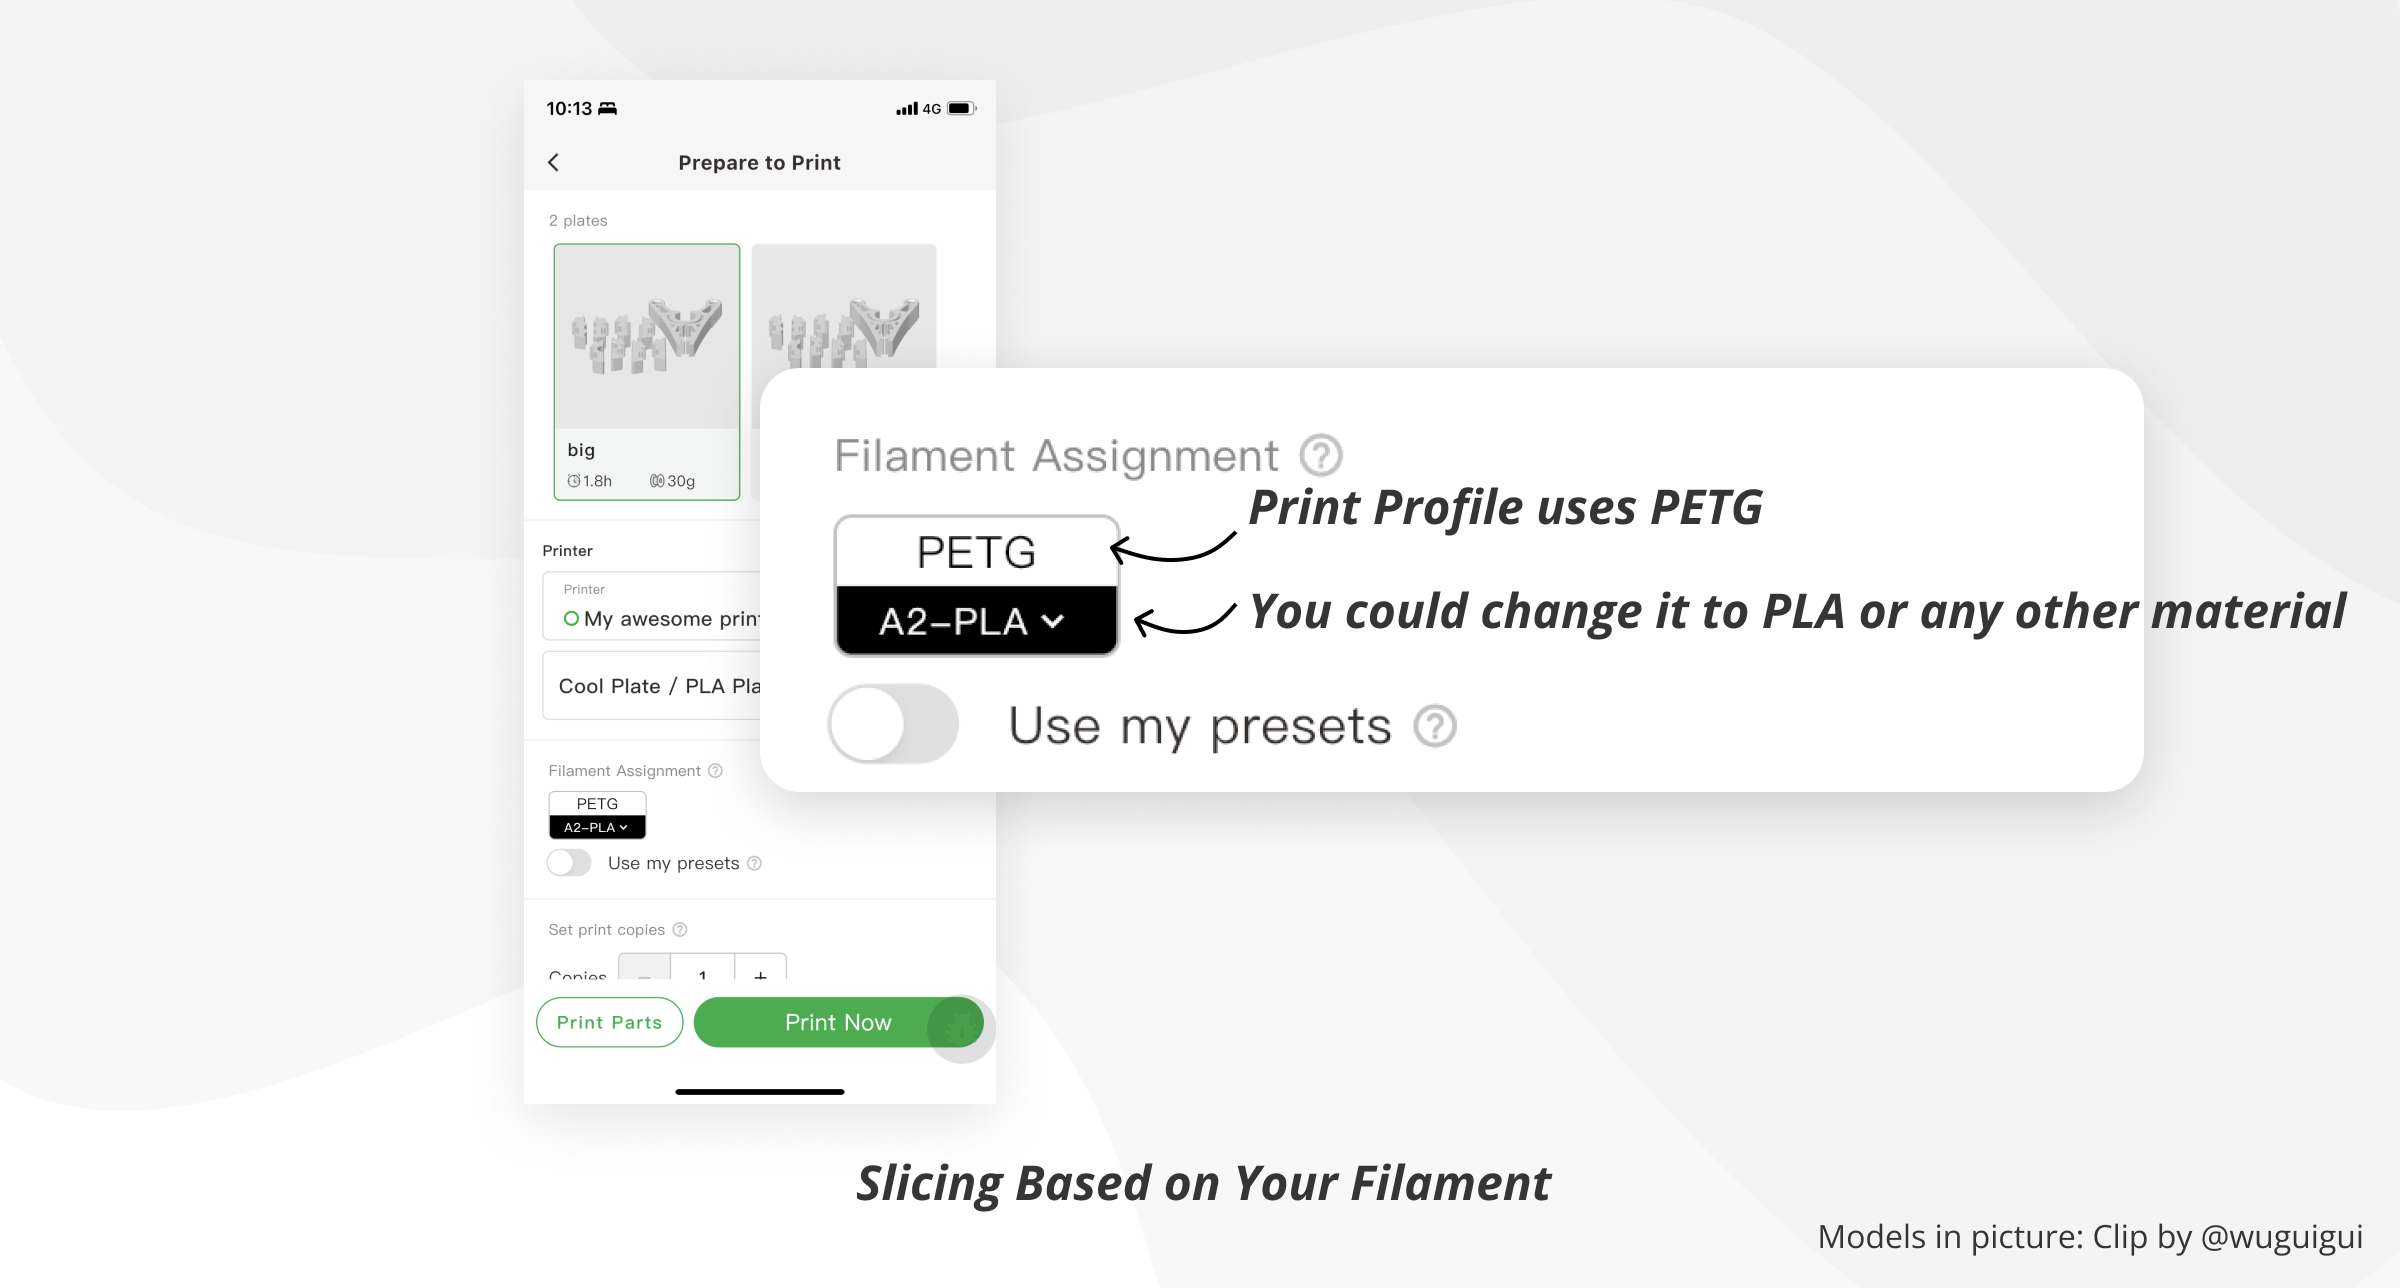
In addition, as an advanced feature, Bambu Handy supports selecting custom filament presets that you define in Bambu Studio. This allows you to achieve optimal printing results, especially for filaments that are not preset in Bambu Studio.
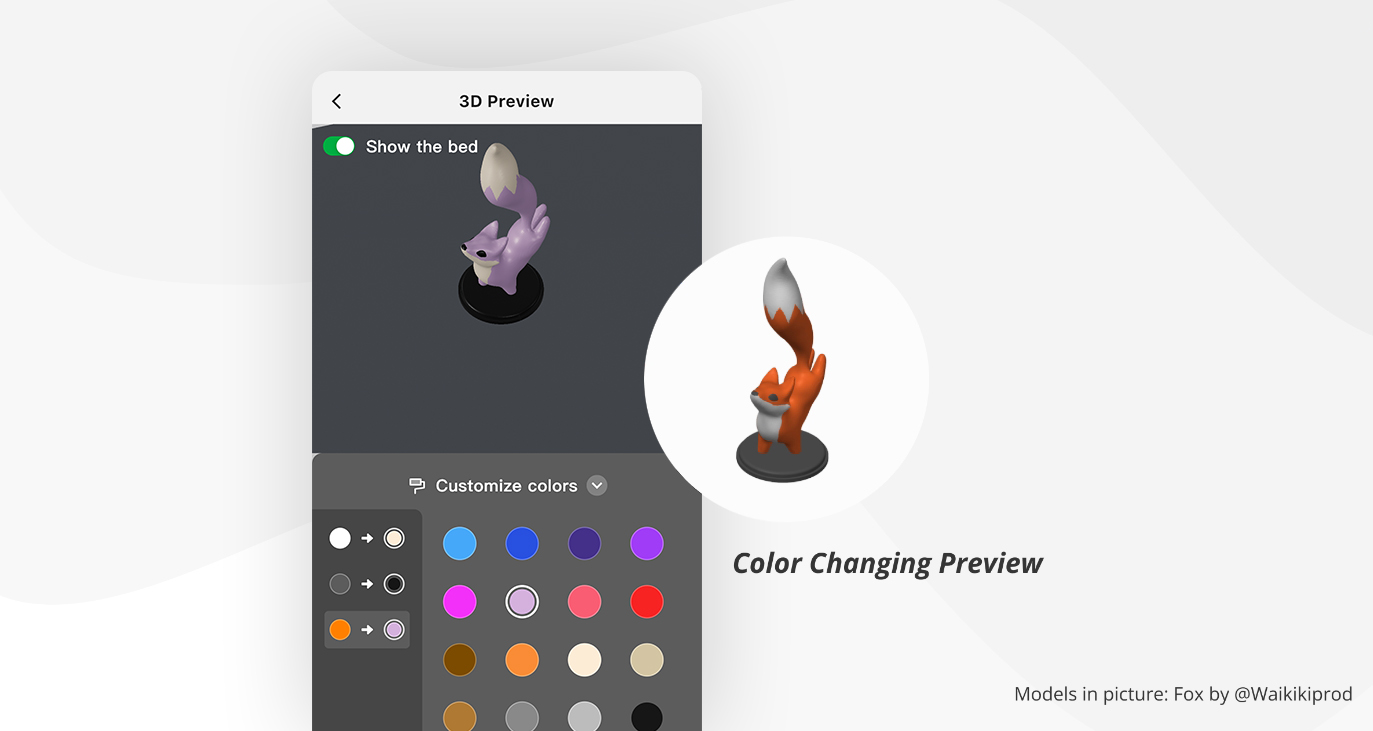
3D preview
This feature provides a clear visualization of what your print will look like with the selected colors. In addition, cloud slicing adjusts the amount of filament flushing to prevent color mixing based on your color selections.