Doprava zdarma od 1 999 Kč
Rychlá expedice
Ověřený obchod
Tisíce zákazníků




Doprava zdarma od 1 999 Kč
This article provides a brief overview of Bambu Handy and a guide to help you quickly install, set up, and start printing right away.
What is Bambu Handy?
Bambu Handy is an all-in-one mobile application designed for Bambu Lab 3D printers. It allows you to remotely monitor and manage your 3D printers. Users can also easily start previous projects, make real-time adjustments to ongoing prints, and streamline the entire printing process.
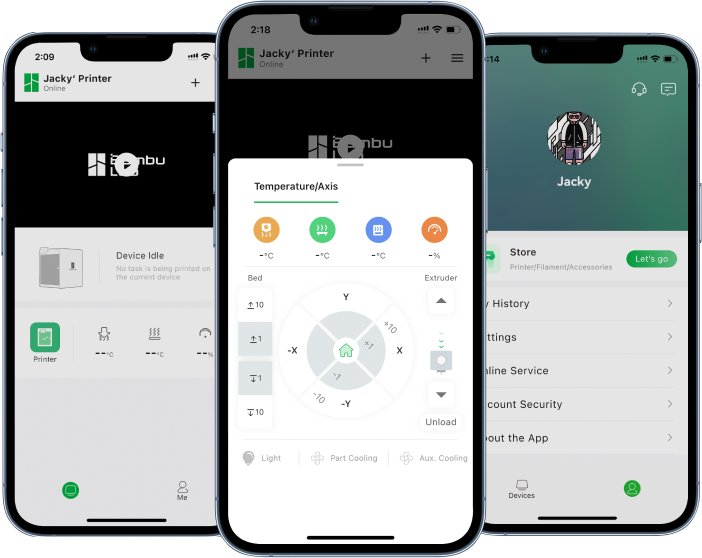
Download and Installation
The Bambu Handy app is available for download from the Play Store or App Store. For quick redirection to the download page, click the link on the official website.
Download Bambu Handy: https://bambulab.com/en/download/app
Initial Setup
Before accessing the app for the first time, you must agree to and accept the User Privacy Agreement. After confirming your consent, the app will ask for permission to enable notifications. We recommend enabling notifications so you can receive important information, such as the printing status of the printer. The app will then automatically switch to the home screen.
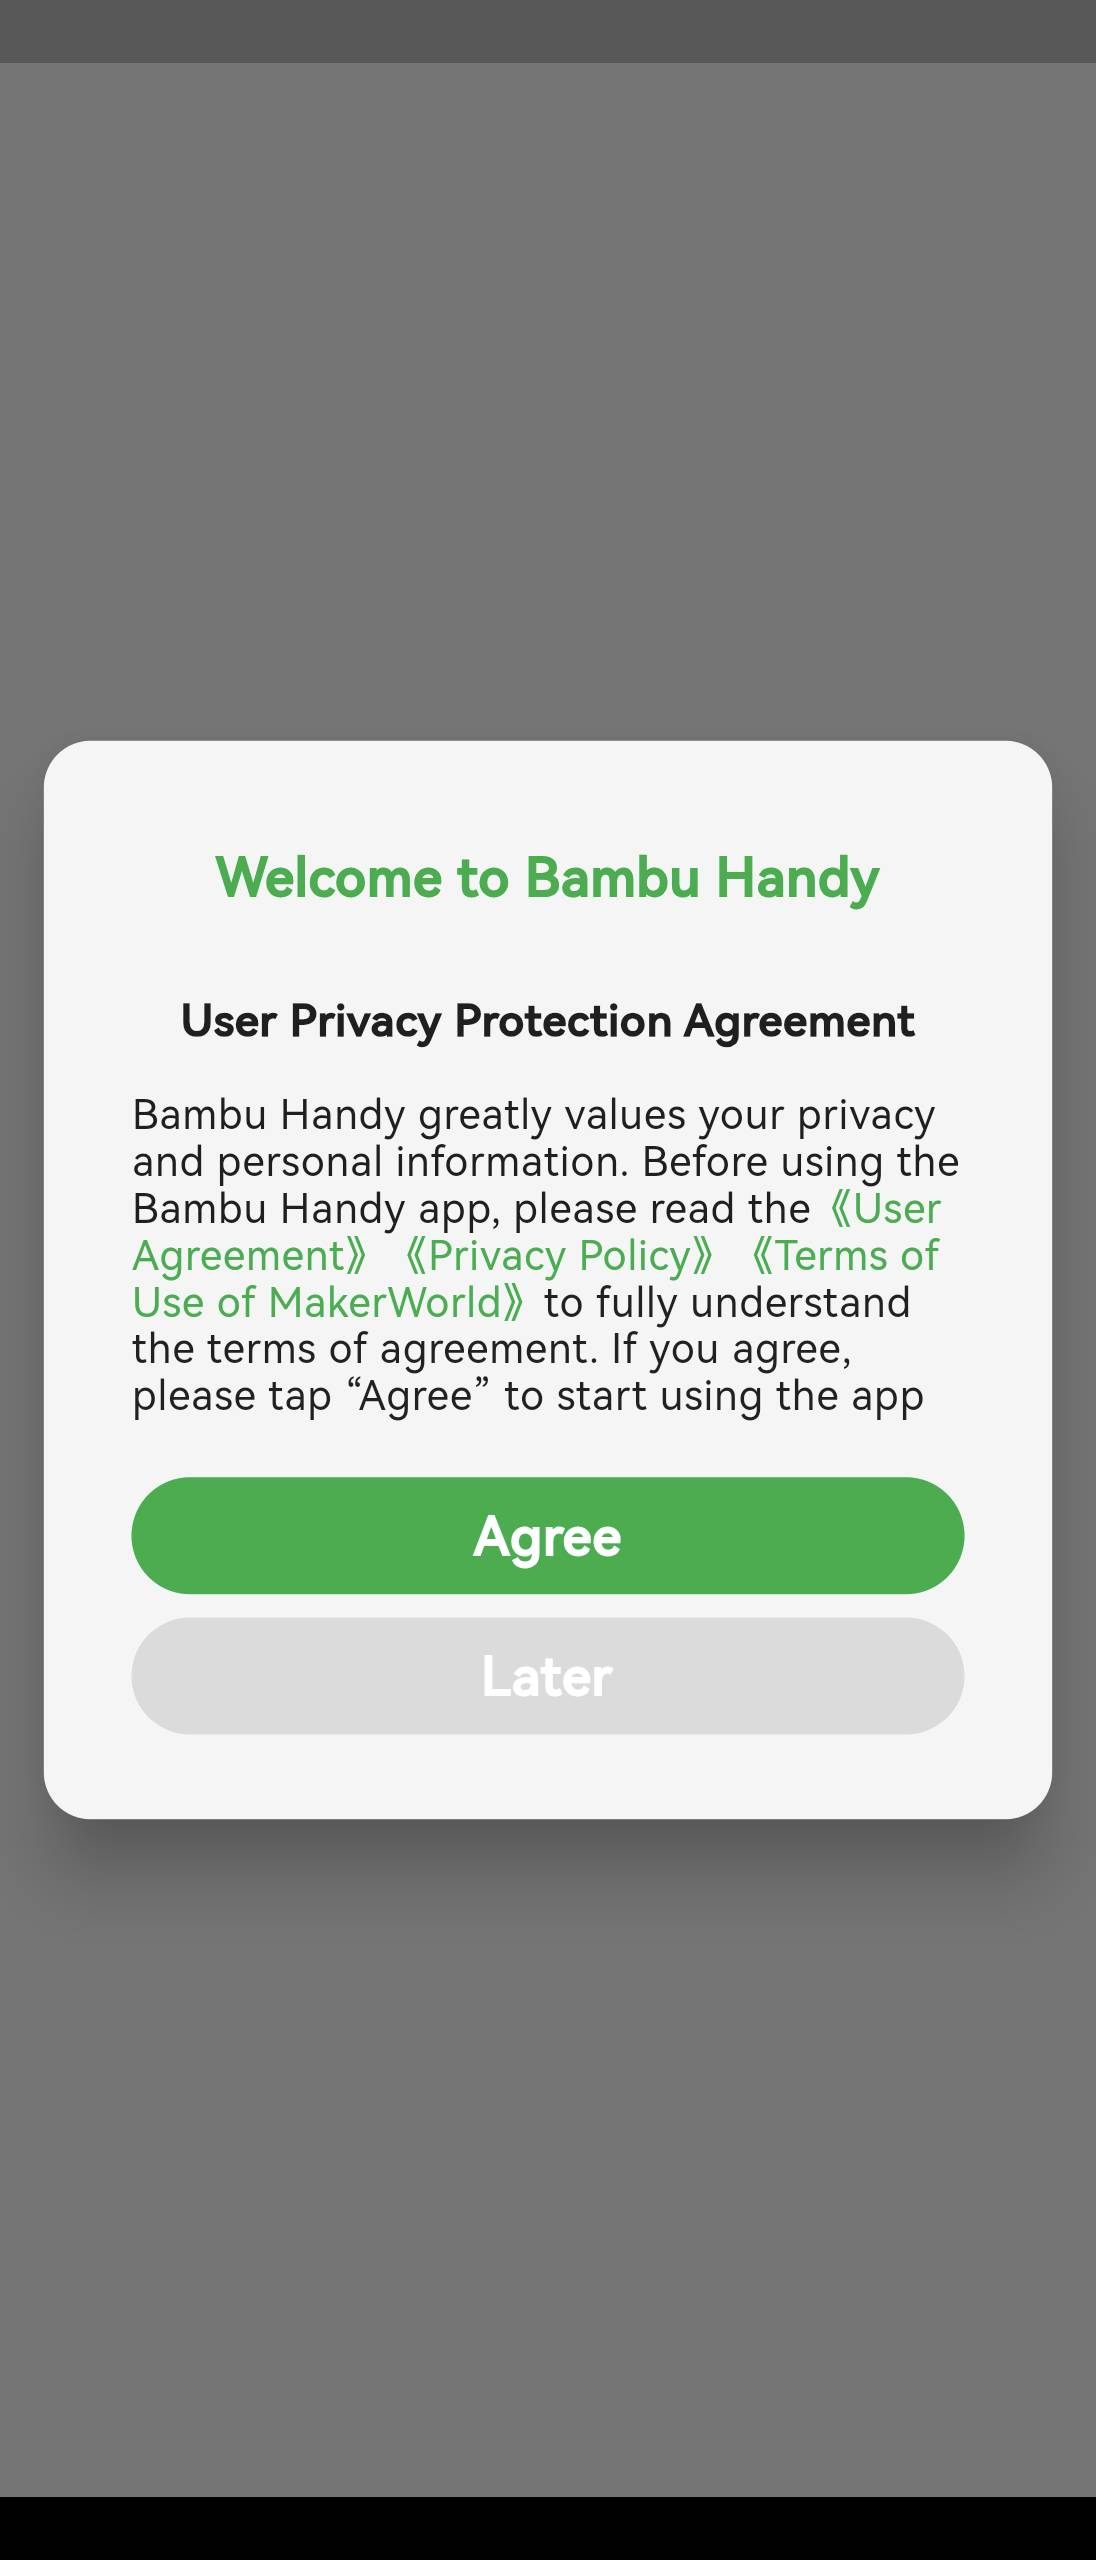
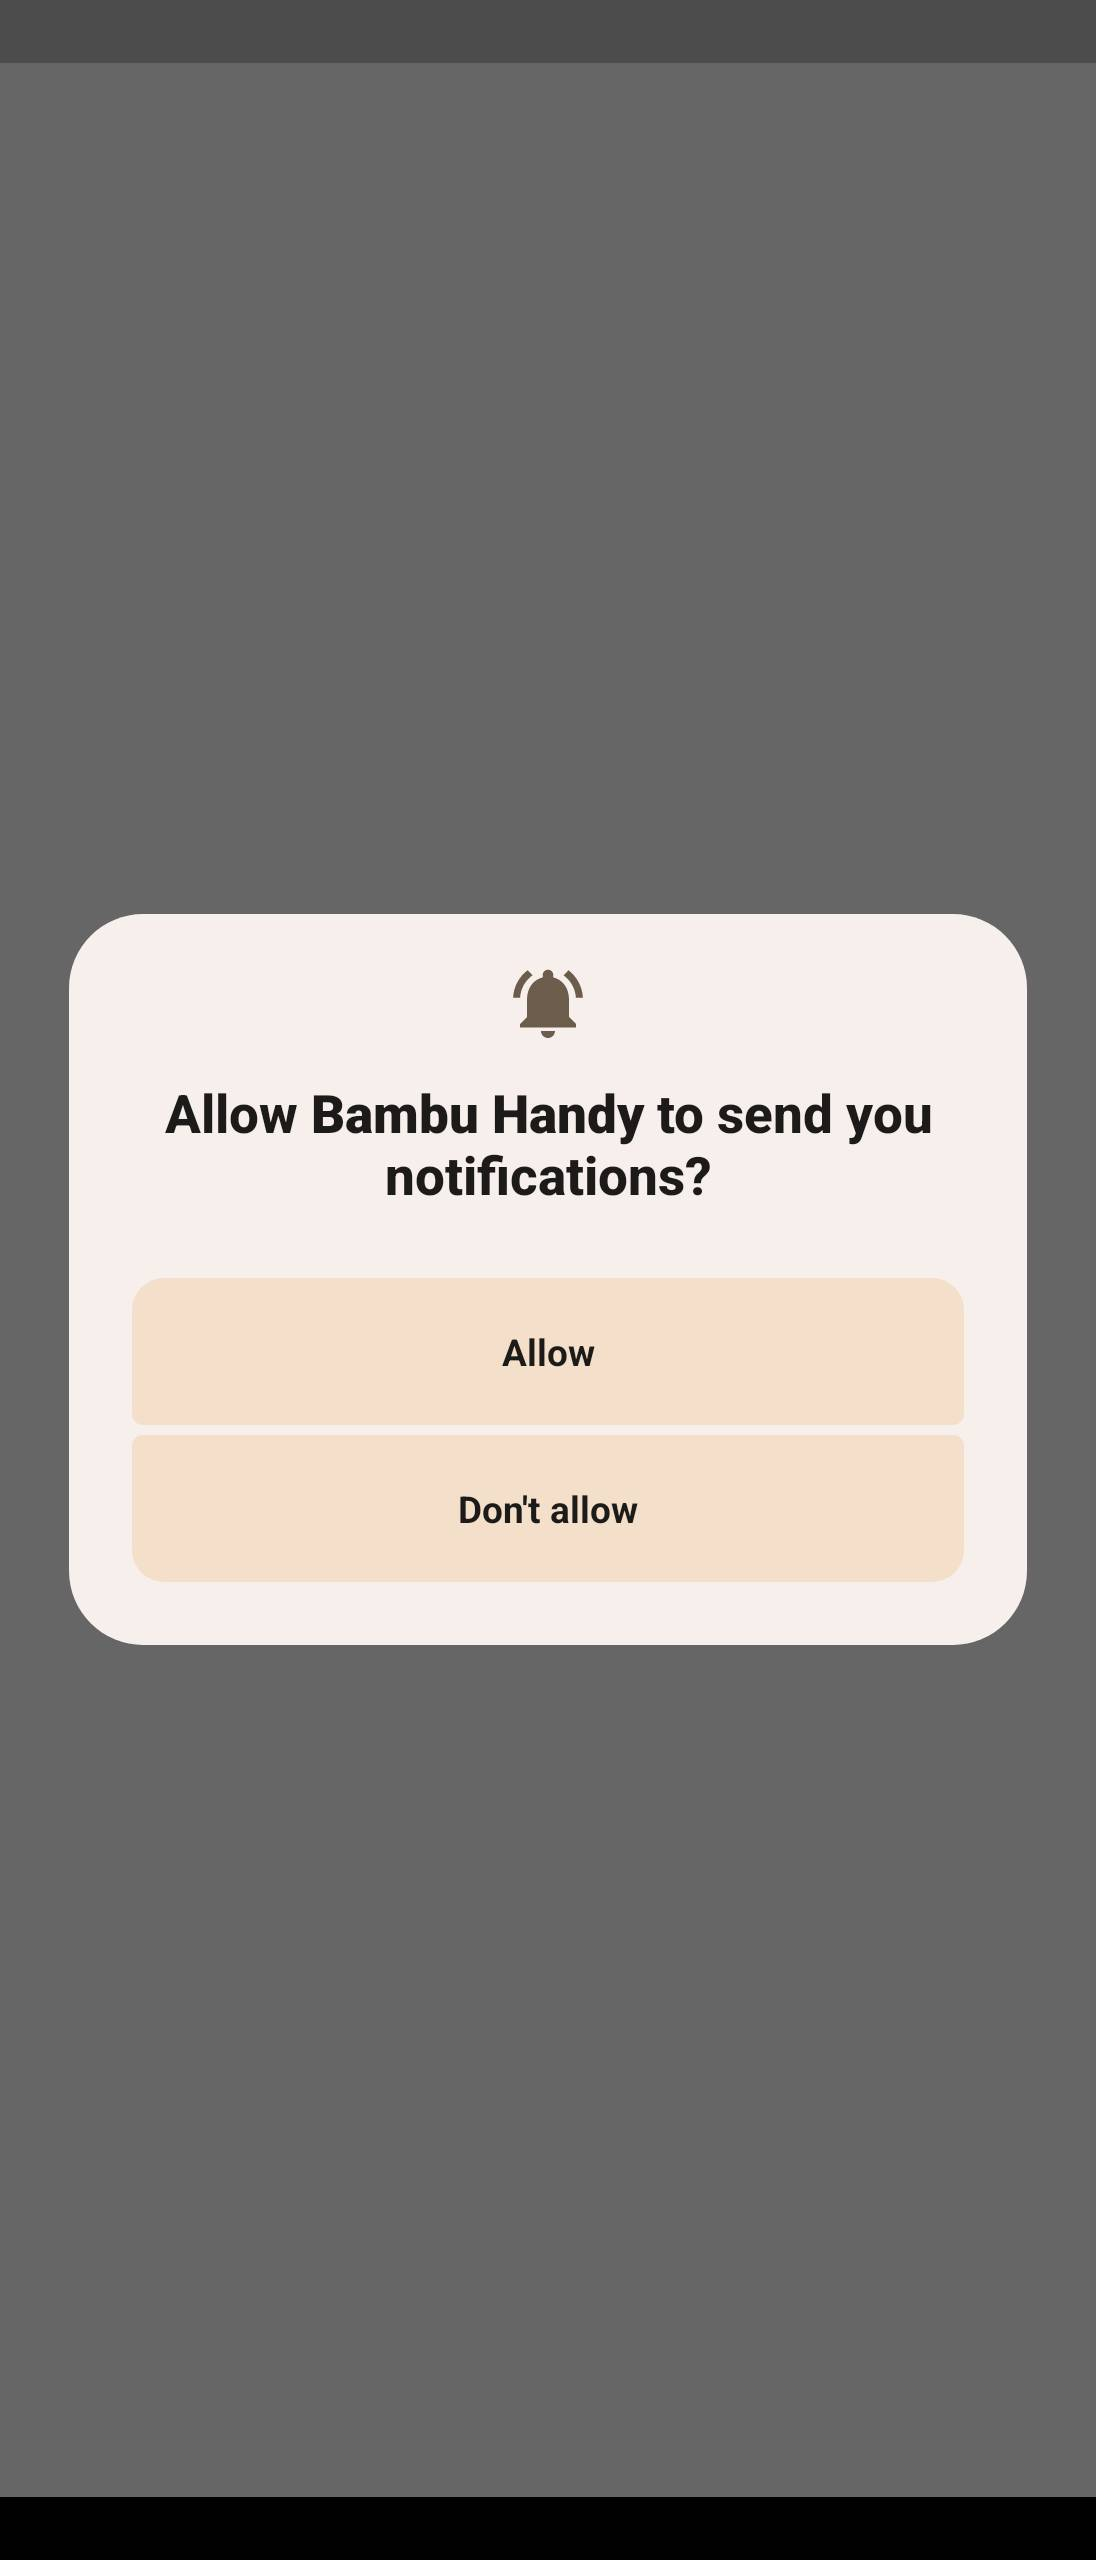
Log In / Register
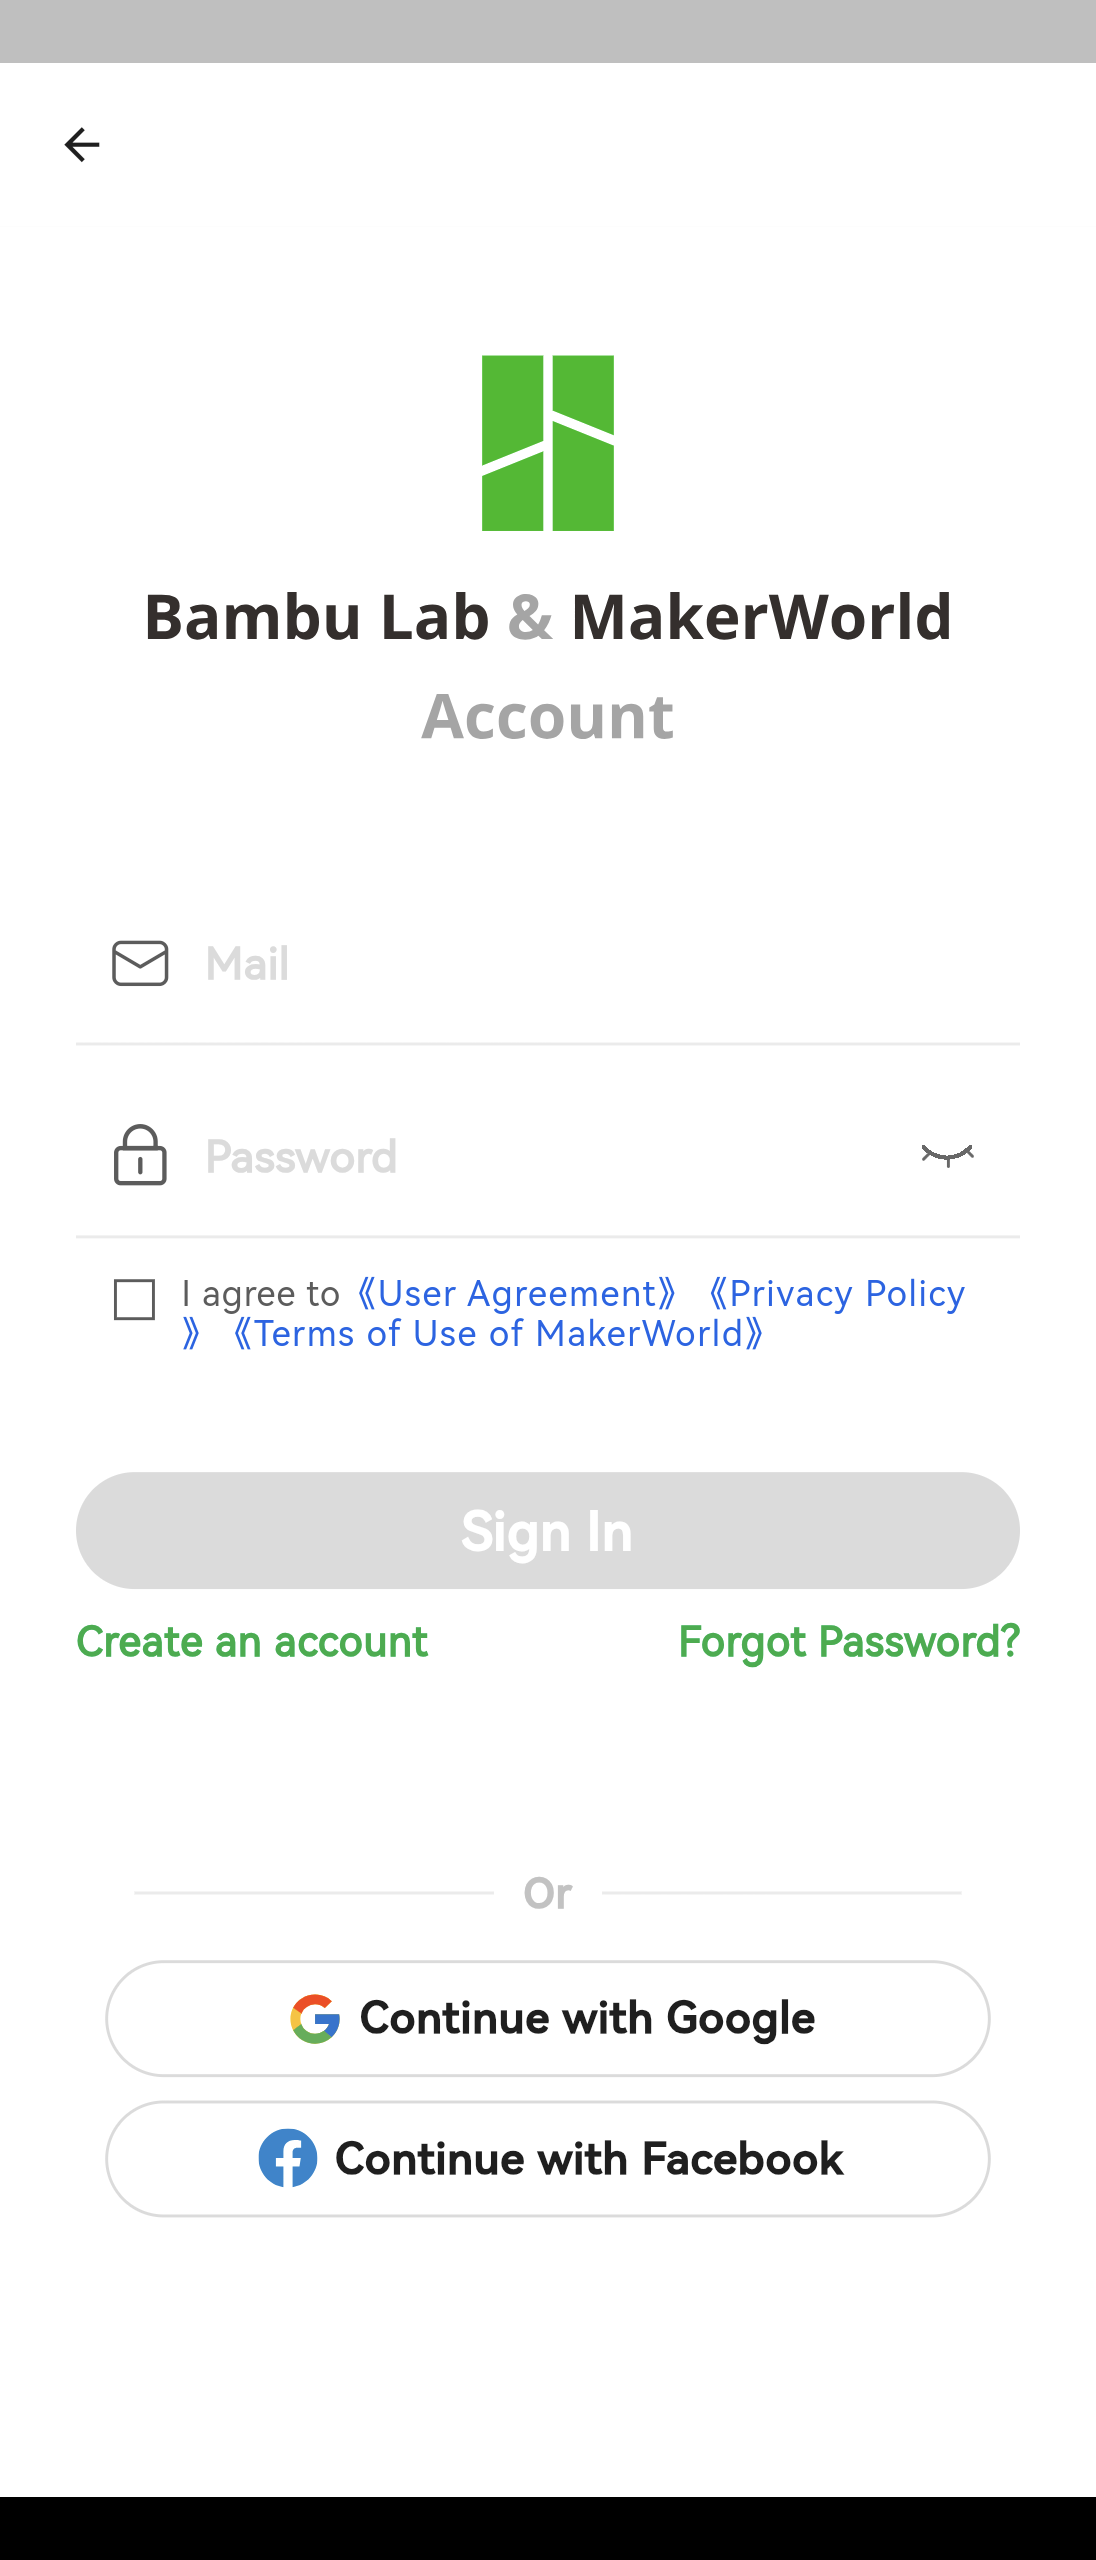
After entering the main interface, tap the Me (Me) button on the right side of the bottom navigation bar to open the “Me” page. Then click Log In / Register at the top of the screen and complete your account registration or log in.
Bambu Handy offers sign-in options using an email address, Google account, or Facebook account.
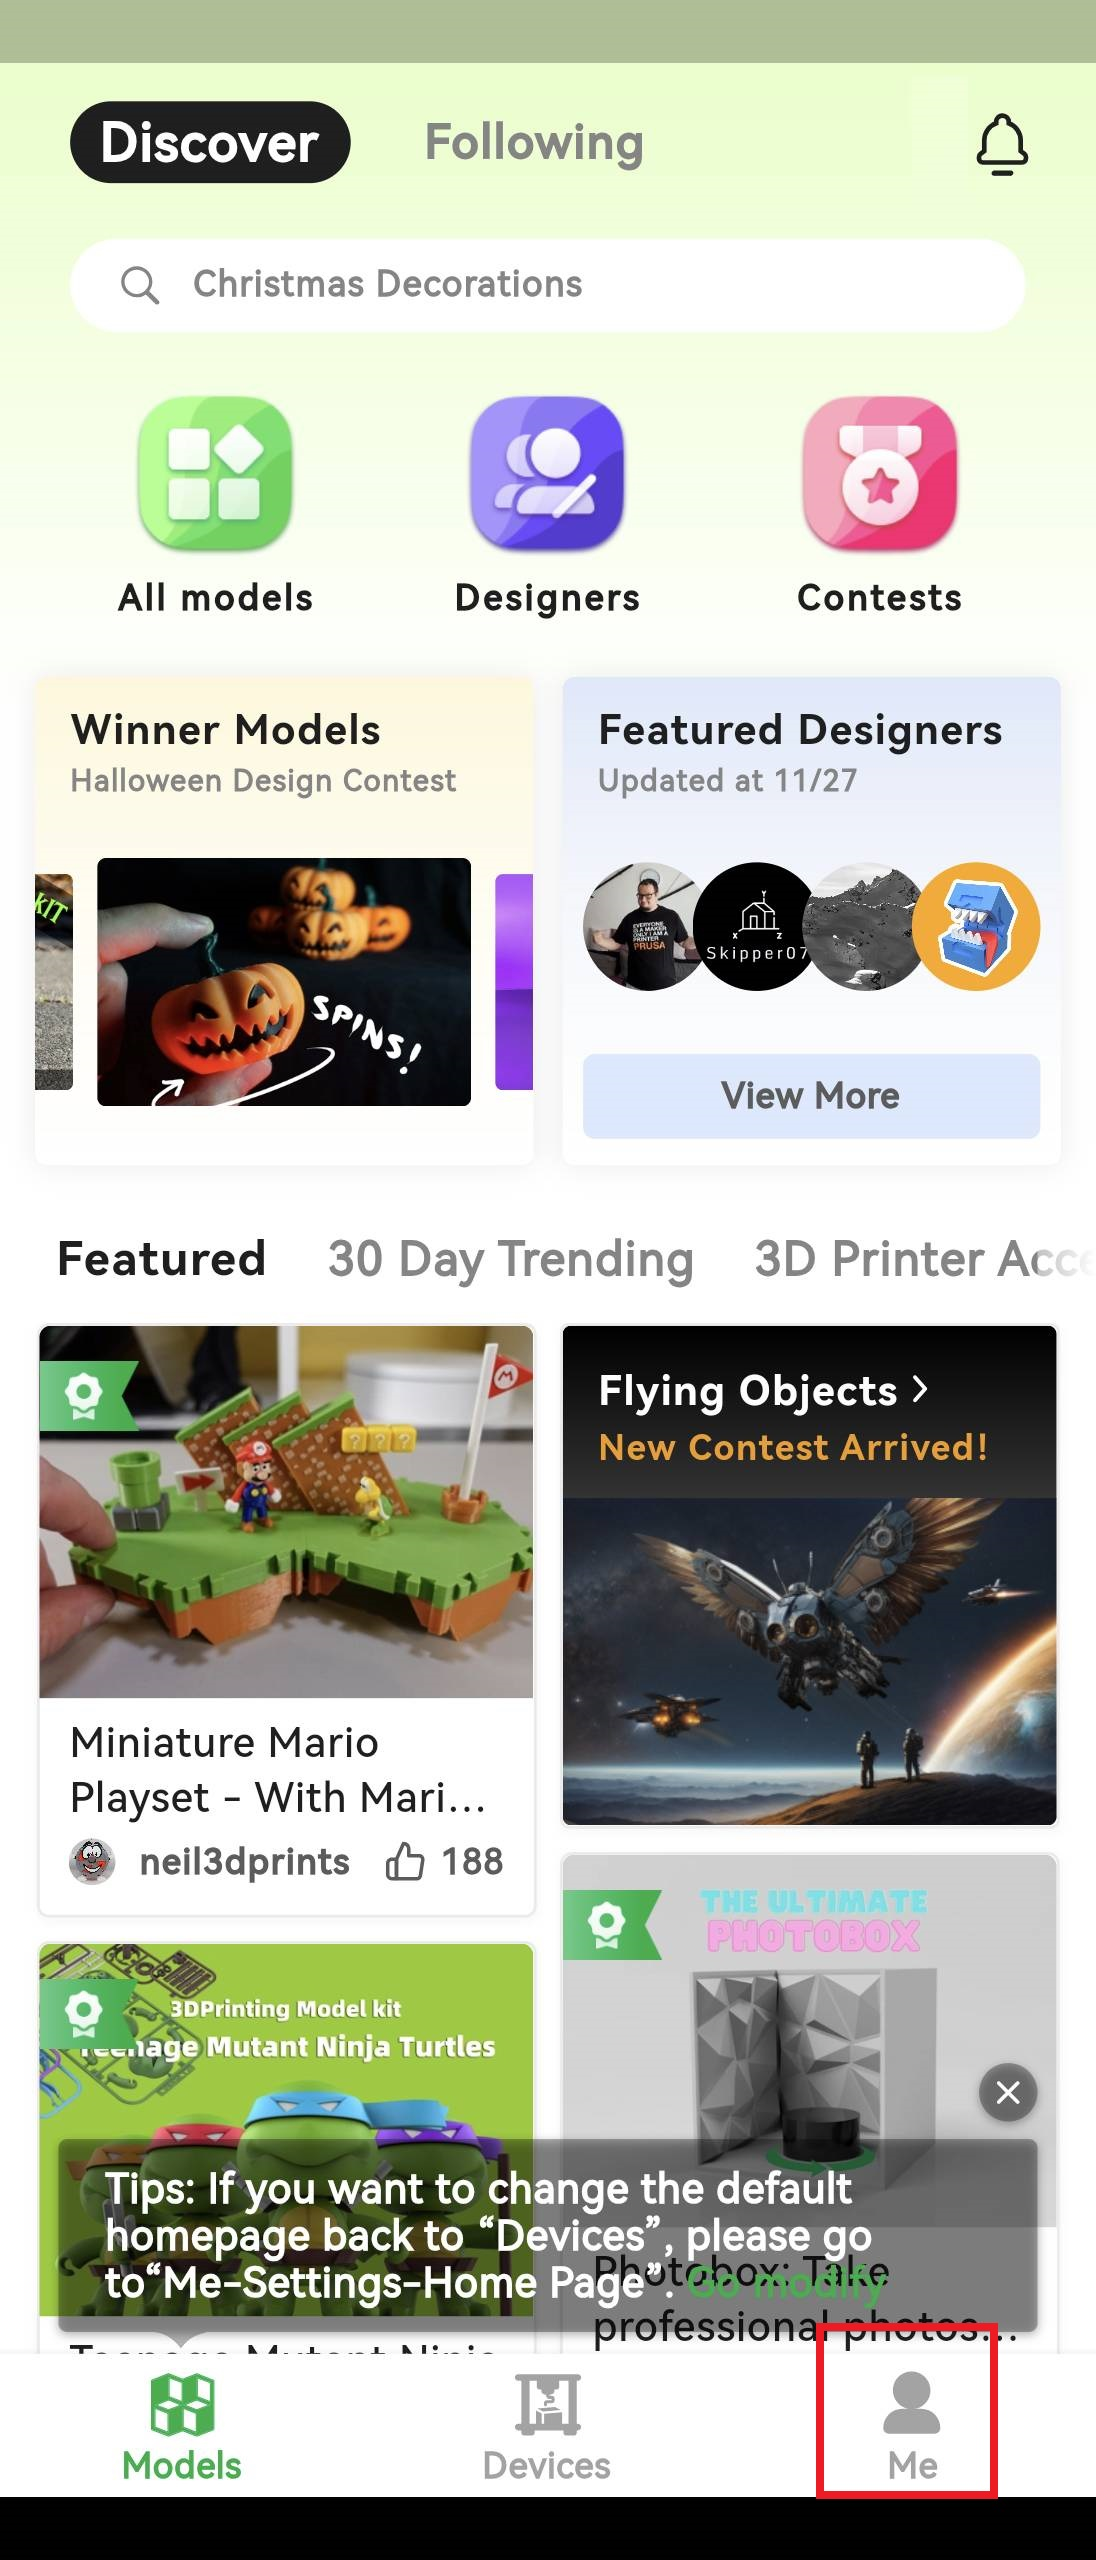
Adding a Printer
After successfully logging in to your account, tap the Devices (Devices) button in the bottom navigation bar to access the “Devices” page, then click Bind Printer (Bind Printer) to add a printer.
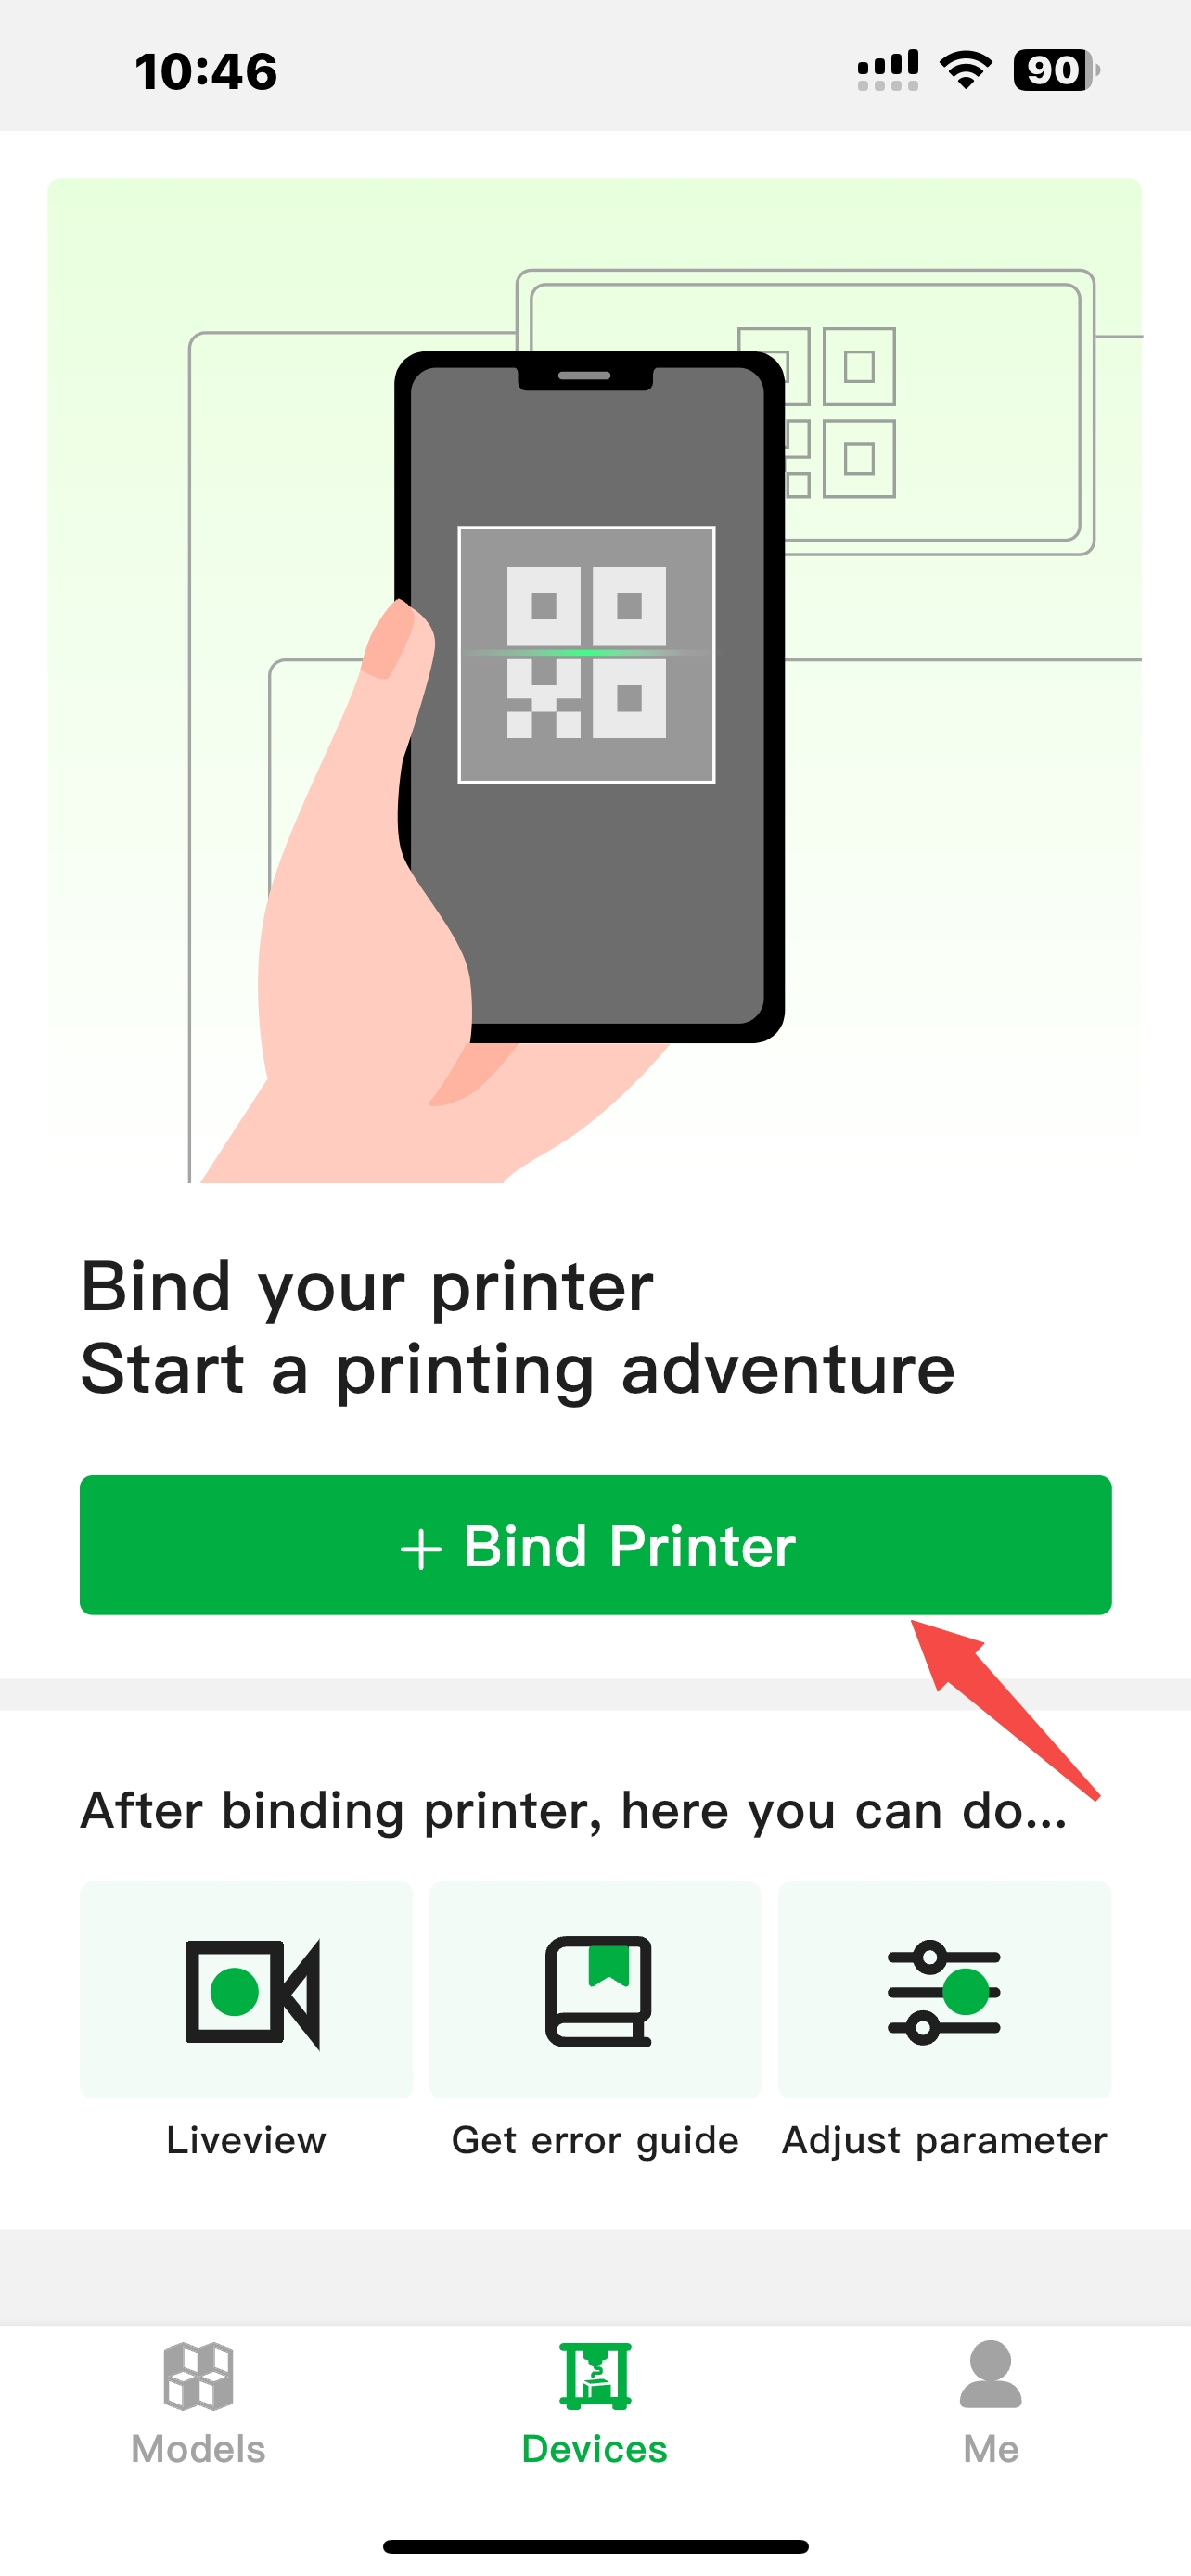
Find the login QR code on the printer screen and scan it.
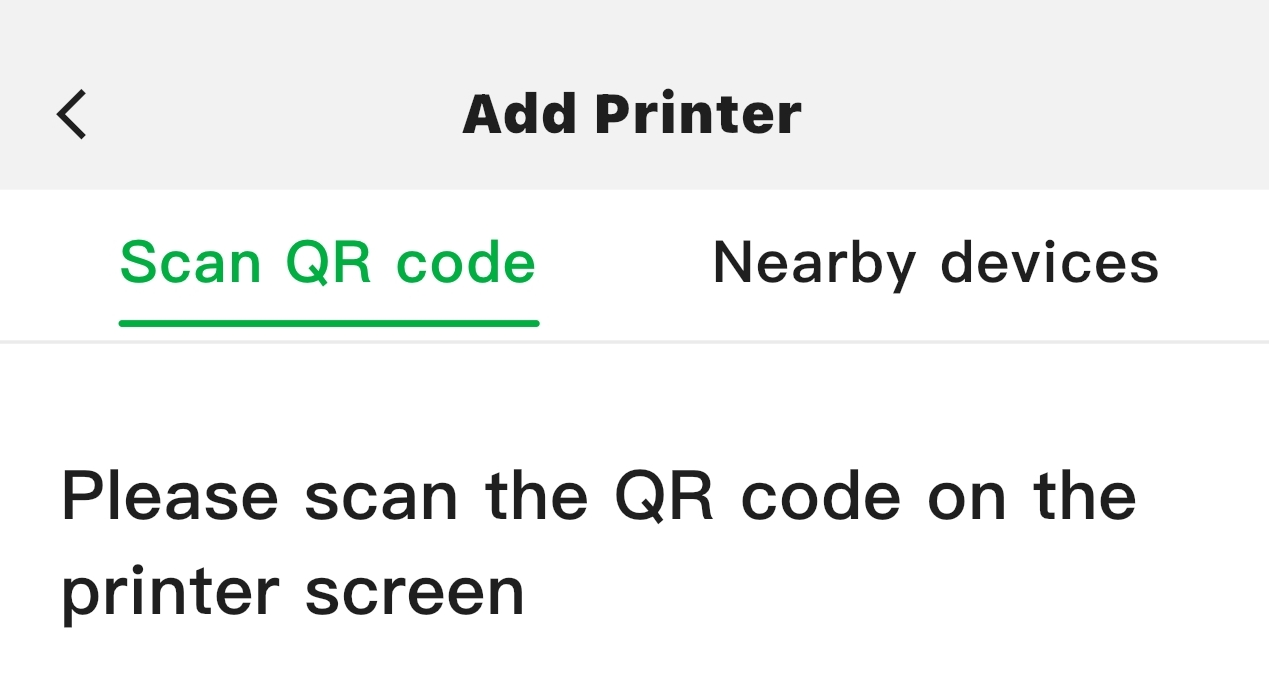
Note: If scanning the code fails, you can zoom in or out on the “Scan QR Code” page, or clean the camera.
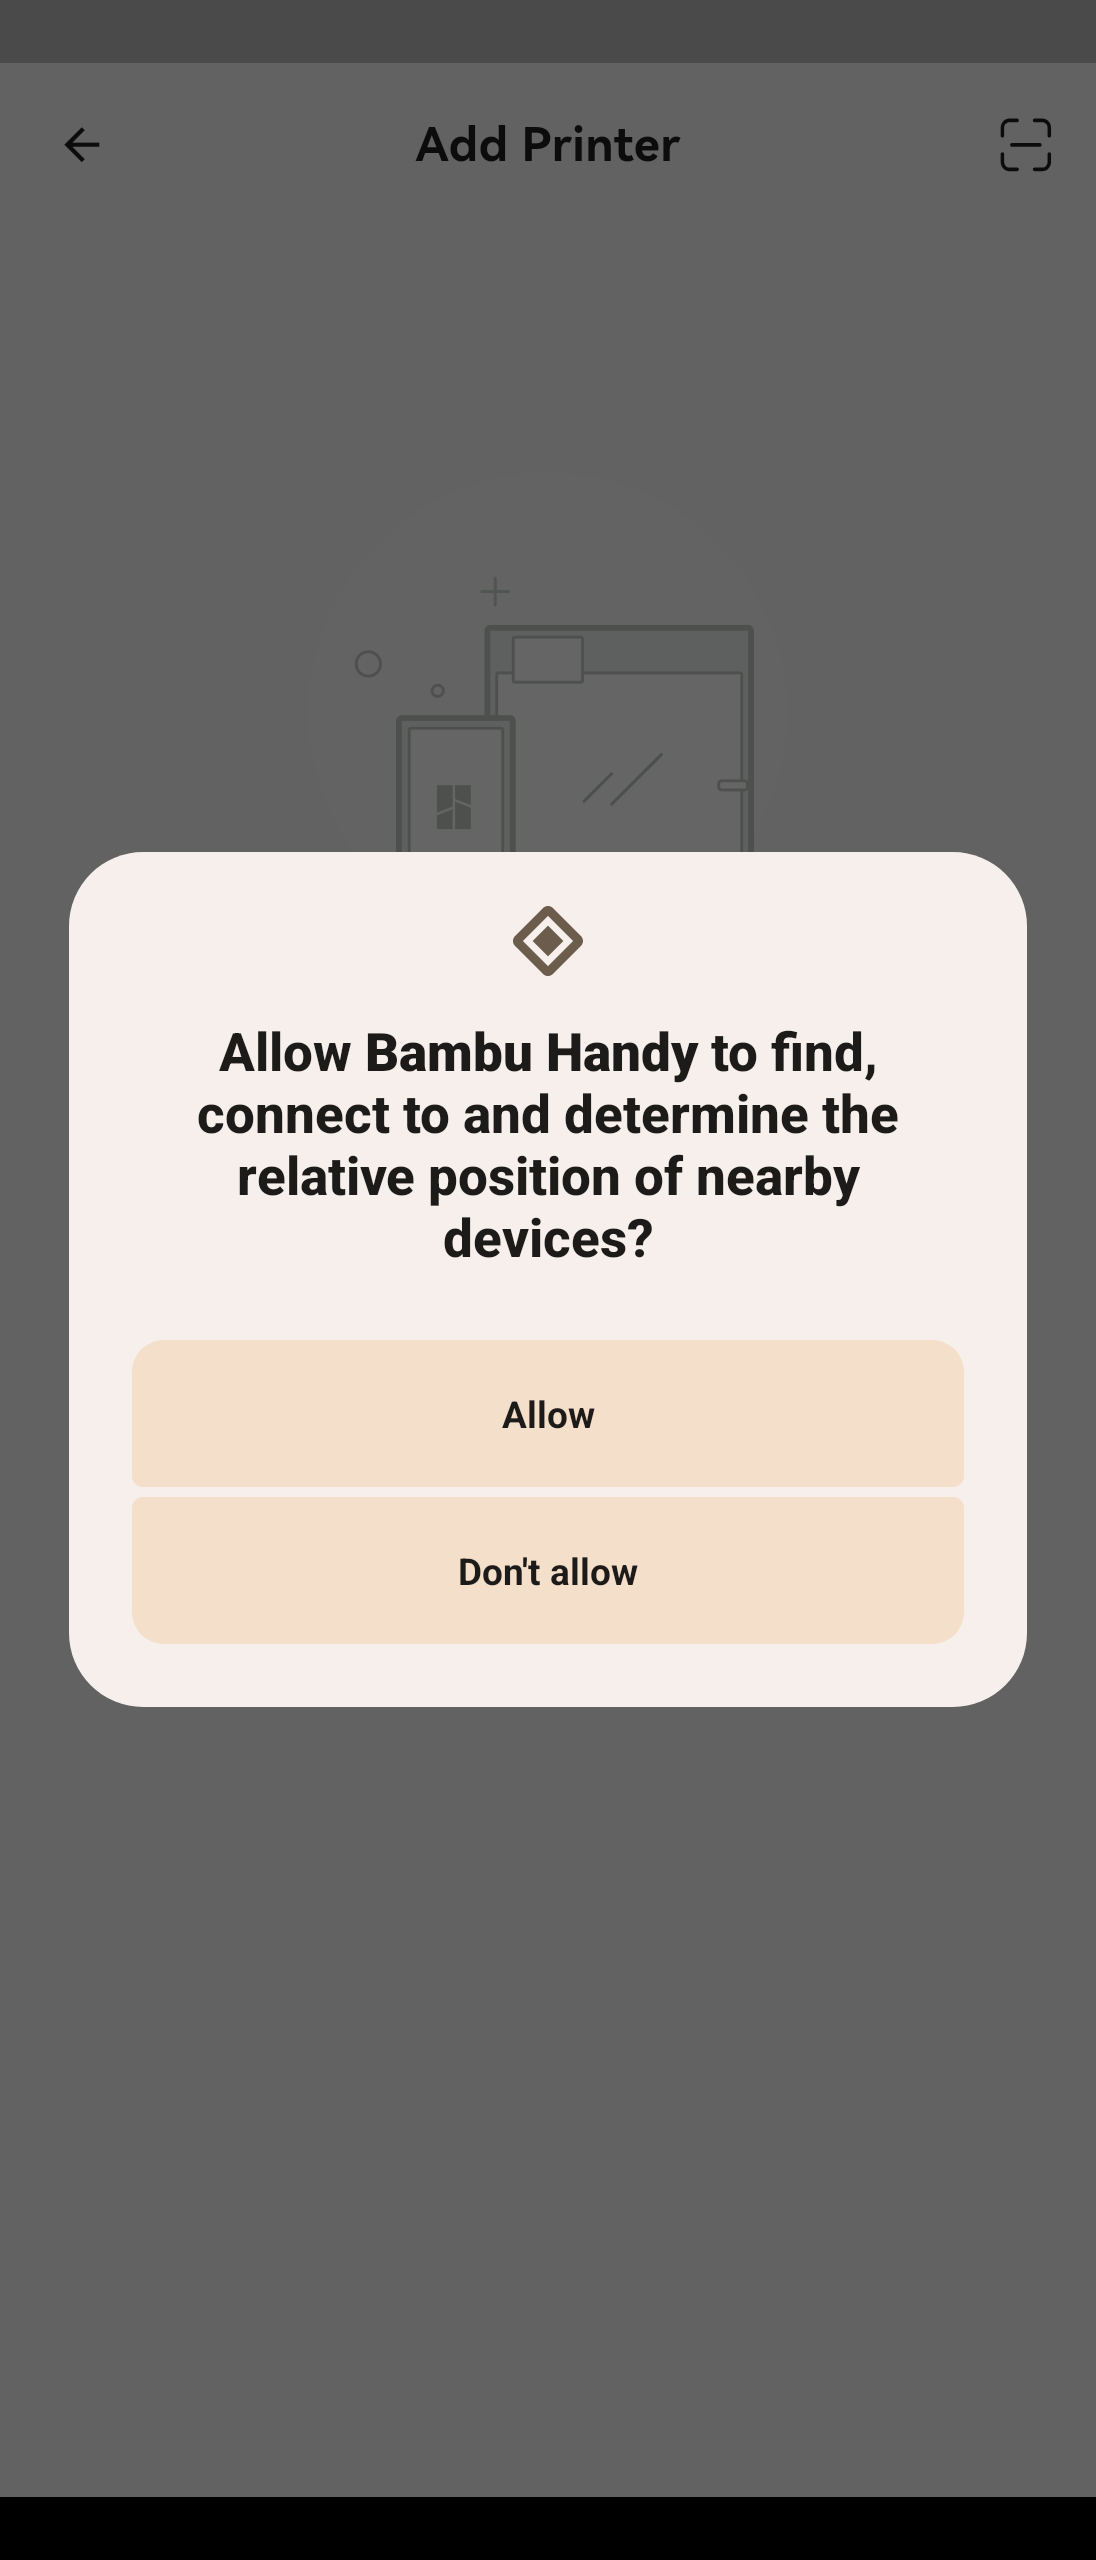
Nearby Devices
The printer must be connected to the internet to use the connection with your Bambu Handy account:
If the printer is on the same local network (LAN) as your phone, the device list in the Bambu Handy app will automatically display the discovered device.
Note: The Bambu Handy app currently does not support the printer's LAN mode, and an internet connection must be used to connect to the printer. LAN is used only to discover the printer; data transfer must take place over the internet.
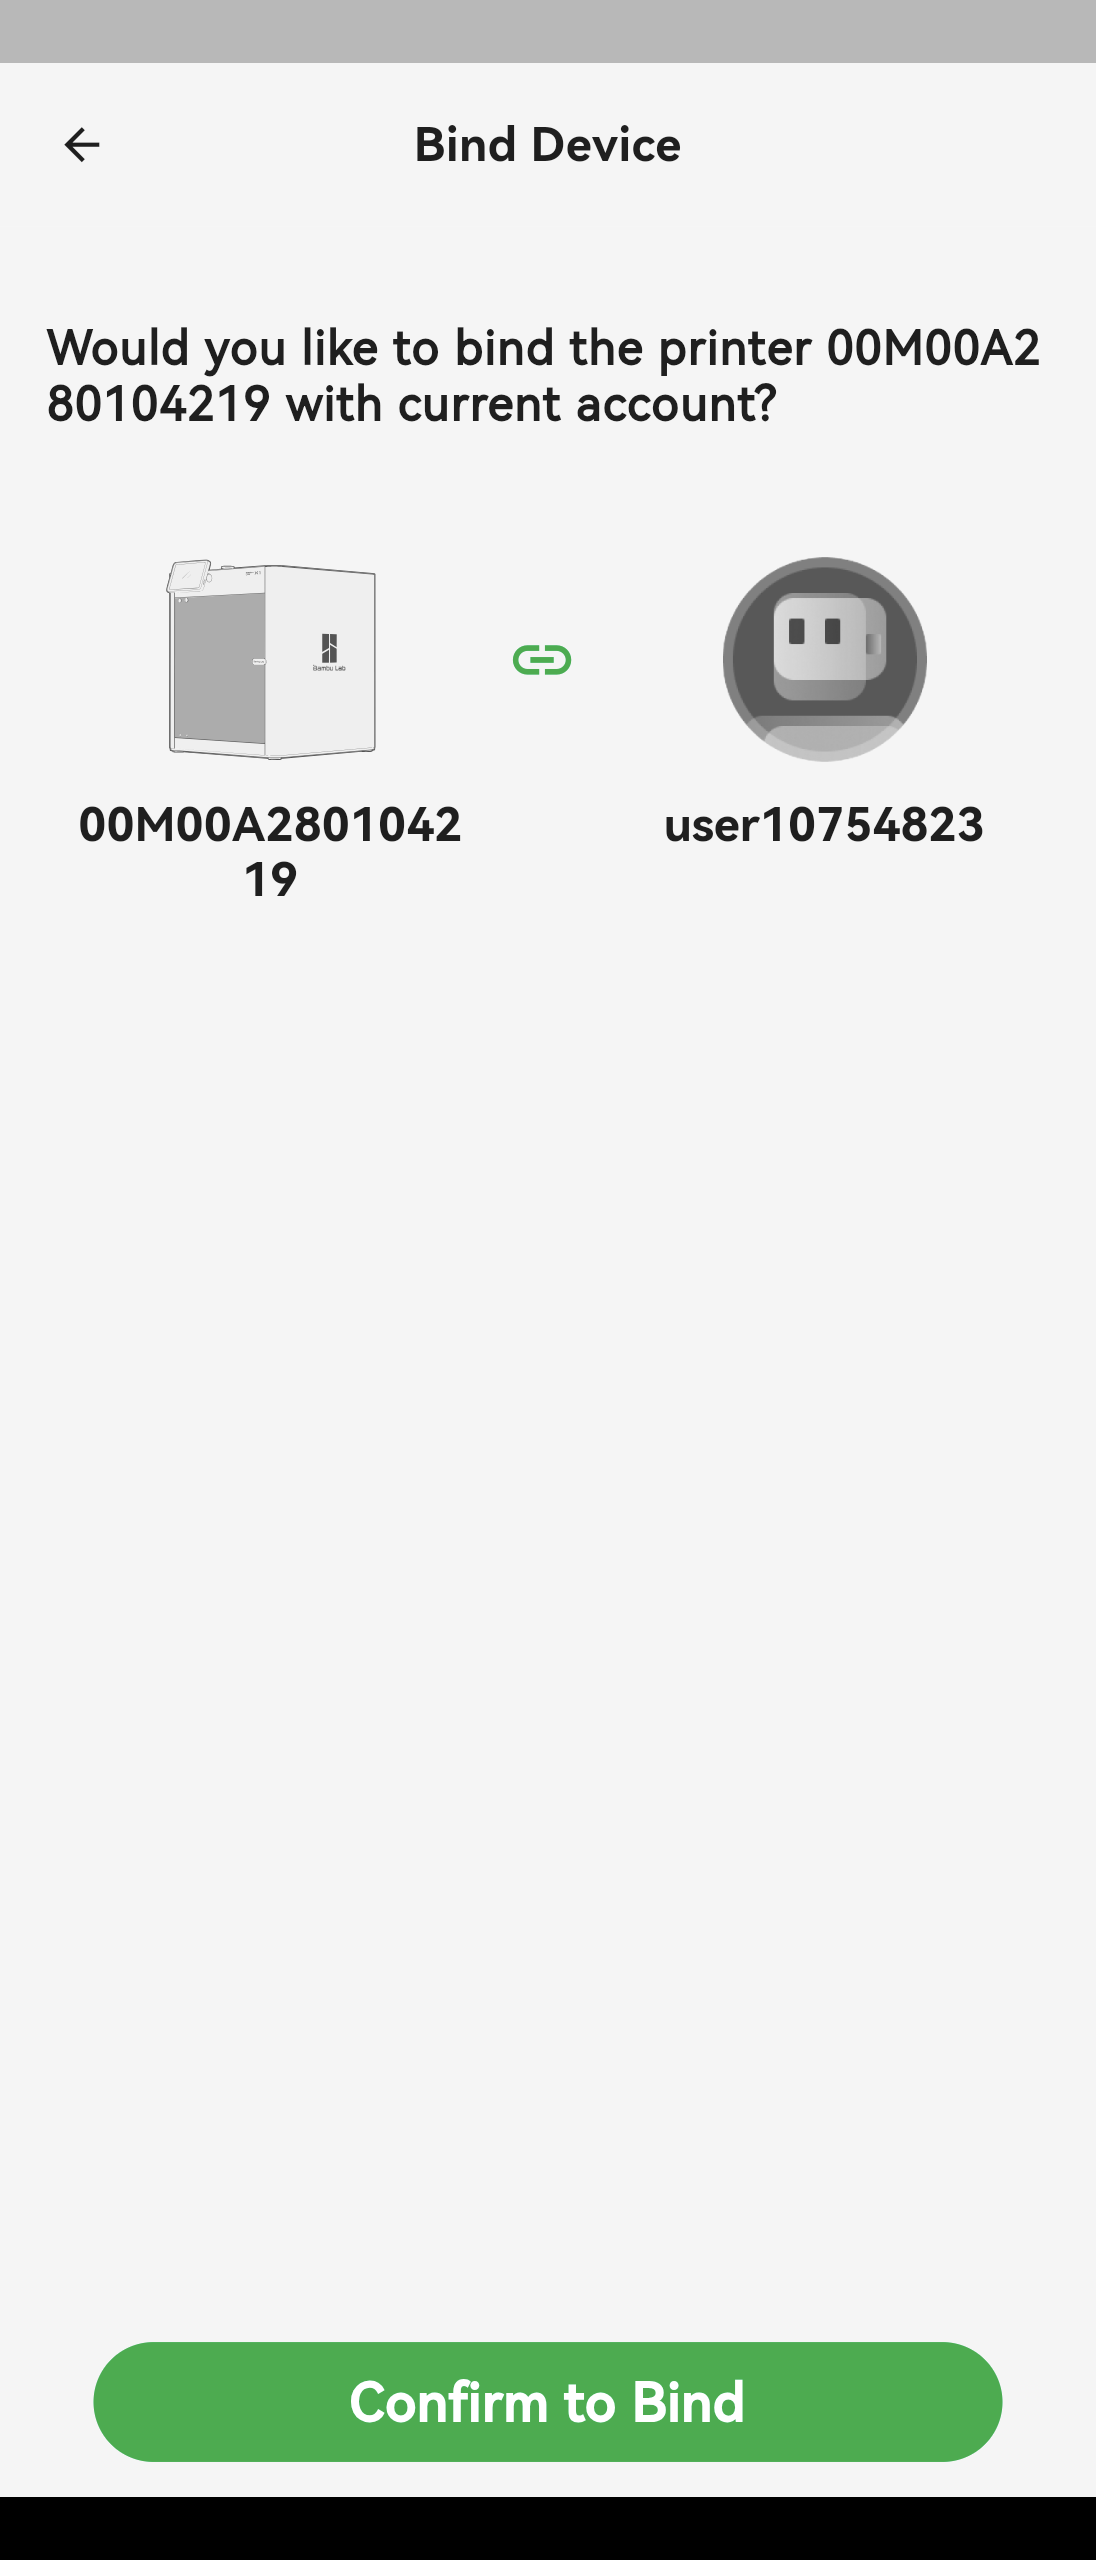
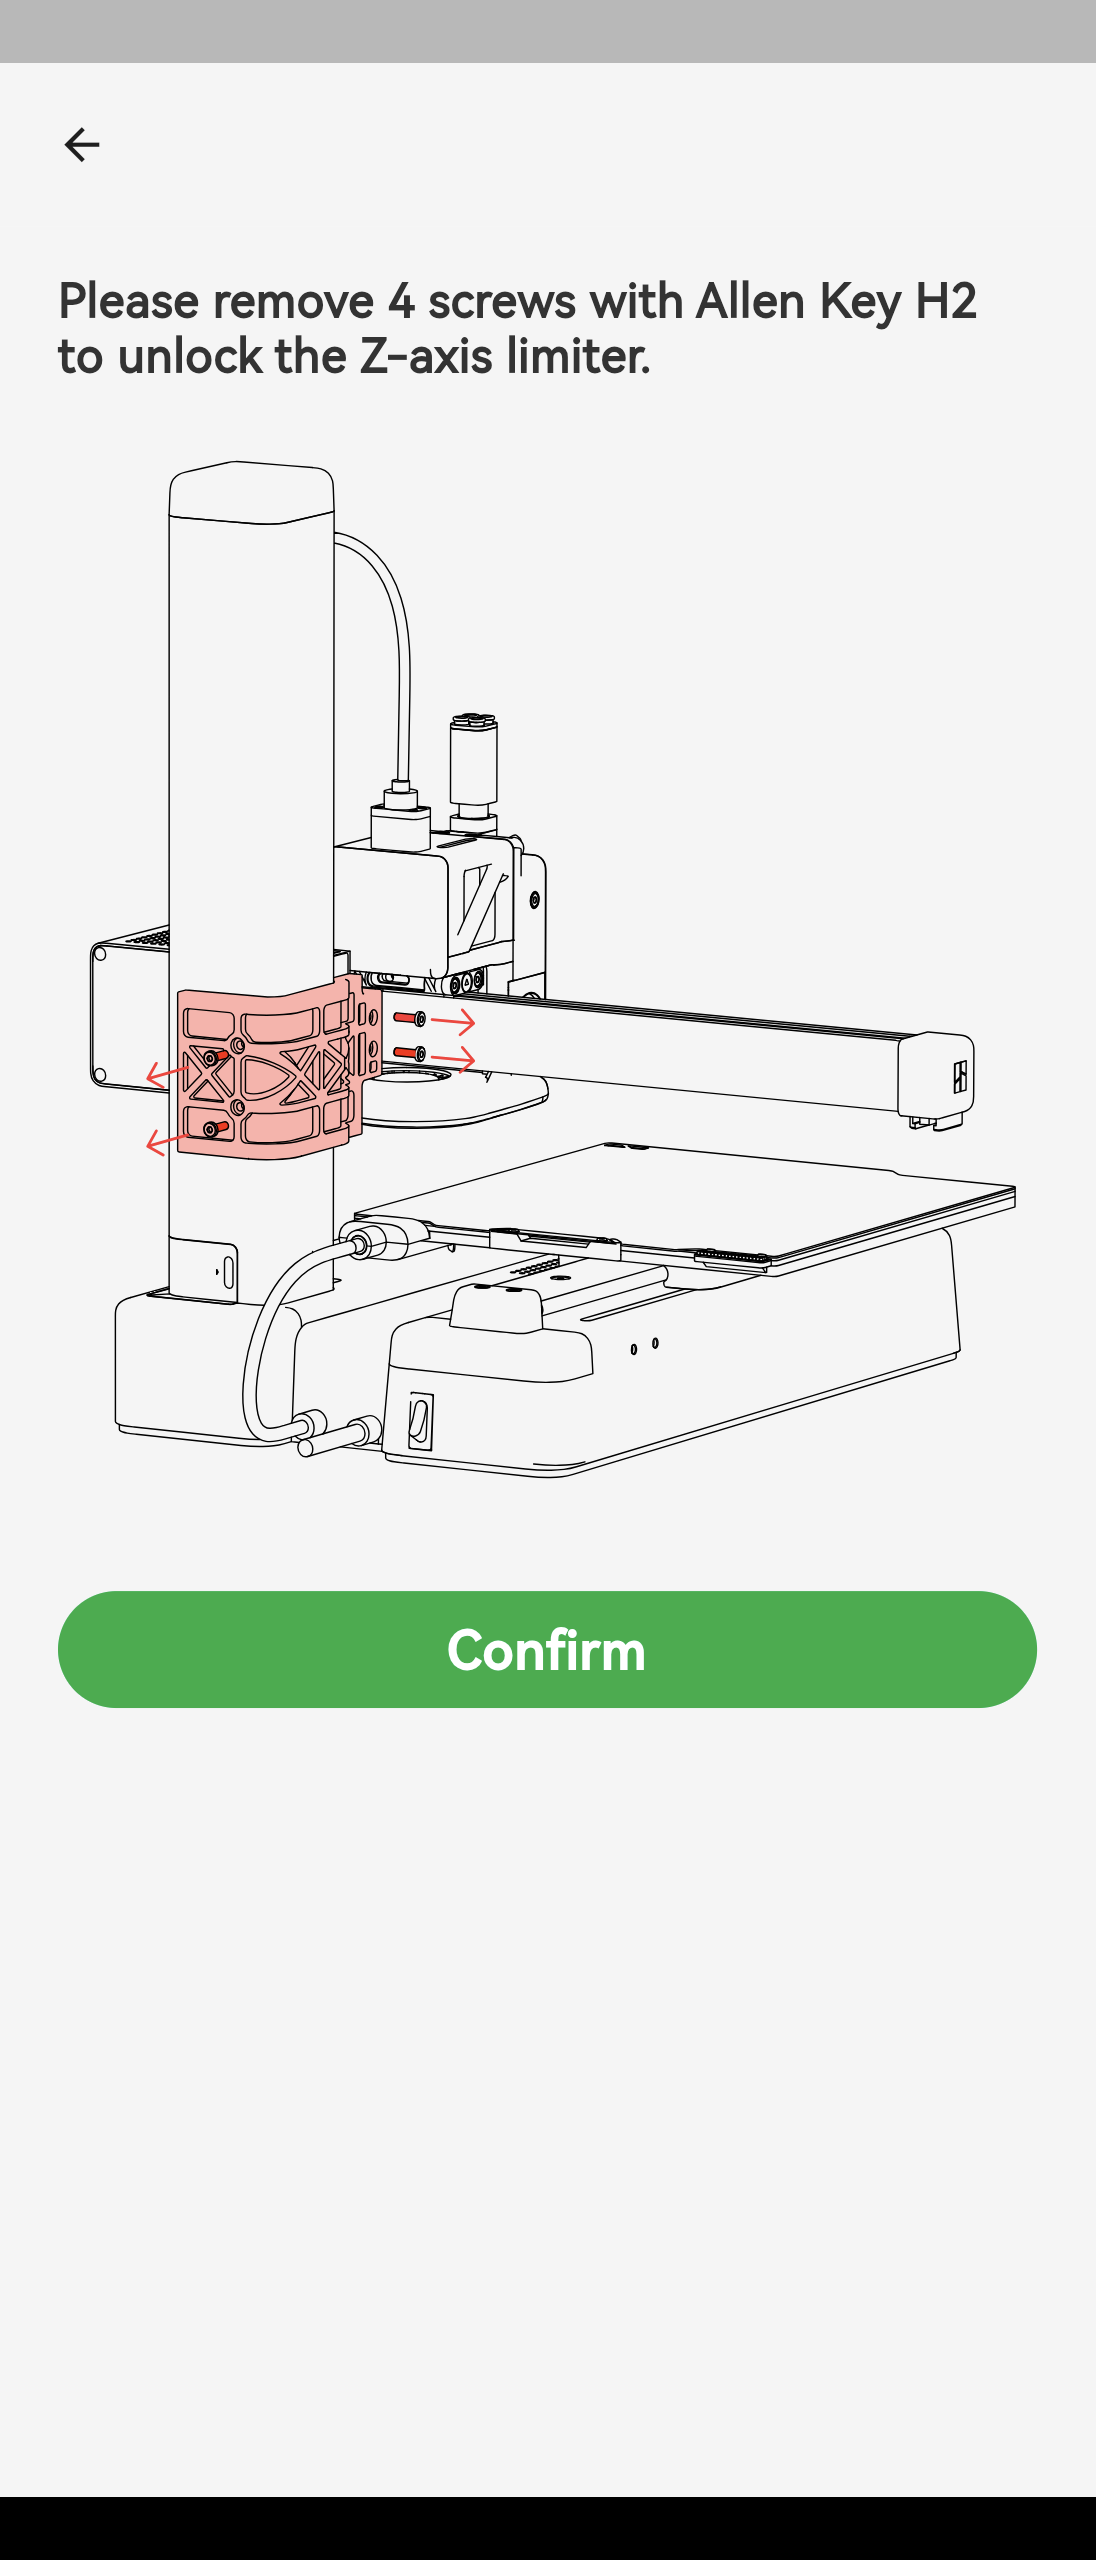
After completing the binding process, if you are using the 3D printer for the first time, you may need to remove all protective parts installed on the printer during shipping according to the instructions in the app. If you are already familiar with the printer and have used it before, you can skip this step by clicking Confirm.
Home Page
[Modely] Interface Features
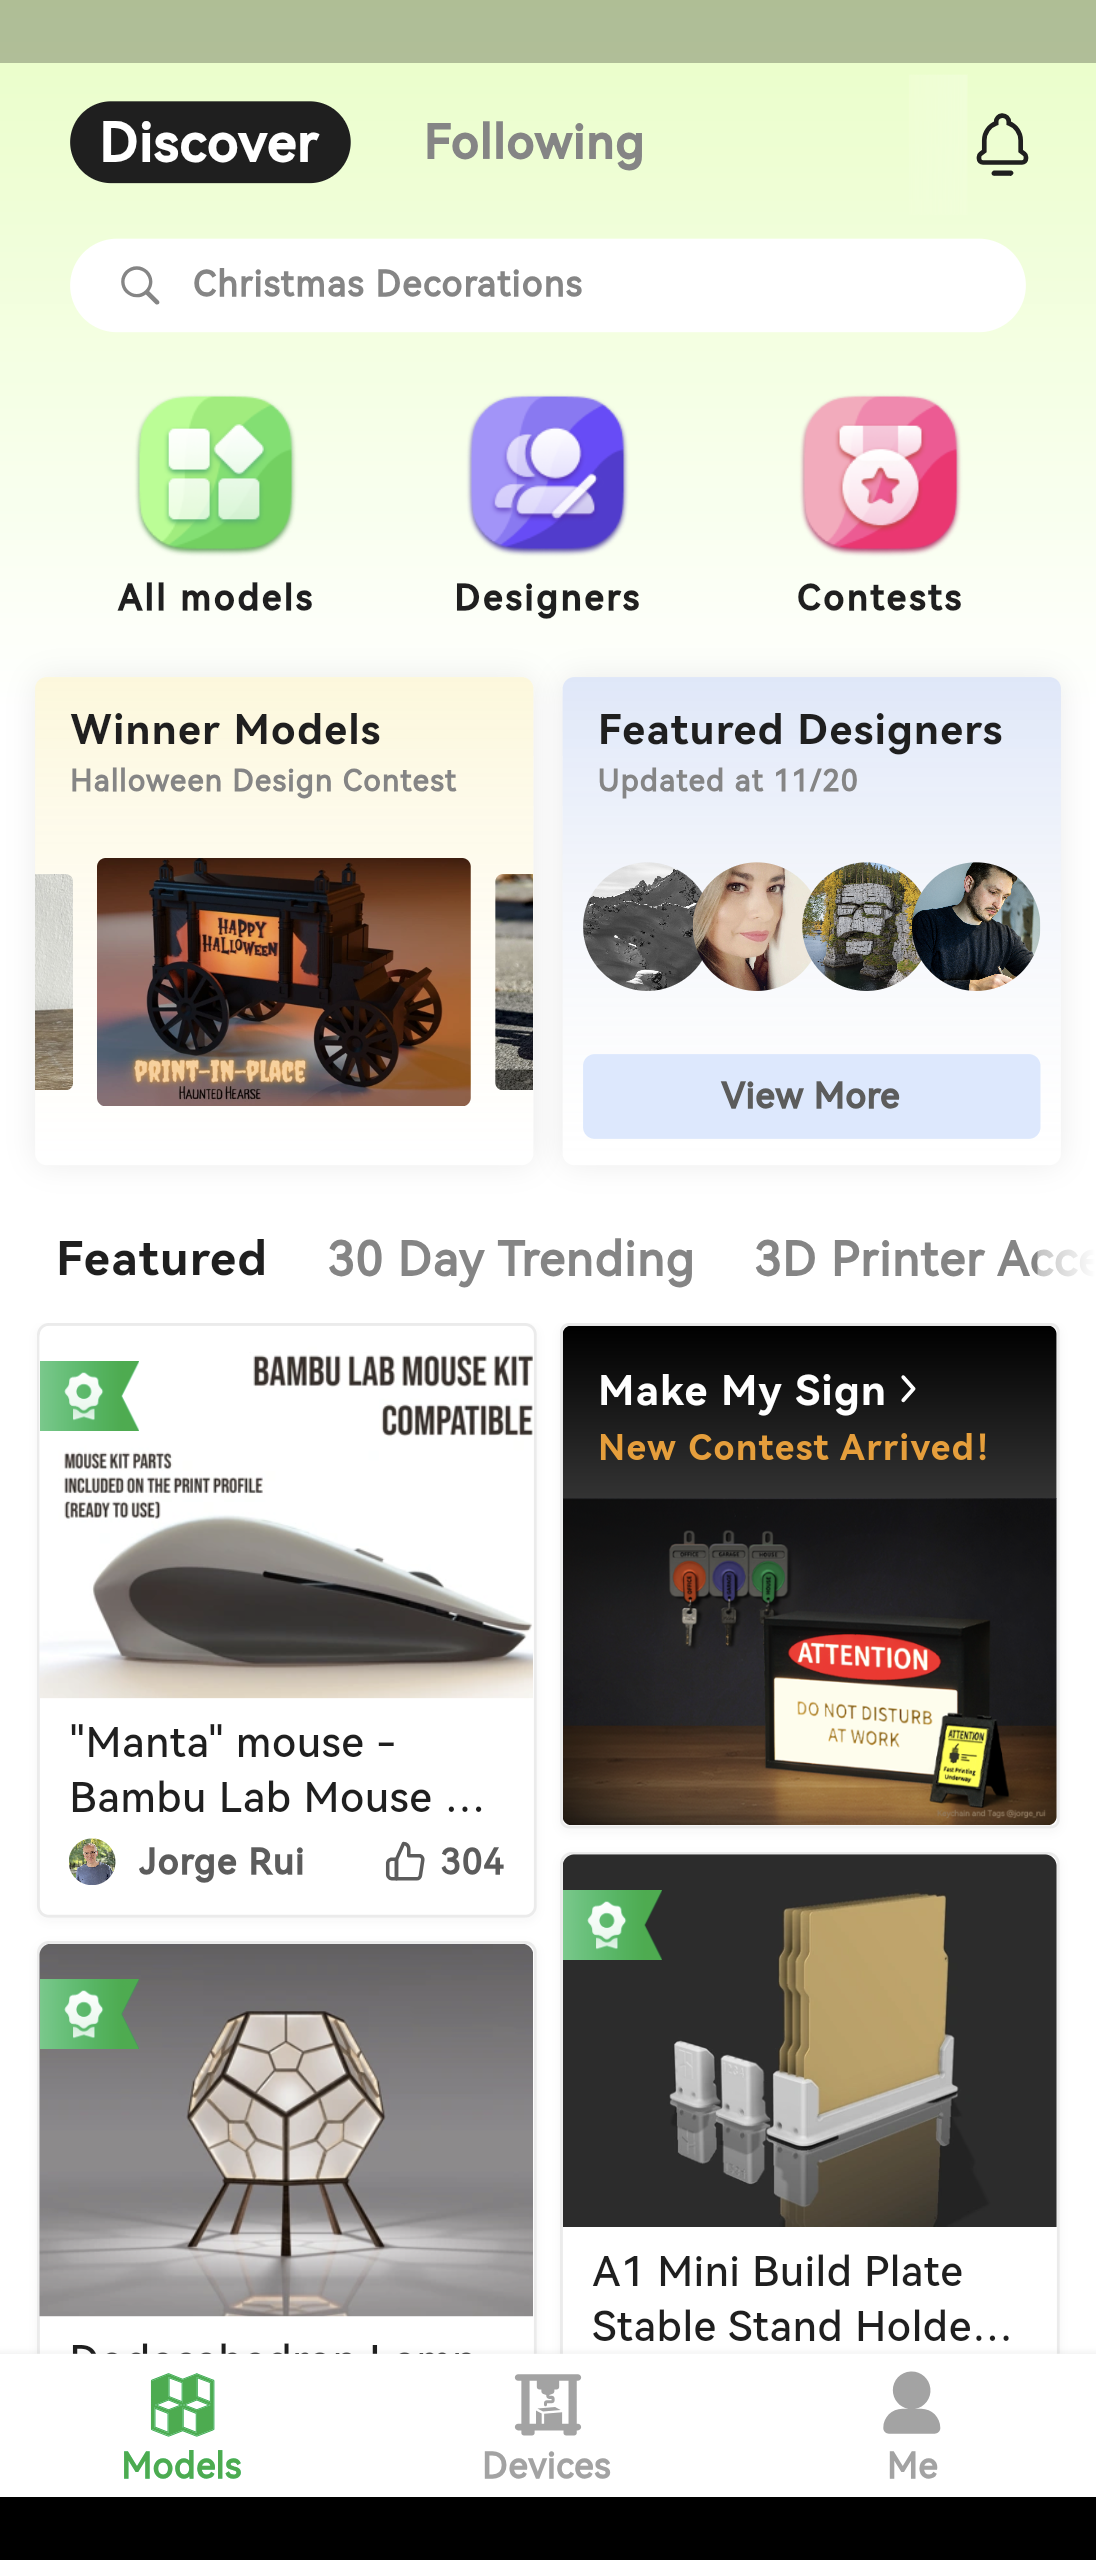
The “Models” interface is where you can access MakerWorld, allowing you to share models with others and browse their work. You can also send your favorite models directly for printing.
There are two main tabs in the upper-left corner of this screen. The “Discover” tab is where you can browse models and designers, while the “Following” tab allows you to check the latest posts from designers you follow.
You can also access the contests section from the “Discover” tab. Bambulab regularly organizes contests in which designers from around the world participate. You can explore other people's ideas or participate yourself. The winners of each contest receive exciting prizes!
Interface Features [Zařízení]
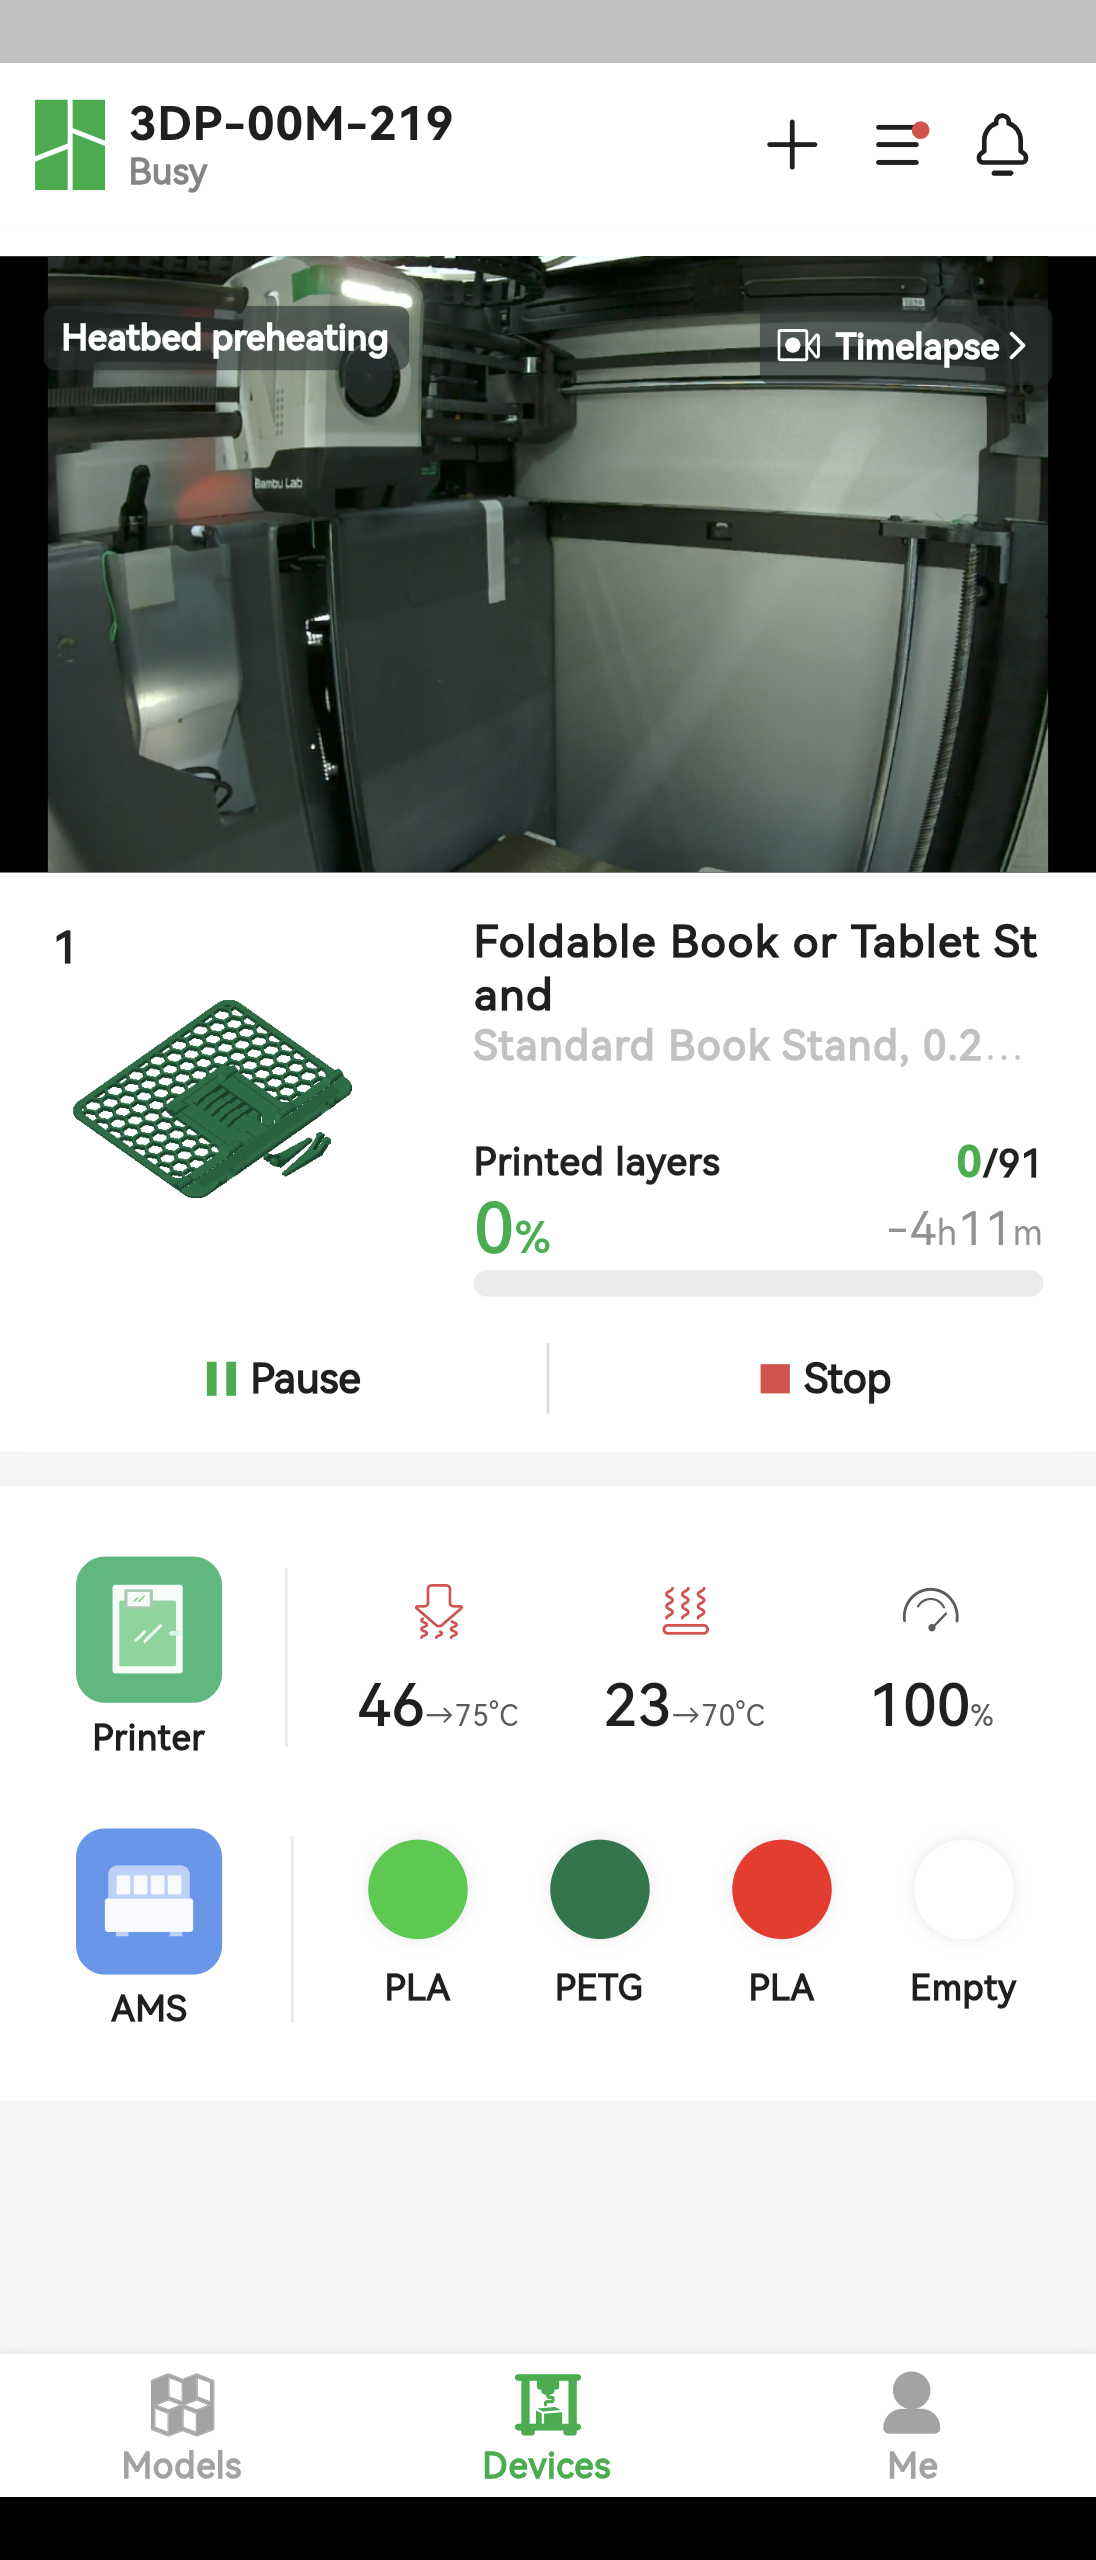
After completing the printer binding process, the app will automatically switch to the devices screen. The “Devices” interface contains a top bar, a printer monitoring image, the currently printed object (or the most recently printed object), and printer controls.
Top Bar
The top of the interface displays the name and status of the current device, and you can click it to switch between different connected devices.
The three buttons on the right are Add Printer, Device Settings and Messages. Adding a printer was explained in the previous section, while Messages is used to display all messages received by the user from both the printer and MakerWorld. The Device Settings menu is described in the advanced features section.

Printer Monitoring Image
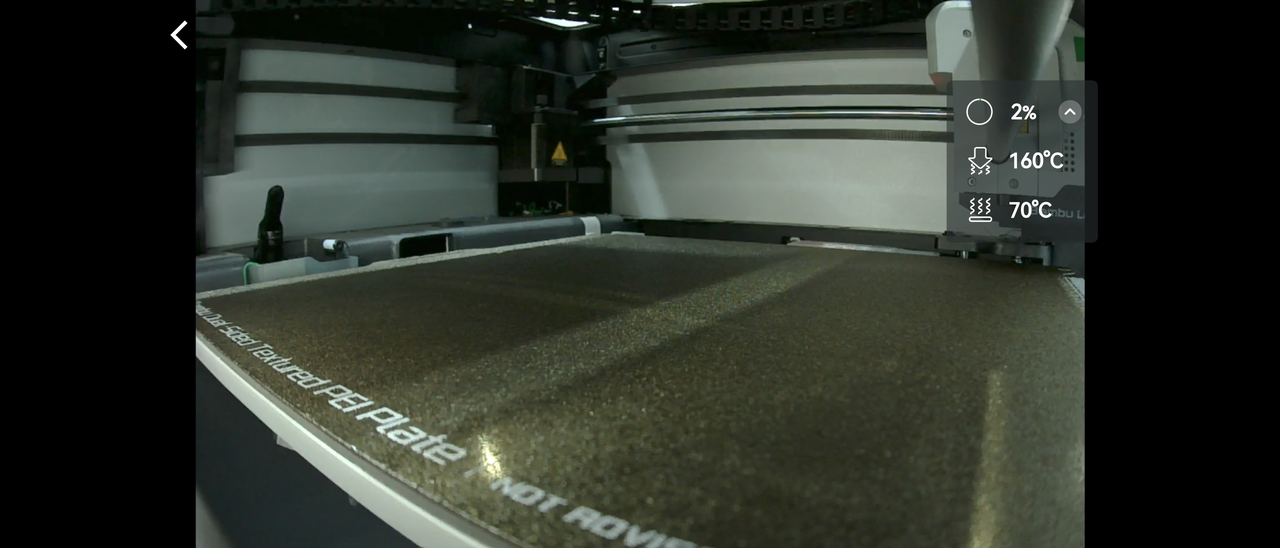
You can view the current image returned by the printer at any time by clicking the play button in the printer monitoring image. Clicking the Camera button in the lower-right corner of the screen takes a snapshot, which is saved to your phone's album. You can also click the Full Screen button in the lower-right corner to switch to full-screen mode and view the returned image. In full-screen mode, users can adjust the screen size using two-finger zoom, making it easier to observe print details.
Print Project
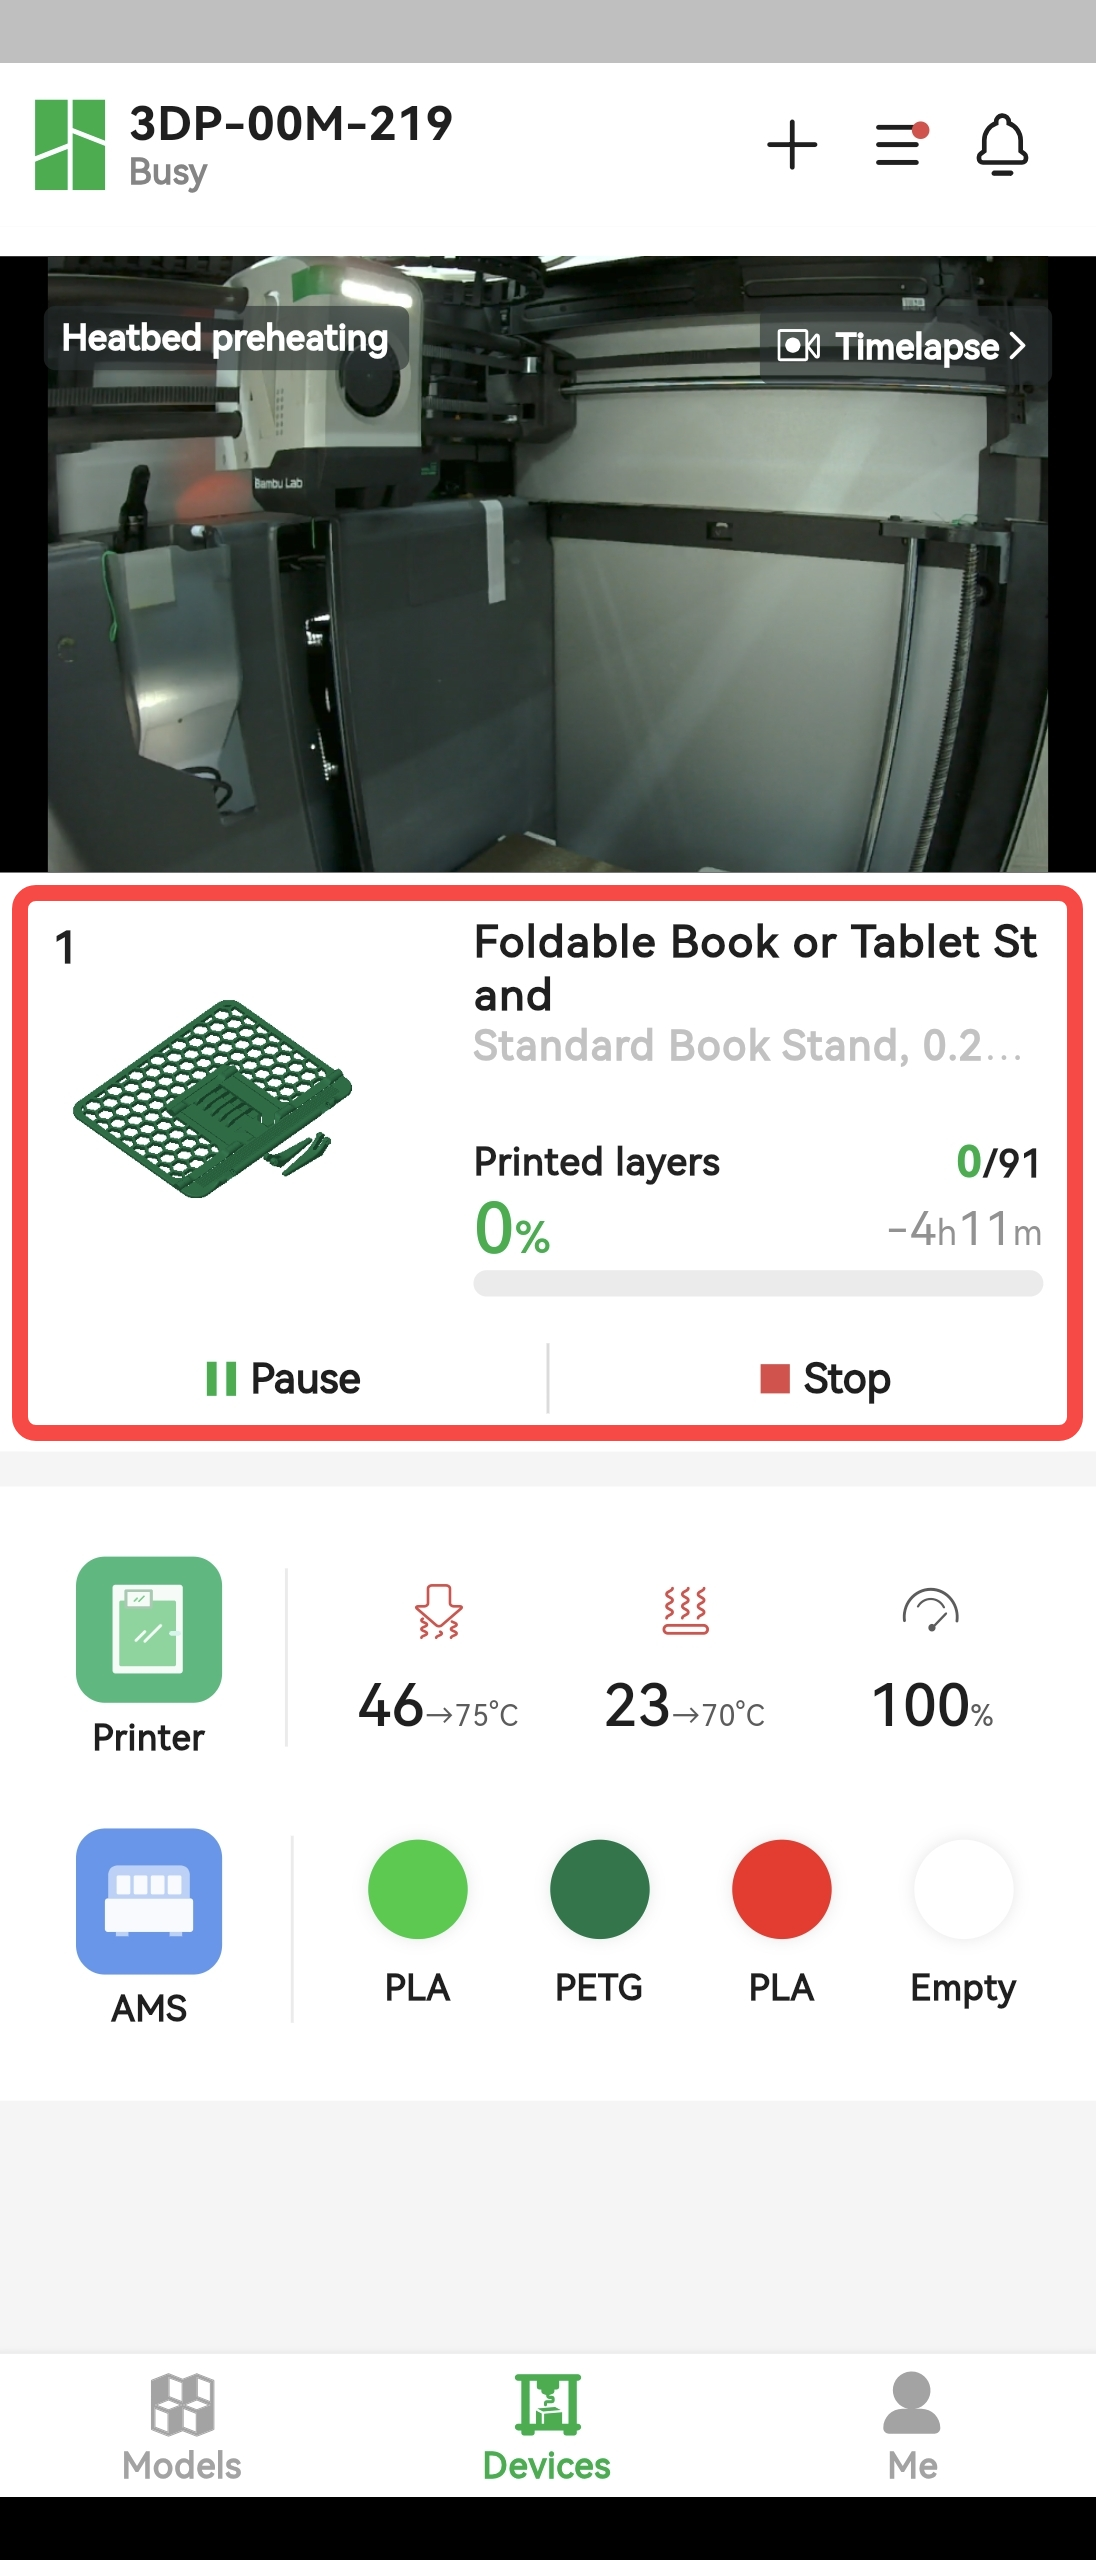
The Print Items module displays only the last item printed by the connected device if no item is currently in progress. If the printer is printing, the module displays the item currently being printed and the print control options. If the print was started directly on the printer, the module displays only the Pause and Stop options, but if the print item was sent to the printer from Bambu Studio, the module displays the Skip Part option in addition to Pause and Stop. This option is described in more detail in the advanced features section of this article.
Printer Control
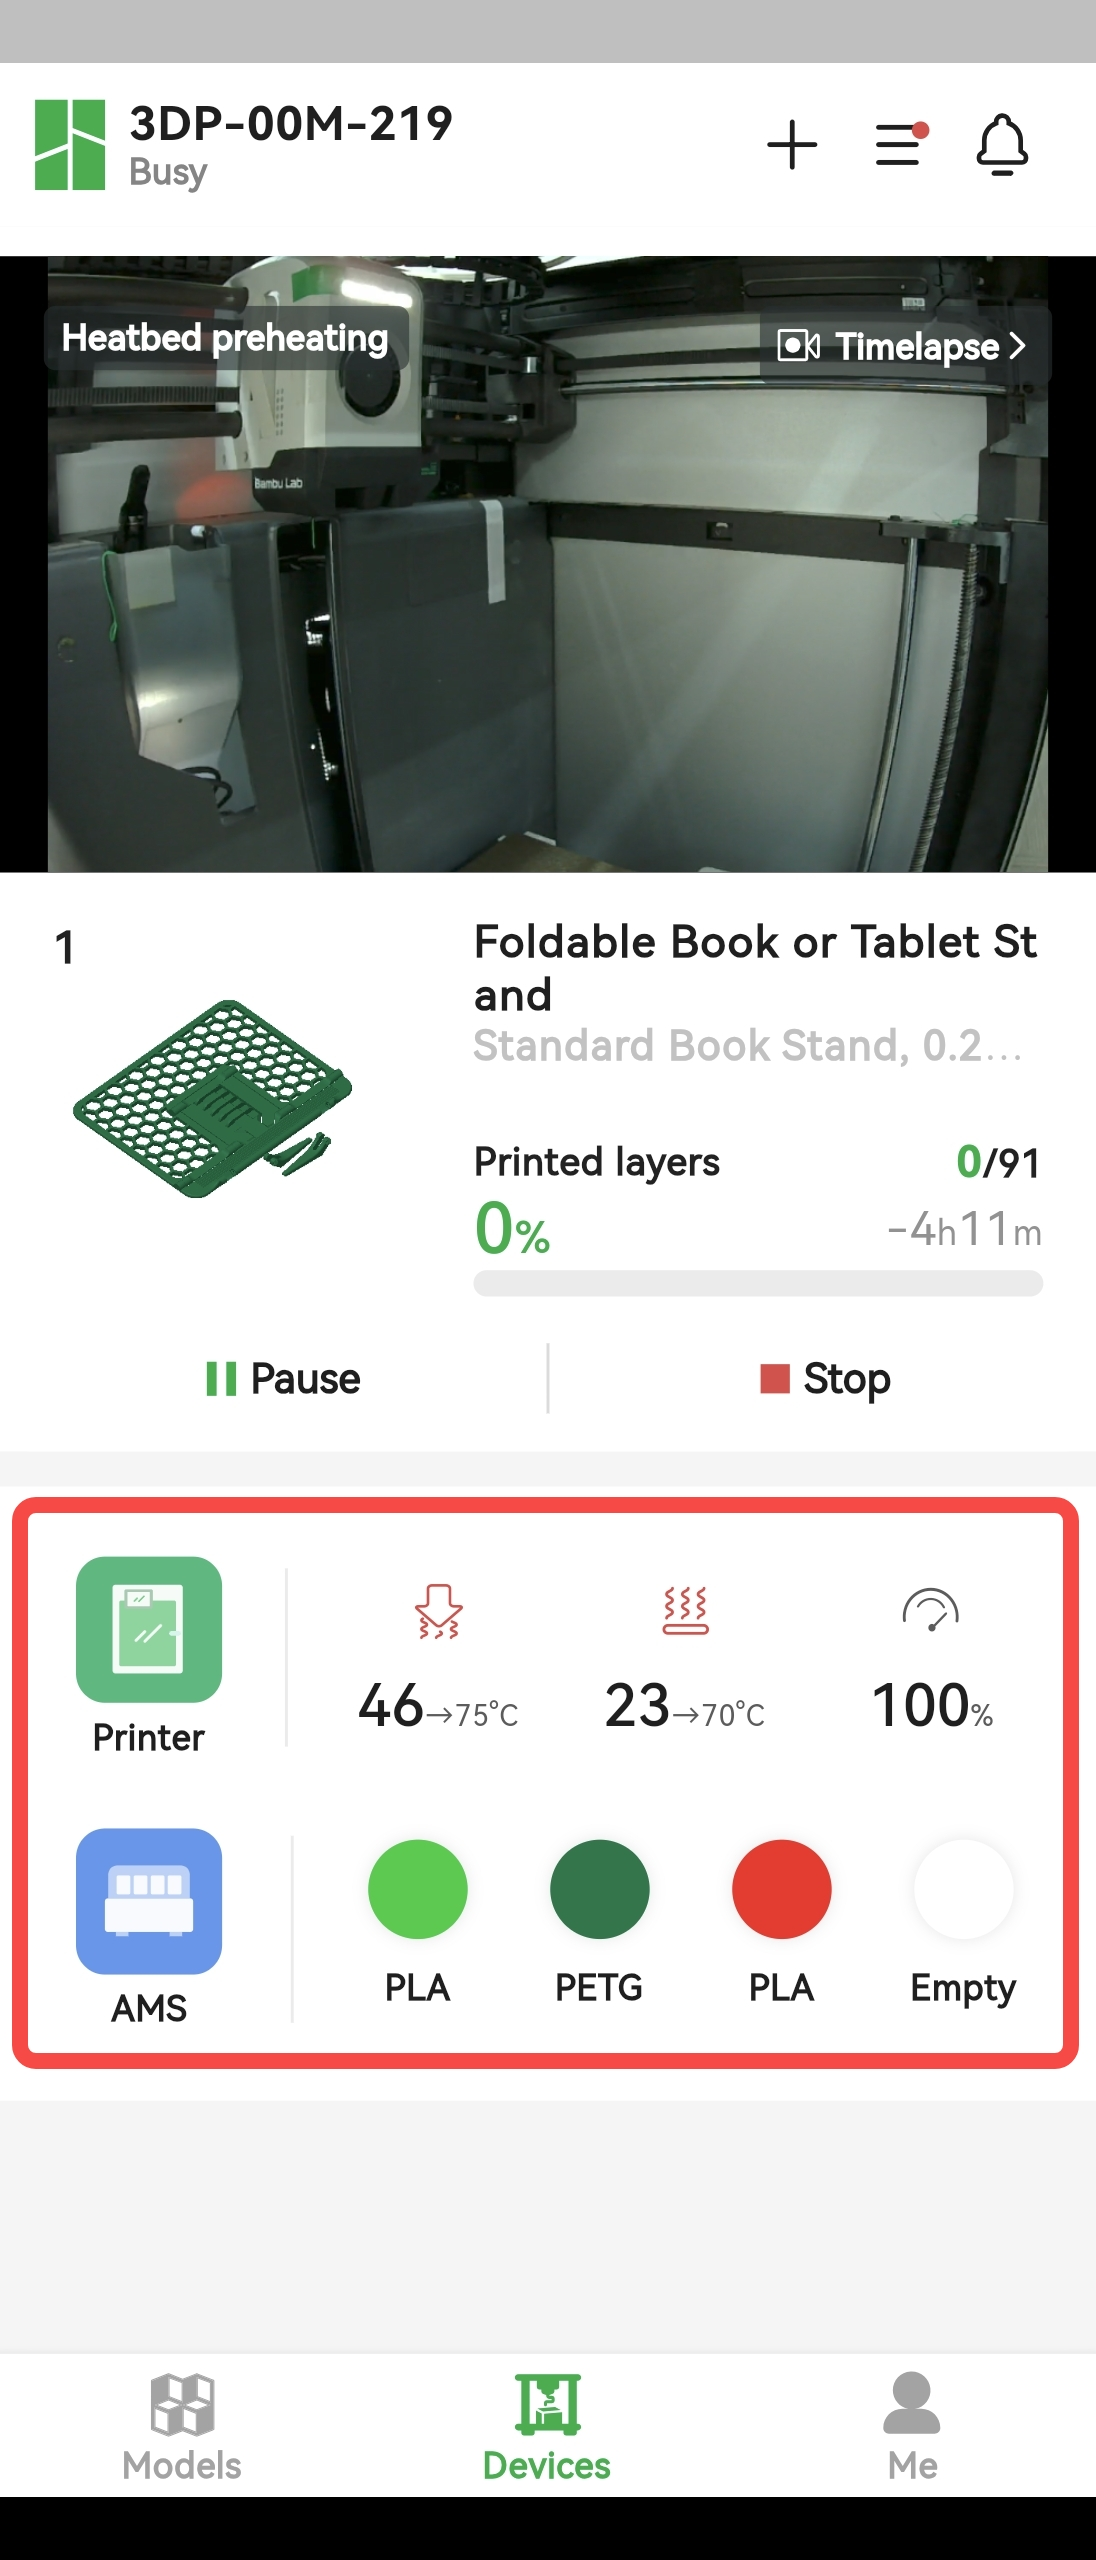
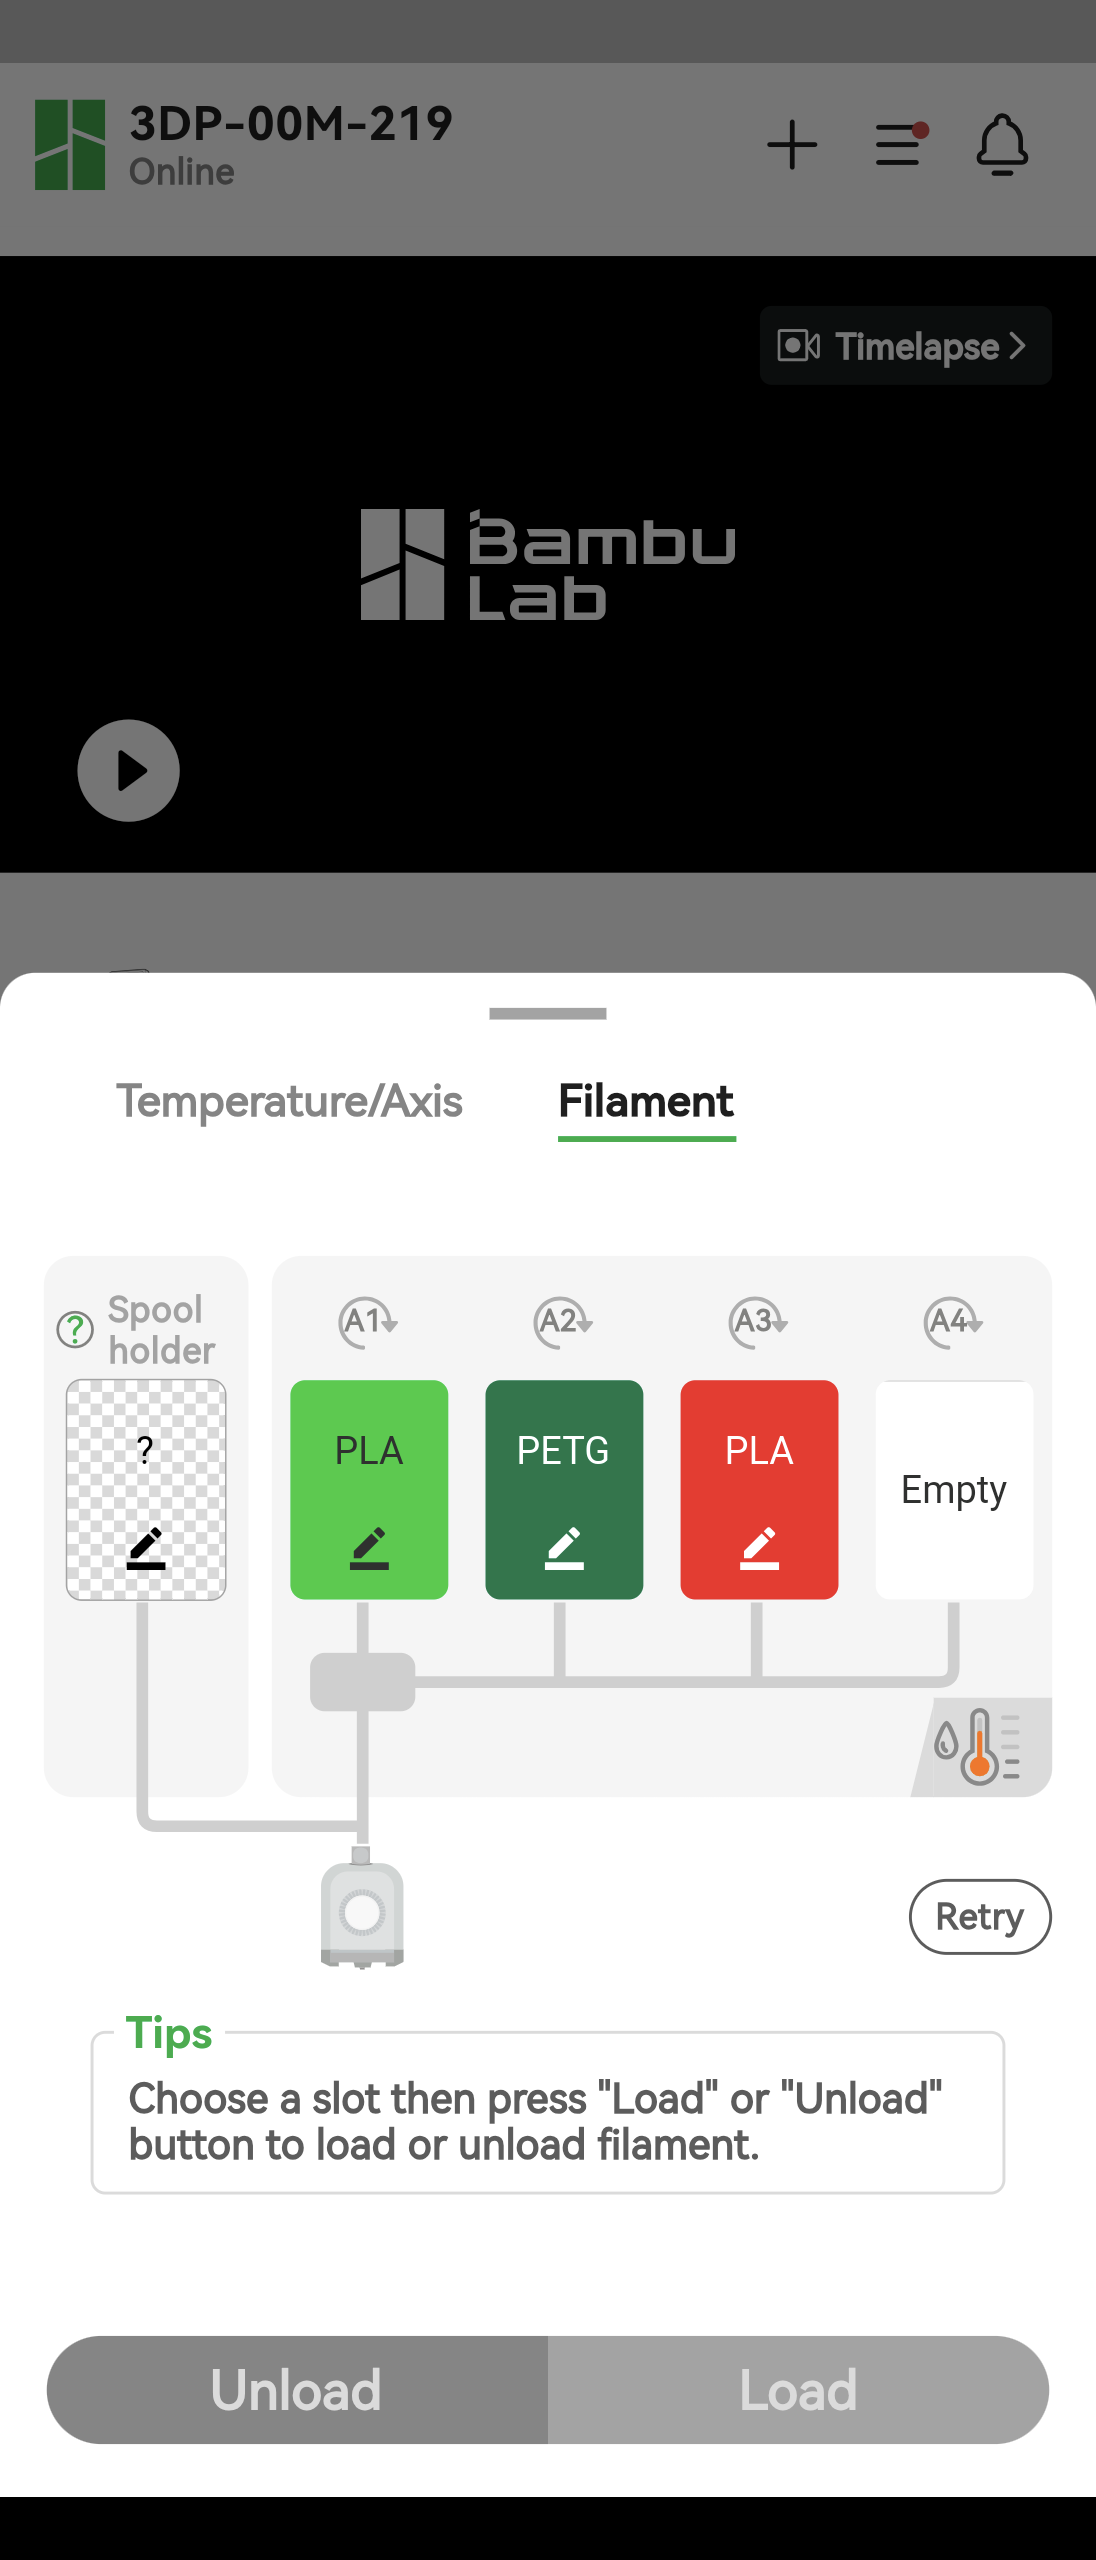
The Printer Control section contains control options for both the printer and the AMS (Automatic Material System).
On the main screen, you can directly set the nozzle temperature, heated bed temperature, and print speed, or click the colored block corresponding to each filament to view material information.
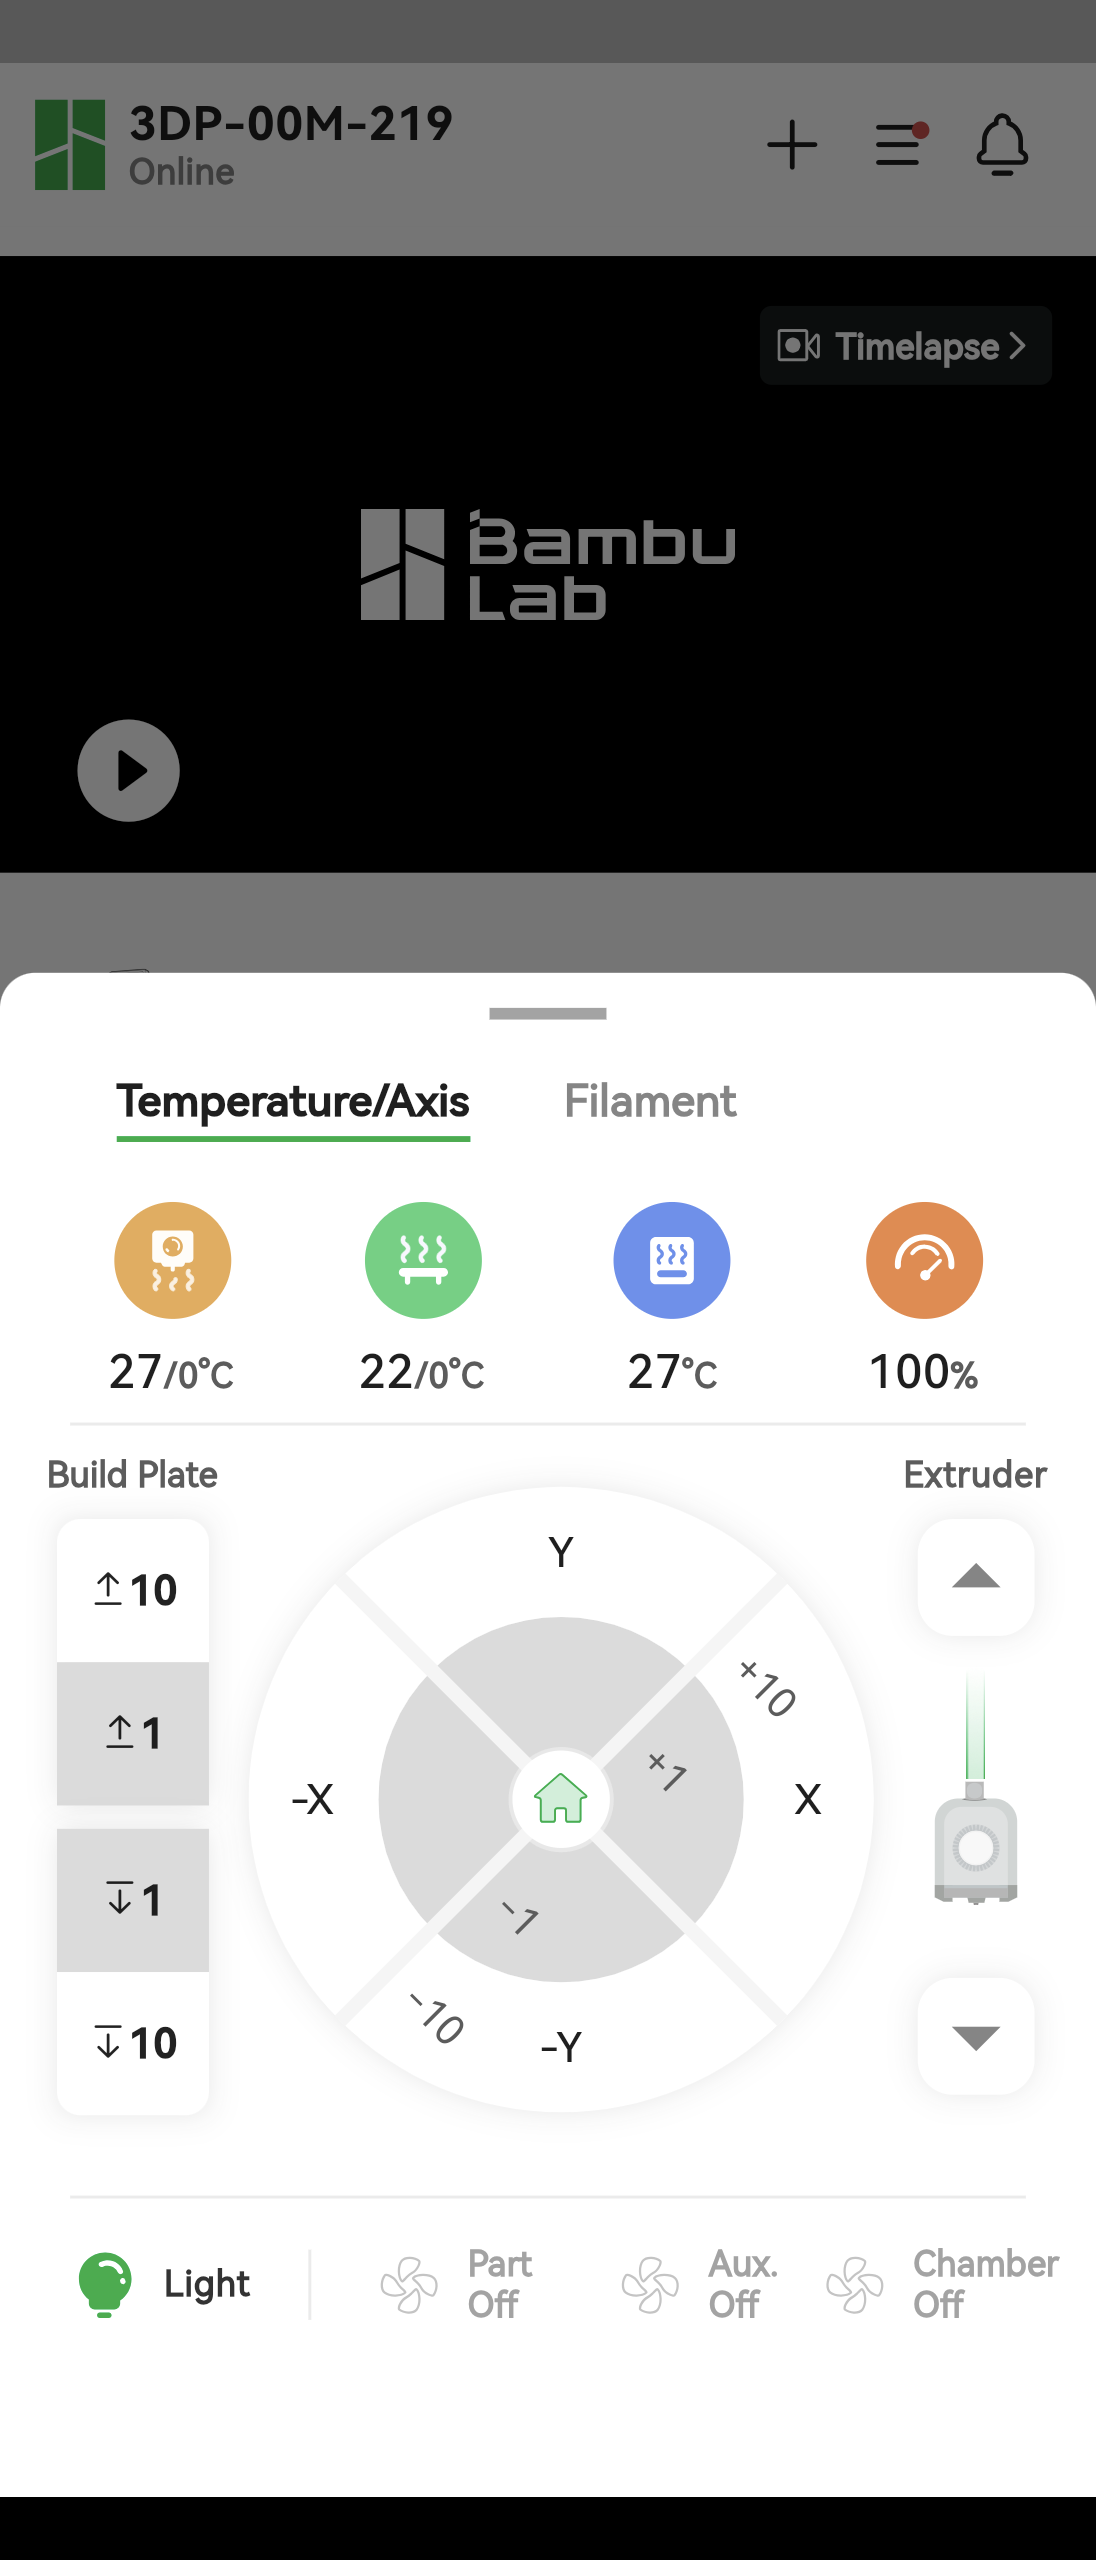
Clicking Printer or AMS on the left side of the module takes you to a detailed page where, in addition to the functions available on the main screen, you can move the printer axes, control certain components (such as the light and cooling fan), and operate the AMS to load/unload filament.
Interface Features [Já]
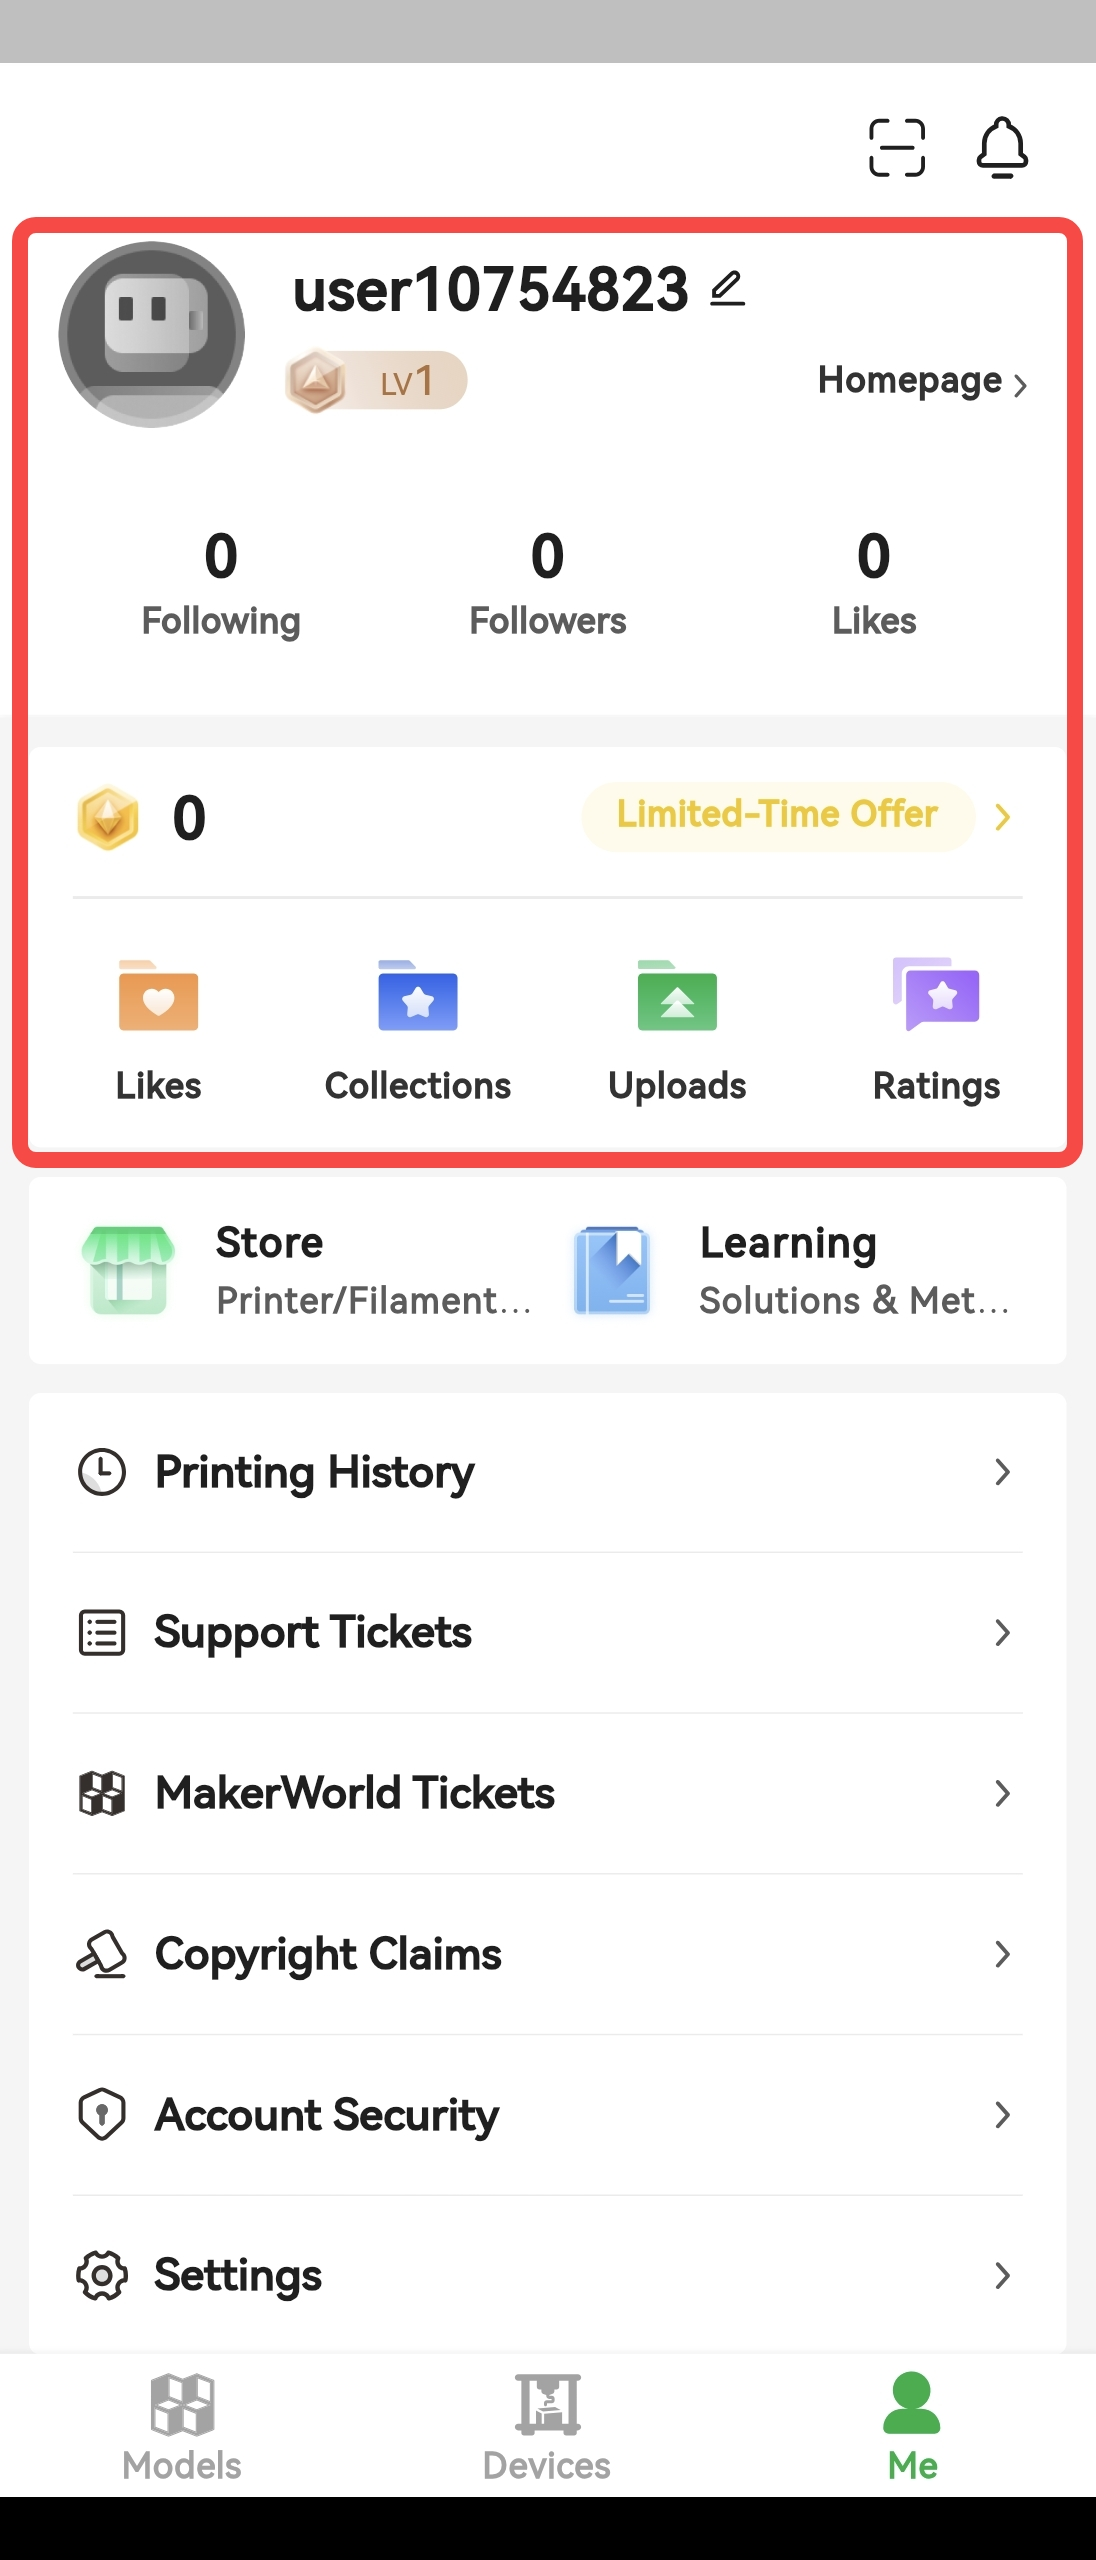
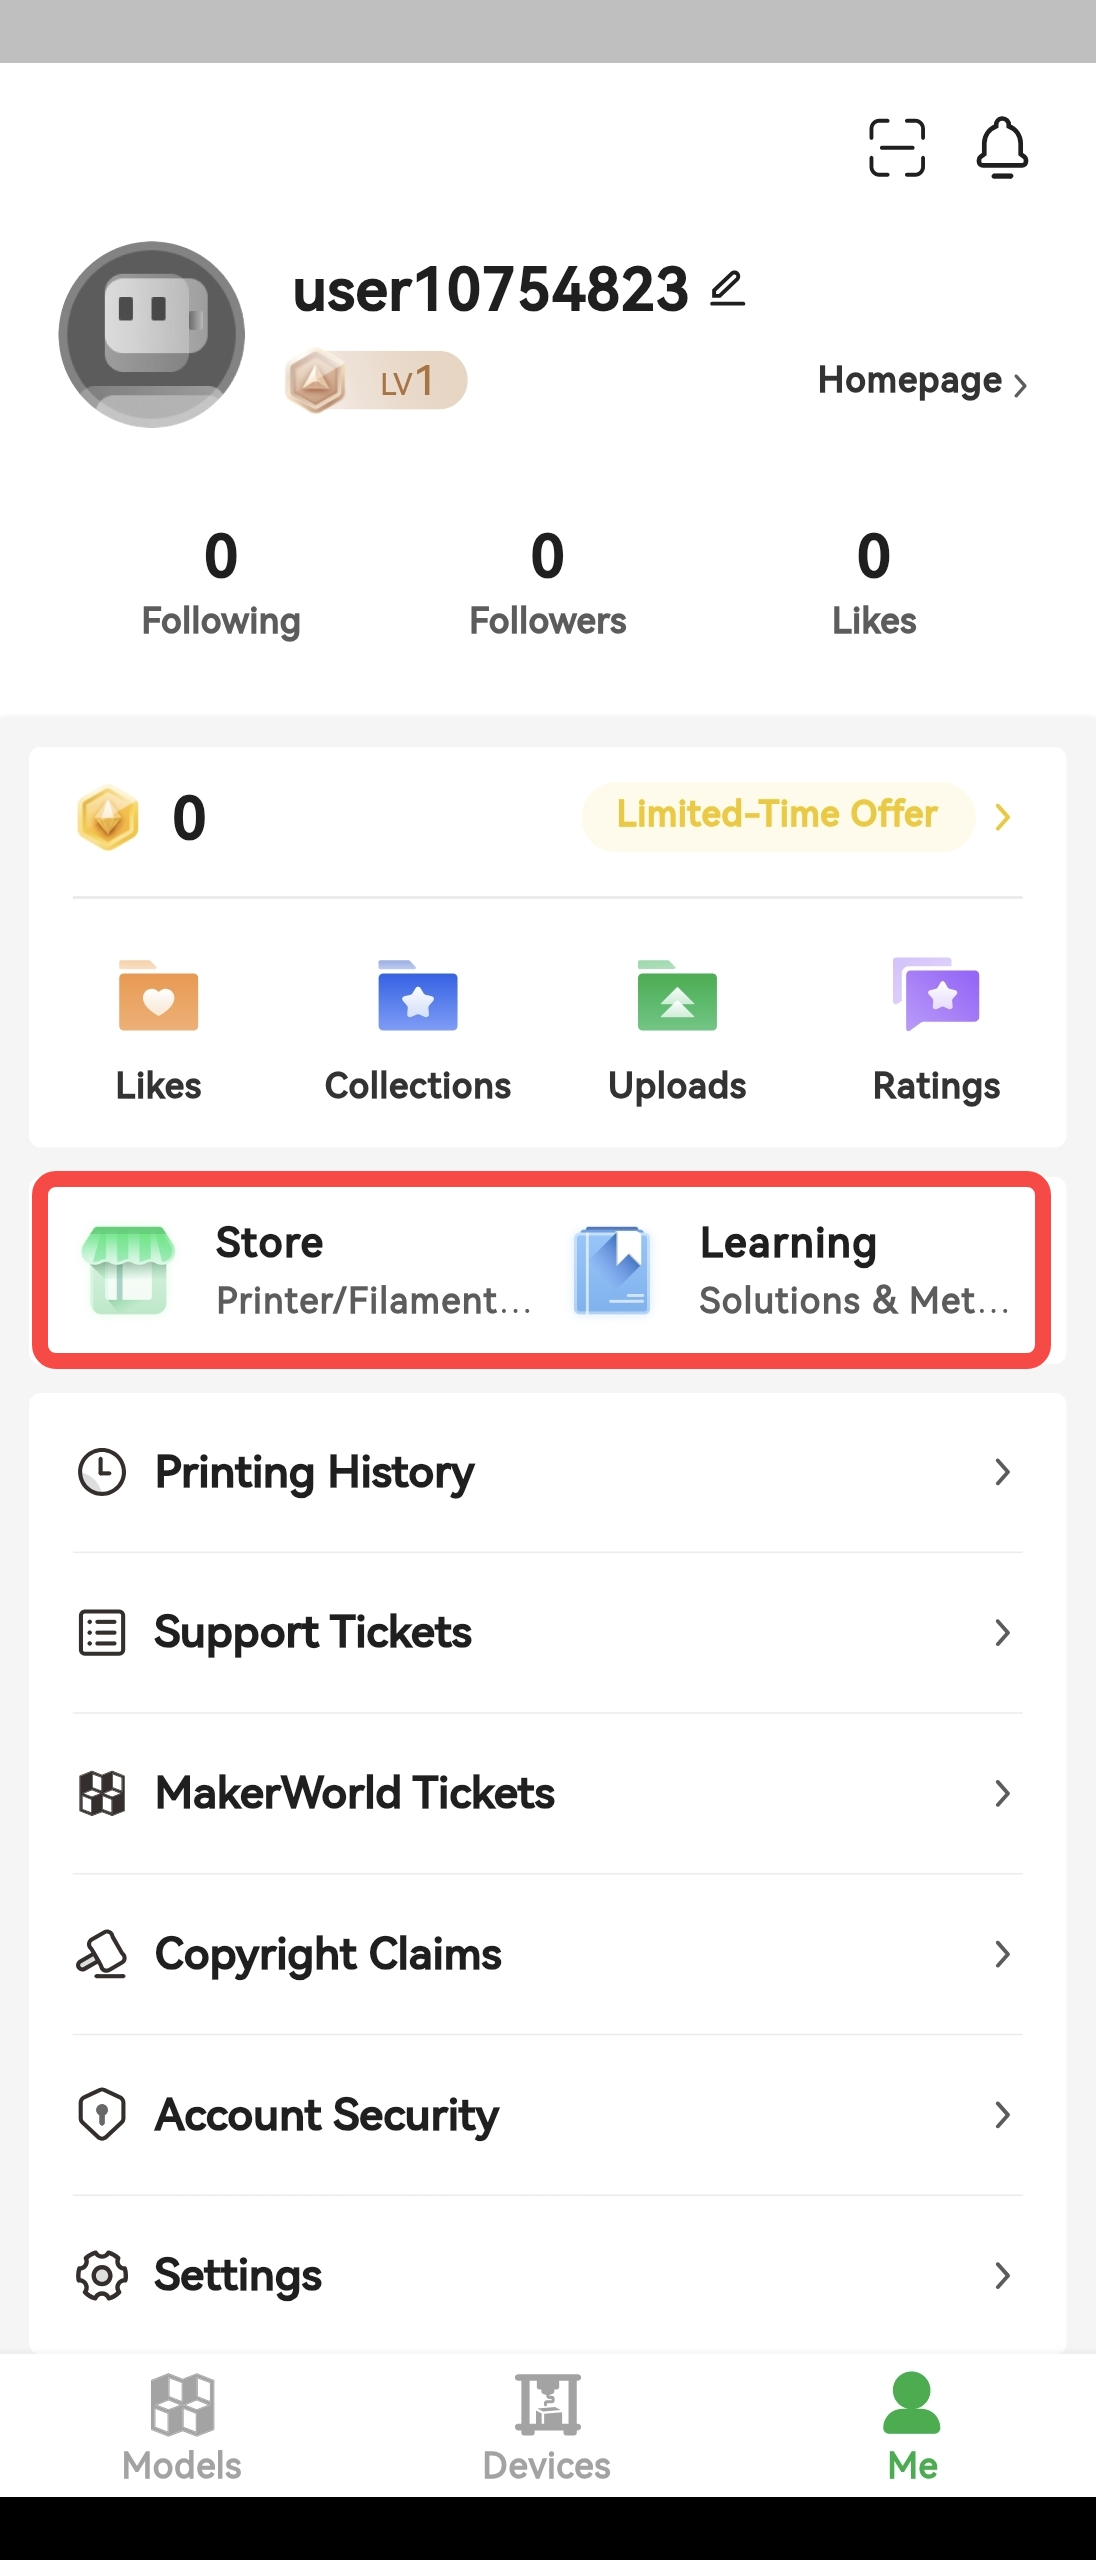
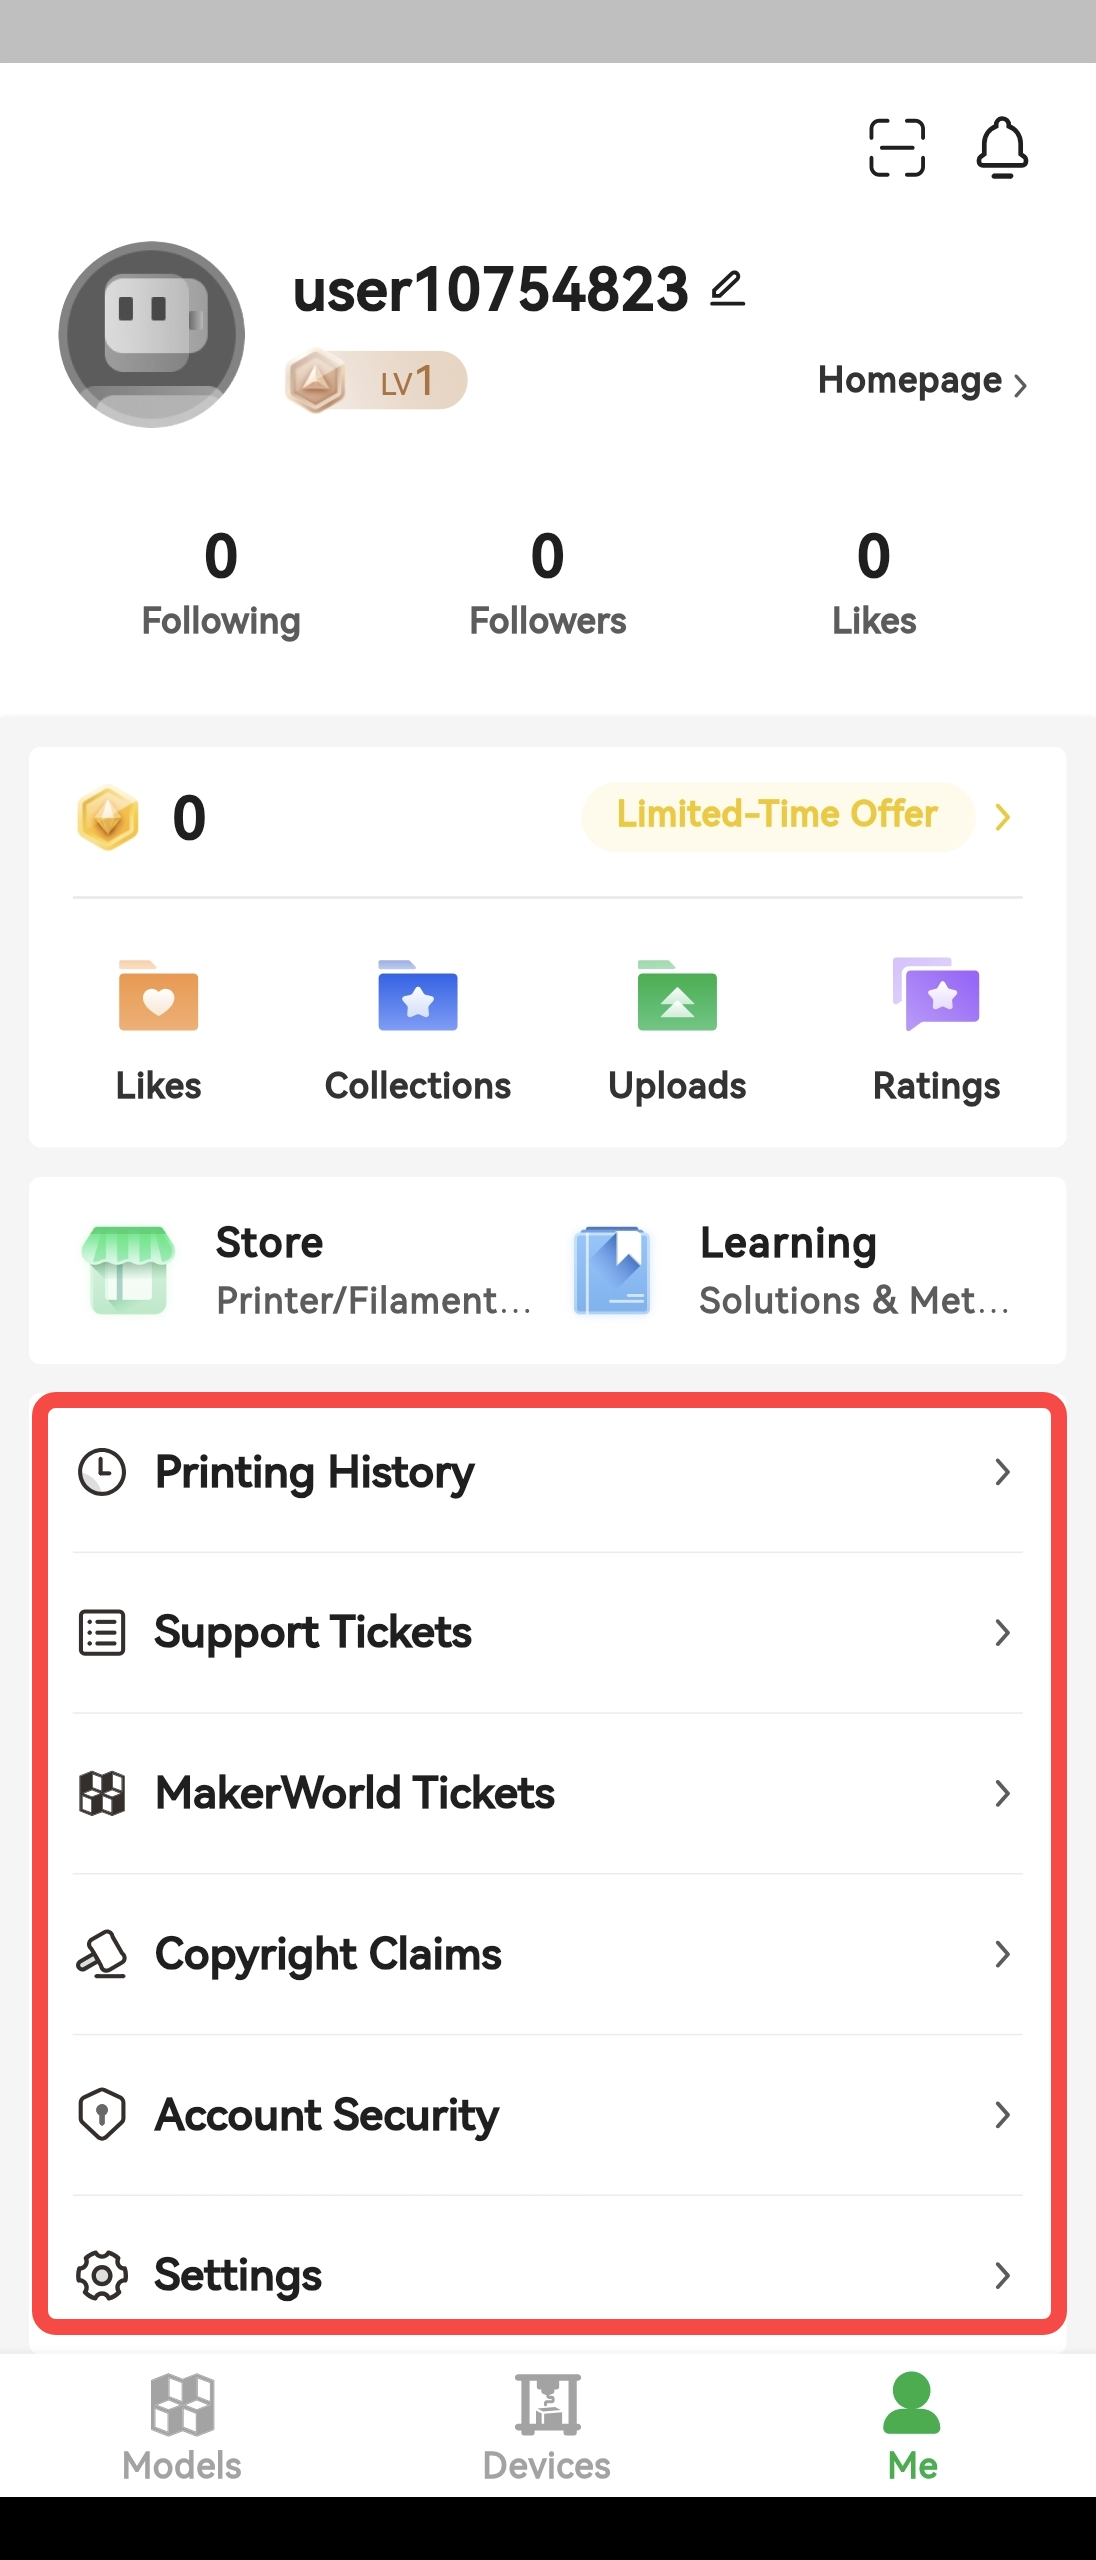
The Me interface includes the MakerWorld module, Store, Tutorials section, and User Management module.
MakerWorld Module
The MakerWorld module includes information about your personal home page, points, likes, and collections. For more information, you can visit the official MakerWorld website.
Store and Tutorials
User Management Module
Advanced Features
This section focuses on two of the app's more advanced features.
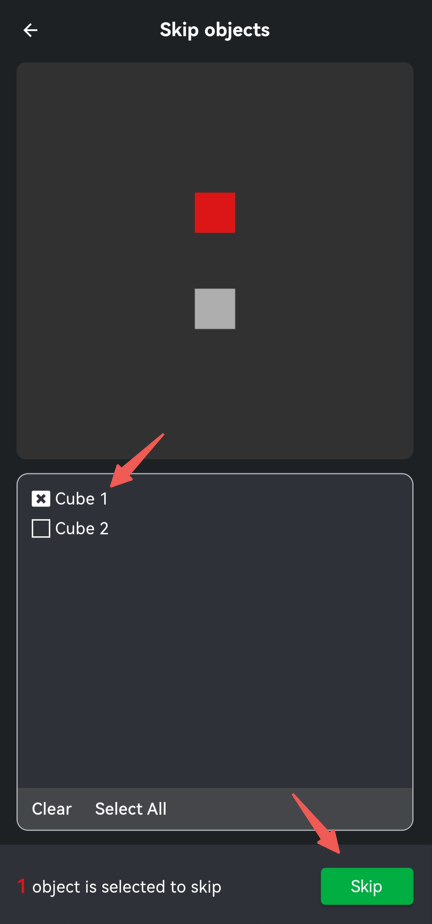
Print Parts/Skip Parts
There are two situations in which you can choose a specific part to print. The first is when a print job is sent to the printer from Bambu Studio—in this case, you can choose which part to print on the devices screen. The second situation occurs when a print is started from the print history or directly from MakerWorld. In both cases, if there are multiple parts on one print plate, you can use the Print Parts/Skip Parts function to choose which part to print, saving time and material. Keep in mind that if you choose to skip a part during printing, the operation cannot be undone. If you want to print the skipped part, you will need to restart the print. More information about the print parts/skip parts function can be found in the Skip Objects section.
Device Settings
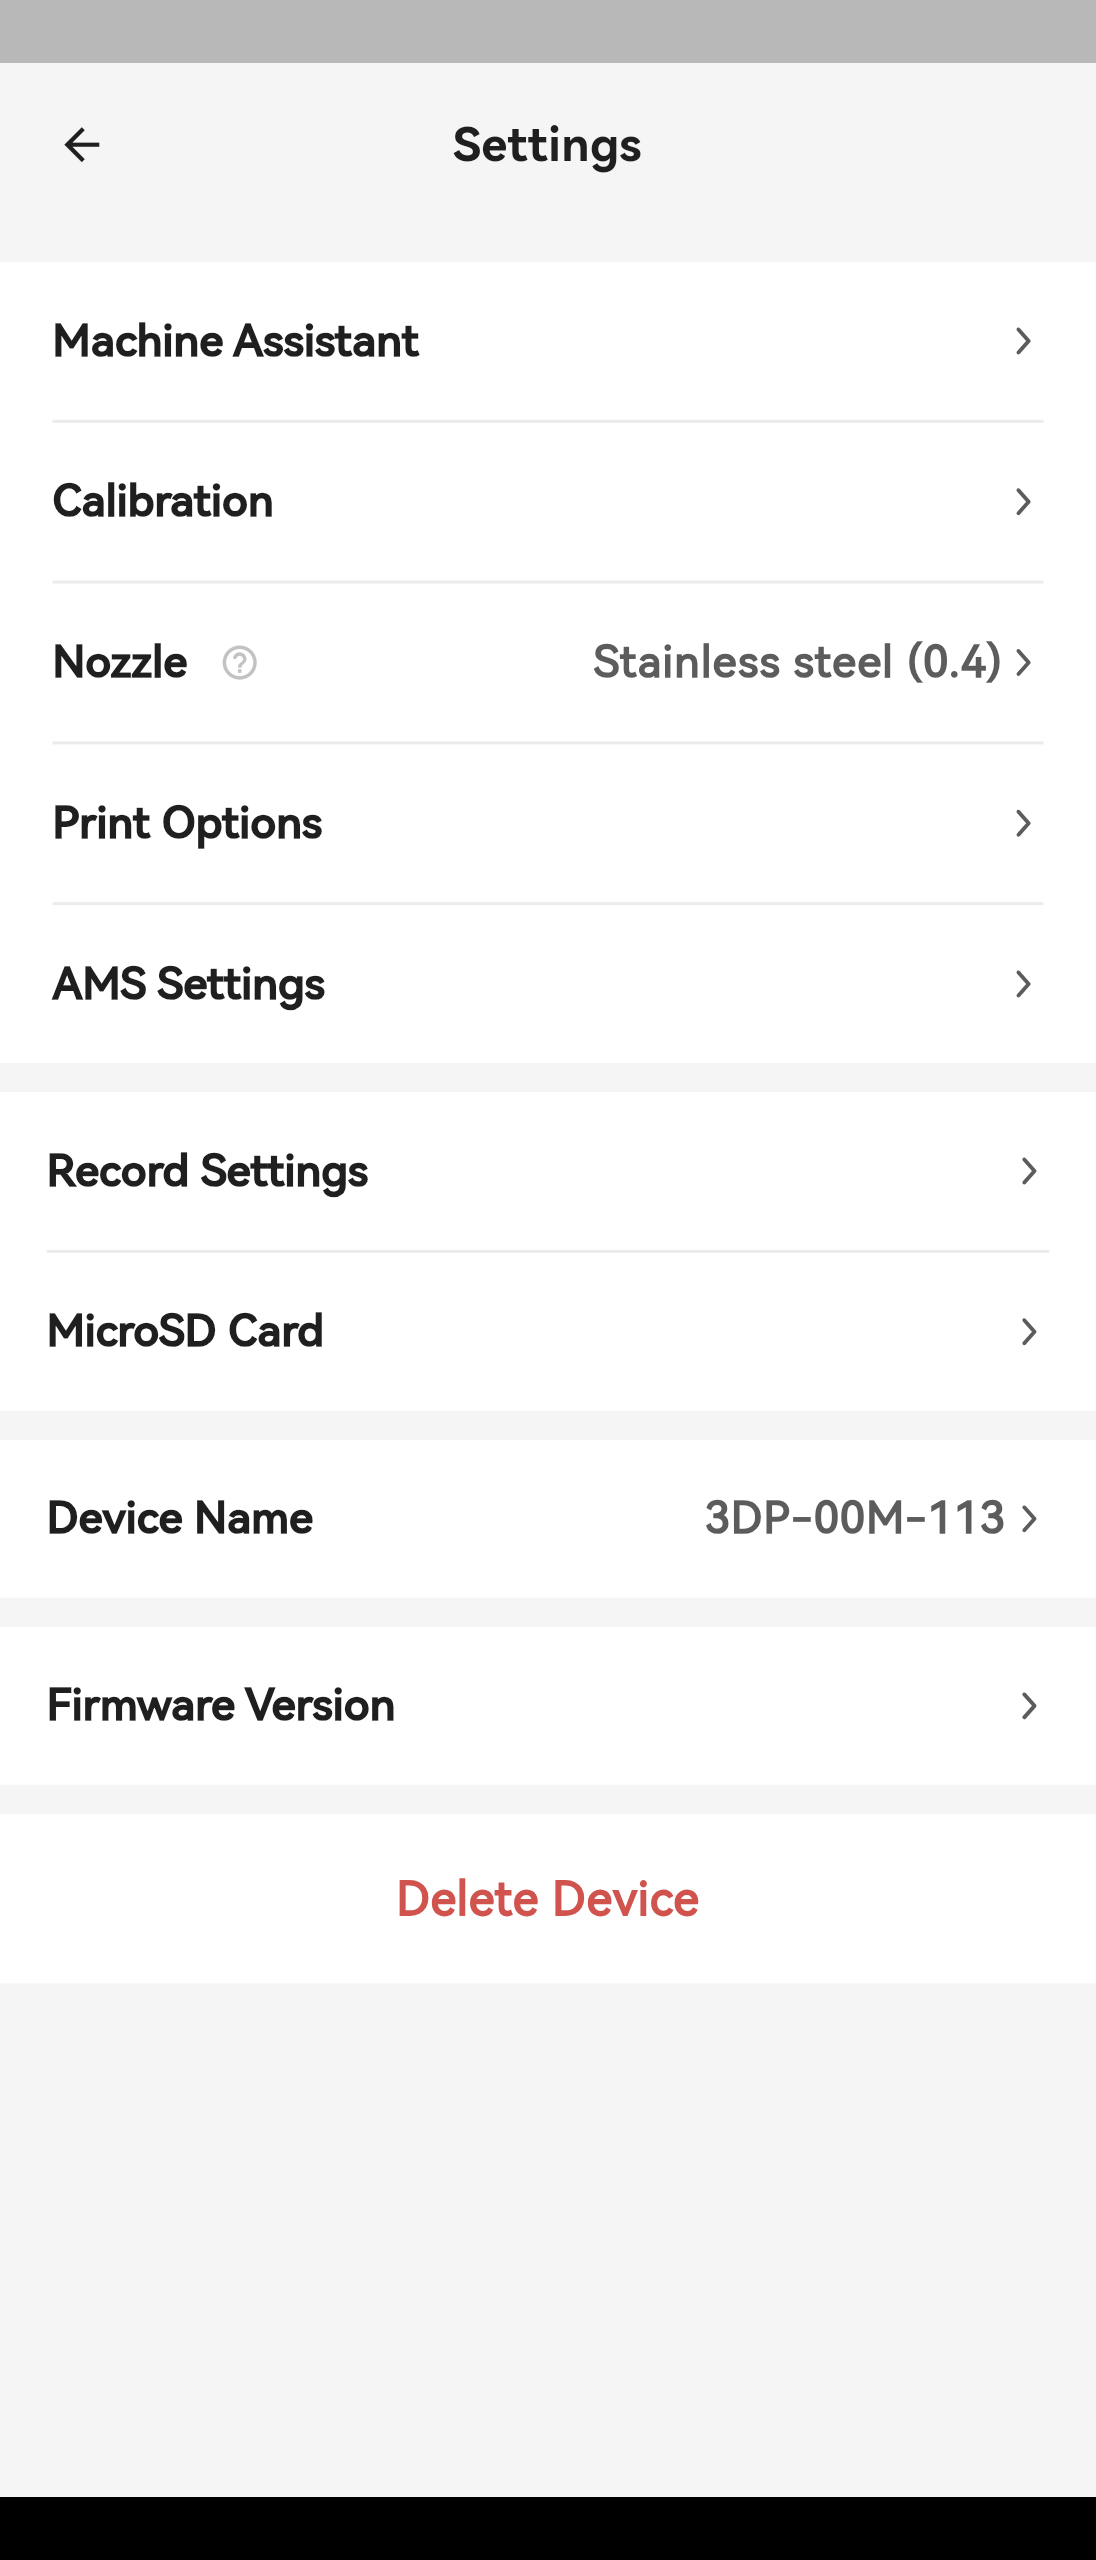
Device Settings is used to control the settings of the currently selected device and includes the following options.
Device Assistant
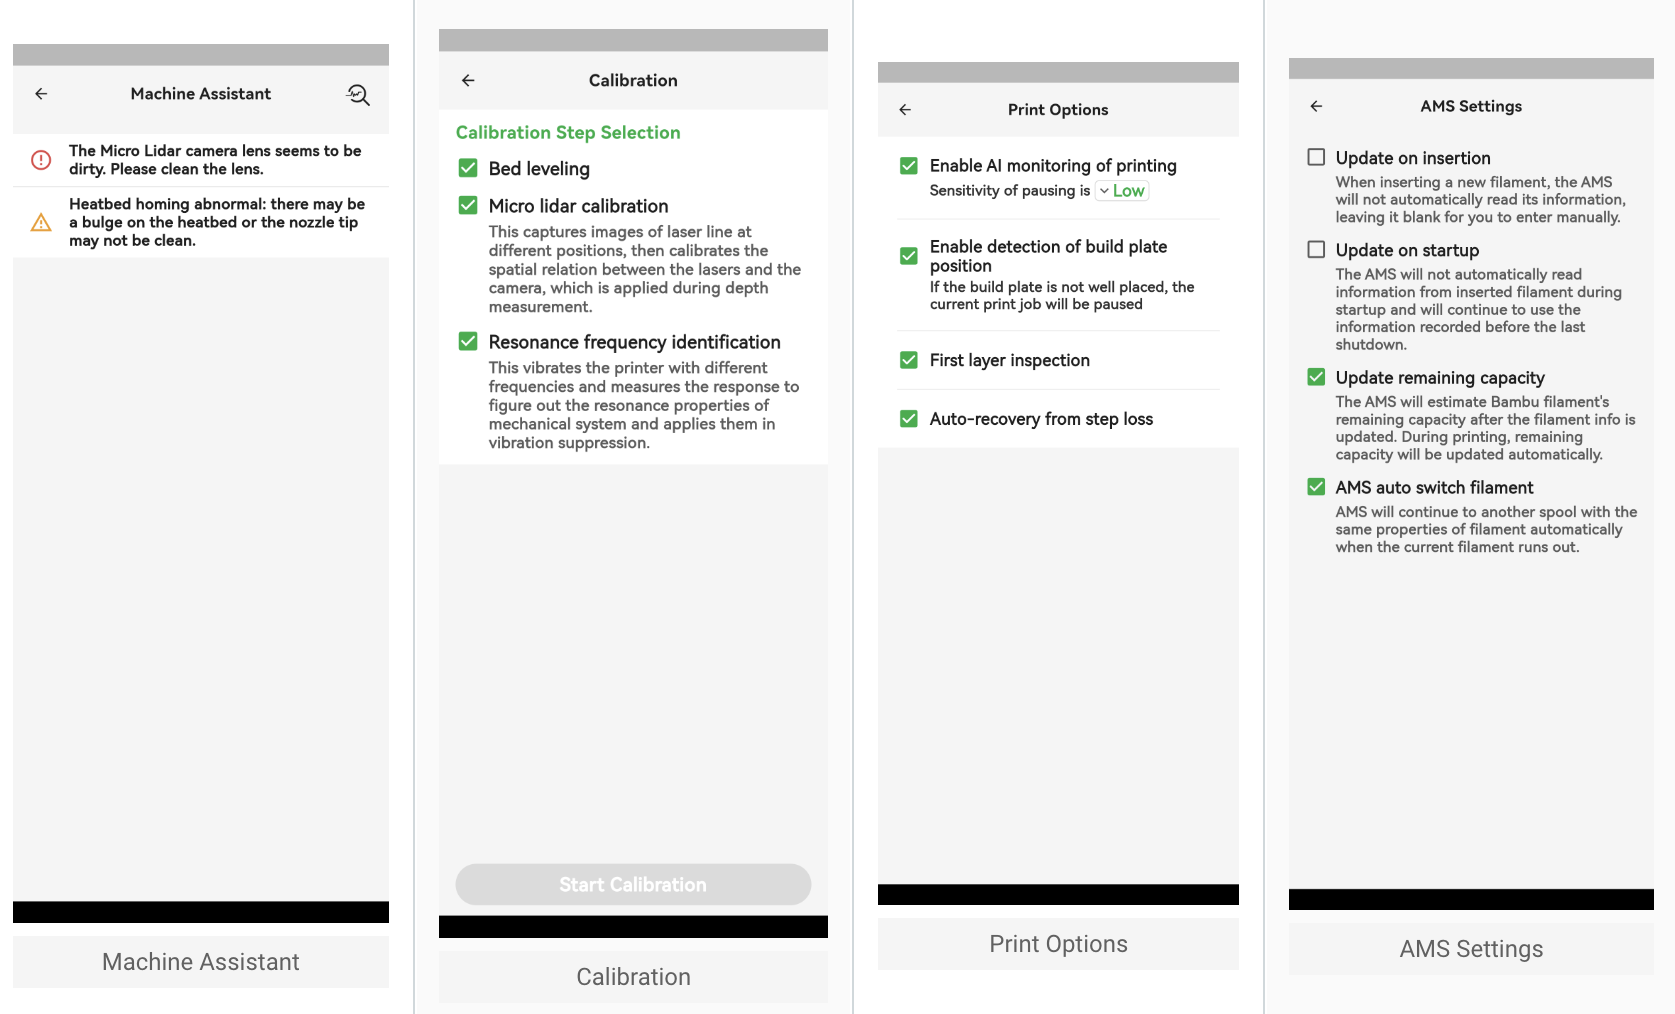
This option displays information about abnormal device conditions. By clicking the magnifying glass icon in the upper-right corner, you can start device self-diagnosis, which helps identify problems and provides suitable solutions.
Calibration
This option is used to calibrate the printer, allowing you to choose specific calibration steps according to your needs.
Nozzle
Unique to the X1 series—this option allows you to select the nozzle used by the printer.
Print Options
This option is used to adjust print settings. Due to the limitations of the mobile app, there are fewer print options here than on the printer itself.
AMS Settings
This option allows you to configure AMS (Automatic Material System) parameters according to your needs.
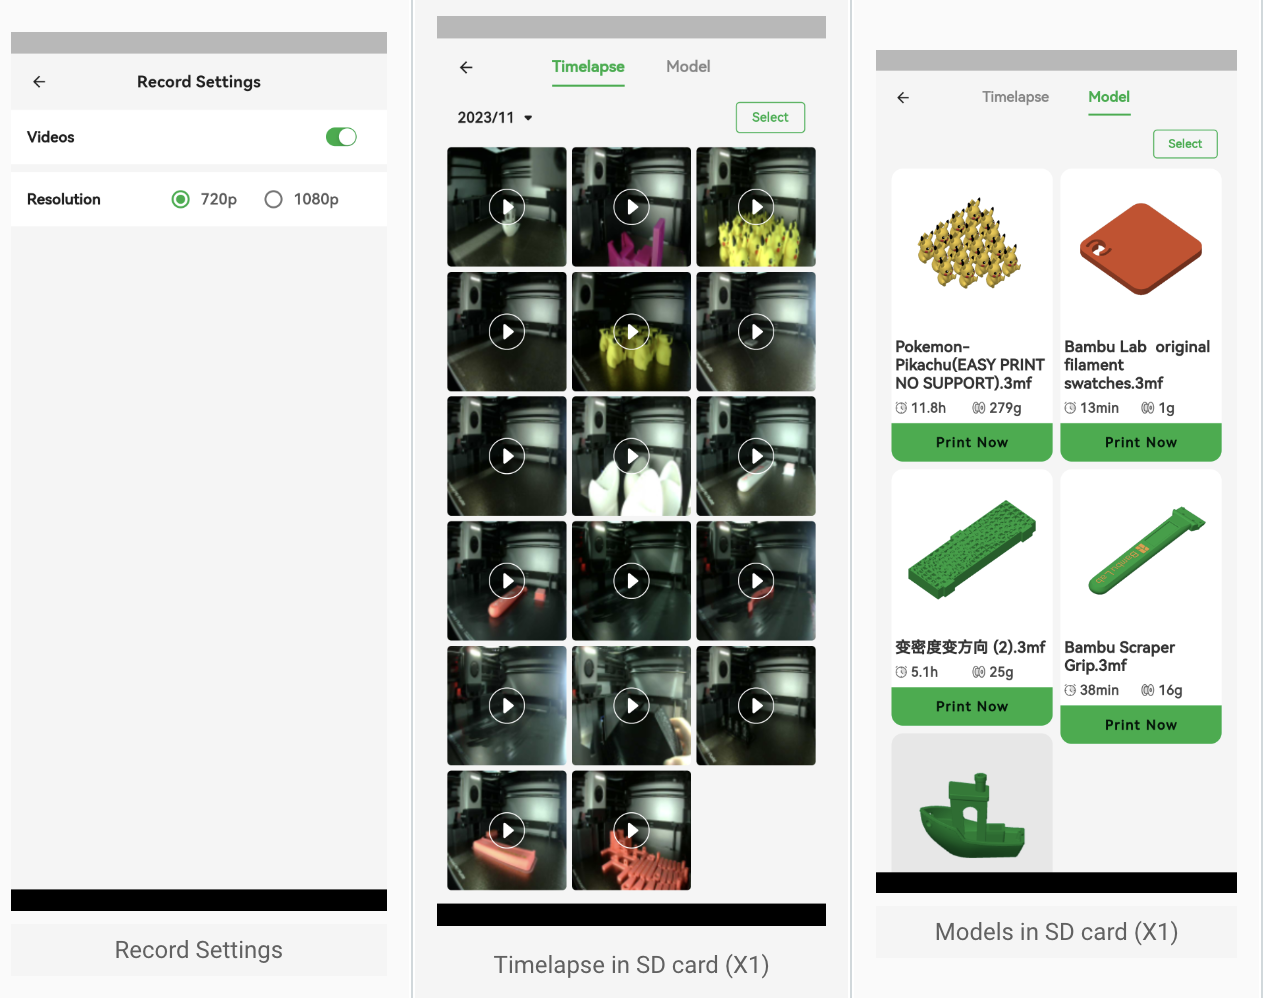
Recording Settings
This option adjusts video recording settings during printing. The X1 series can select the video recording resolution here, and all printers can enable or disable the video recording function here.
Micro SD Card
Unique to the X1 series—this option allows you to view time-lapse videos from the printer's SD card.
Under the TimeLapse tab, you can view and manage time-lapse videos on your SD card. After clicking a specific video, you can download or share it.
Under the Models tab, you can browse models on the SD card and send a specified model to the printer for printing.
Device Name
This option is used to customize the printer name.
Firmware Version
This option is used to update the firmware. By default, the printer is updated to the latest firmware pushed from the server. However, if you encounter problems during use, you can use the I want to revert to the previous version option in this menu to revert to an earlier firmware version.
Remove Device
This option is used to remove the device from the account.
Final Notes
We hope the detailed guide provided was useful and informative.
To ensure safe and efficient operation, if you have any concerns or questions about the process described in this article, we recommend submitting a technical ticket regarding your issue. Please attach an image or video illustrating the problem, along with any other information related to your request.


