Безкоштовна доставка від 1 999 Kč
Швидка доставка
Перевірений магазин
Тисячі клієнтів




Безкоштовна доставка від 1 999 Kč
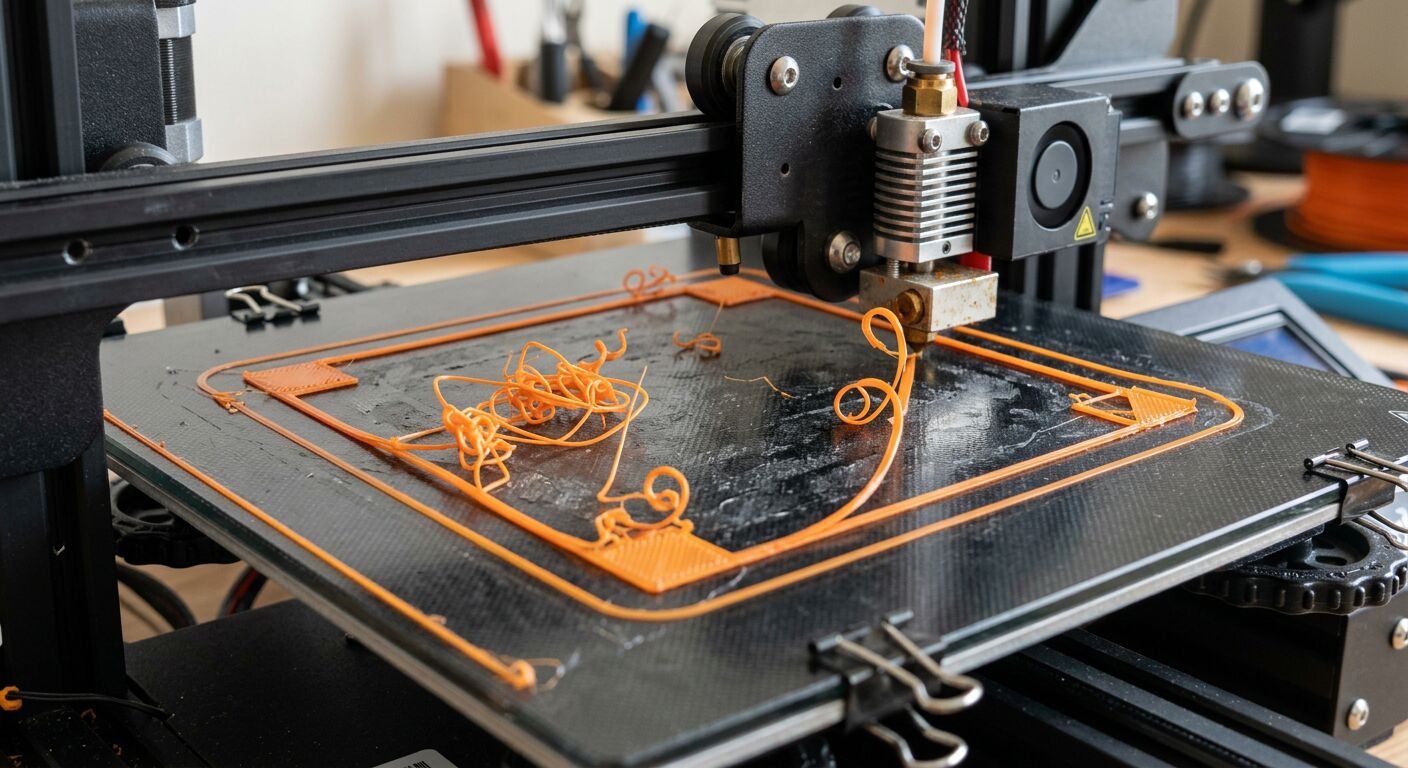
Everyone who prints on an FDM 3D printer sooner or later encounters the same scenario: the model looks perfect in the slicer, the printer starts without complaint, but the result has lifted corners, hairs between parts, shifted layers, or brittle walls. The good news is that most 3D printing errors have relatively clear causes and can be fixed systematically.
The most important rule is: do not change five things at once. Adjust one value, print a short test, and write down the result. Otherwise, you will not know what actually helped.
Before you start tuning the profile, answer three questions:
If the error starts on the first layer, deal with the print bed, Z calibration, and adhesion first. If it appears only after a longer period, suspect temperature, airflow, mechanics, nozzle clogging, or filament quality.
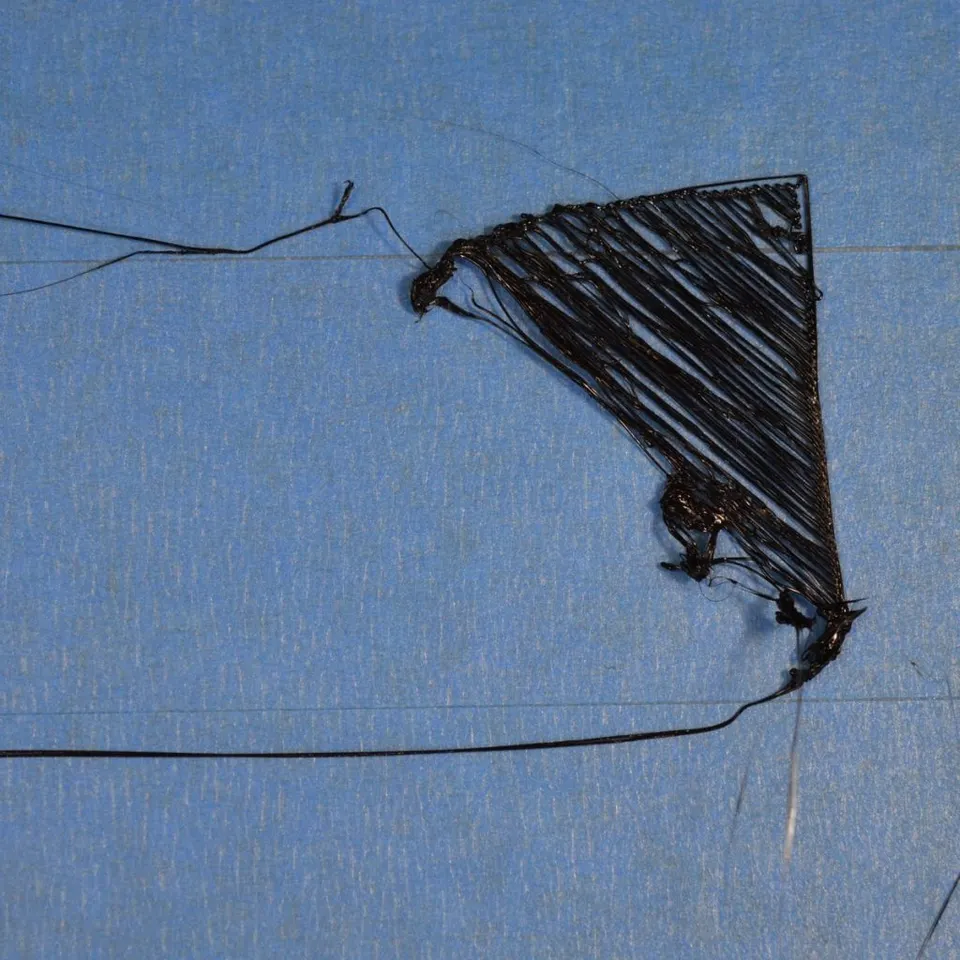
A poor first layer is the most common cause of a failed print. It appears as lines that do not stick to the bed, trail behind the nozzle, form gaps, or cause the print to detach after a few minutes.
First, clean the print bed. Finger grease is enough to make PLA or PETG stick significantly worse. For standard PEI sheets, warm water with a drop of dishwashing liquid, thorough rinsing, and drying with a clean cloth will help. Use isopropyl alcohol according to the surface type and the manufacturer's recommendations. Do not use aggressive chemicals blindly; you could damage some specialized surfaces.
Then check the first-layer height. When the nozzle is too high, the lines are round and gaps remain between them. When it is too low, the material is pushed to the sides, the surface is rough, and the extruder may click. A proper first layer is slightly compressed; the individual lines join together but are not gouged by the nozzle.
It also helps to slow down the first layer. For problematic parts, set the first layer to approximately 15 to 30 mm/s, add a brim, and verify the correct bed temperature for the material.
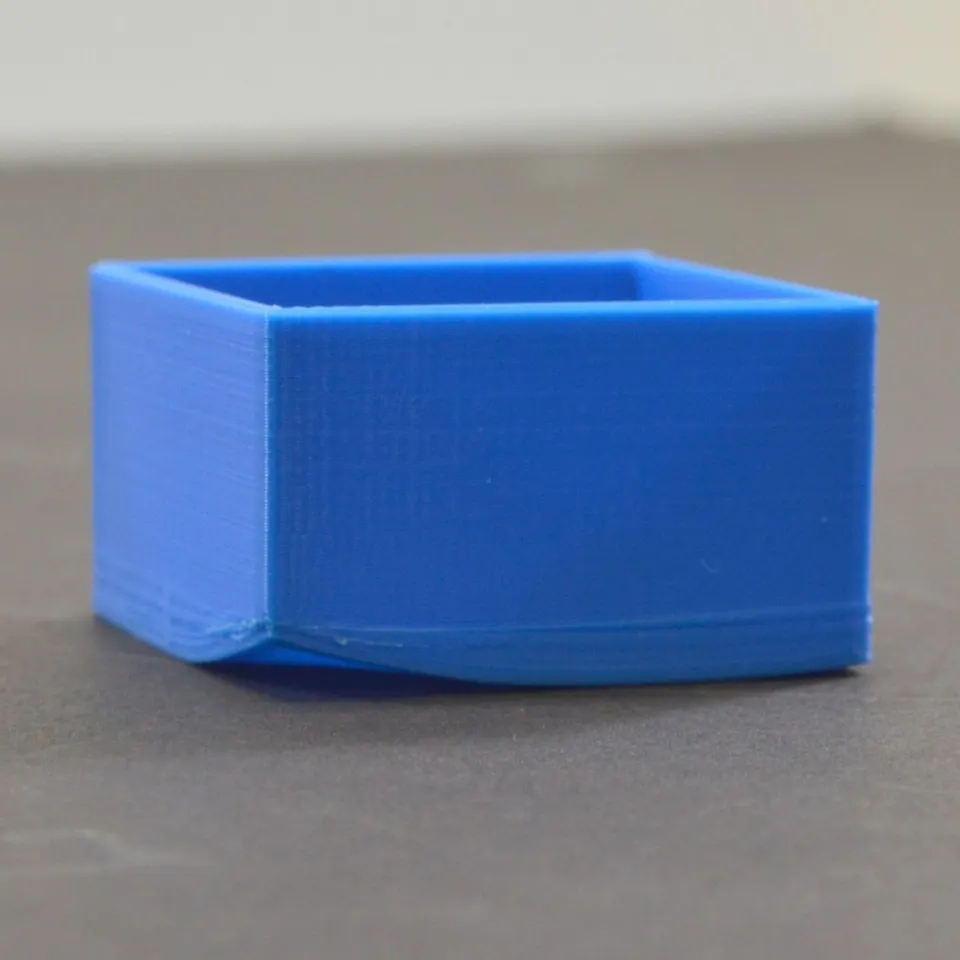
Warping occurs because the material shrinks as it cools. Typically, the corners of large surfaces lift, the part deforms, and in the worst case the entire print detaches. It is most common with ABS, ASA, nylon, and larger PETG parts, but it can also occur with PLA if the bed is dirty or the model has only a small contact area.
Start with adhesion: a clean bed, a proper first layer, a suitable bed temperature, and a brim. For large parts, a wider brim of 5 to 10 mm helps. If you are printing a material that is sensitive to shrinkage, limit drafts and sudden cooling. An open window, air conditioning, or a fan near the printer can ruin an otherwise well-tuned print.
ABS and ASA often require an enclosed space with a higher and stable ambient temperature. With PLA, on the other hand, an enclosure that is too warm can cause the filament to soften in the extruder, so it is important to distinguish between materials. If the part warps repeatedly, try changing the model's orientation, splitting it into smaller parts, or choosing a material with less shrinkage.
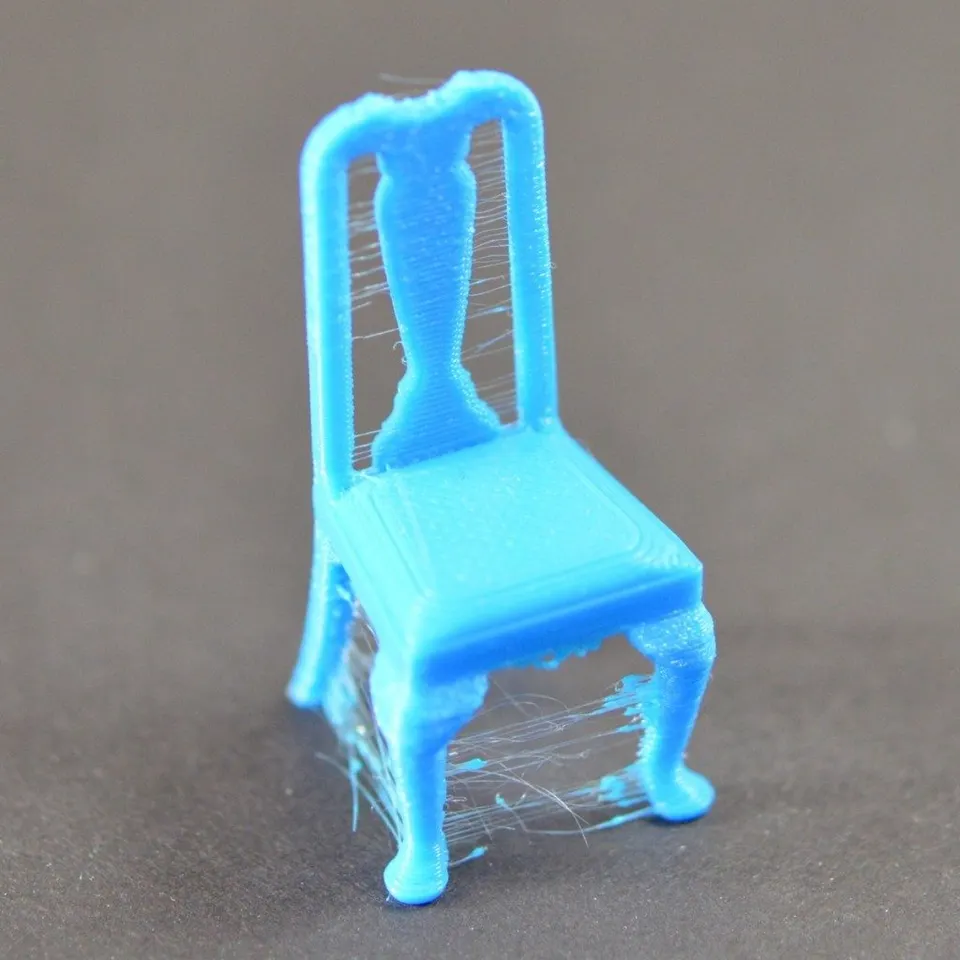
Stringing looks like fine threads between towers, edges, or separate parts of a print. It occurs when material continues to ooze from the nozzle during travel moves.
First, lower the temperature in small steps, for example by 5 °C. A temperature that is too high improves material flow but also increases oozing from the nozzle. Then fine-tune retraction. Direct-drive extruders usually use shorter retractions, while Bowden setups use longer ones. Do not overdo it: retraction that is too long or too fast can cause filament grinding, clogging, or inconsistent extrusion.
Moist filament has a major impact. PETG, TPU, and nylon can absorb moisture faster than you might expect. If the print cracks, hisses, has a rough surface, and also produces a lot of stringing, dry the filament. Storing it in a sealed box with silica gel is an inexpensive preventive measure.
In the slicer, it also helps to set travel moves so that the nozzle does not unnecessarily cross visible outlines, enable wipe on retraction, and check that the outside of the nozzle is not covered with old material.
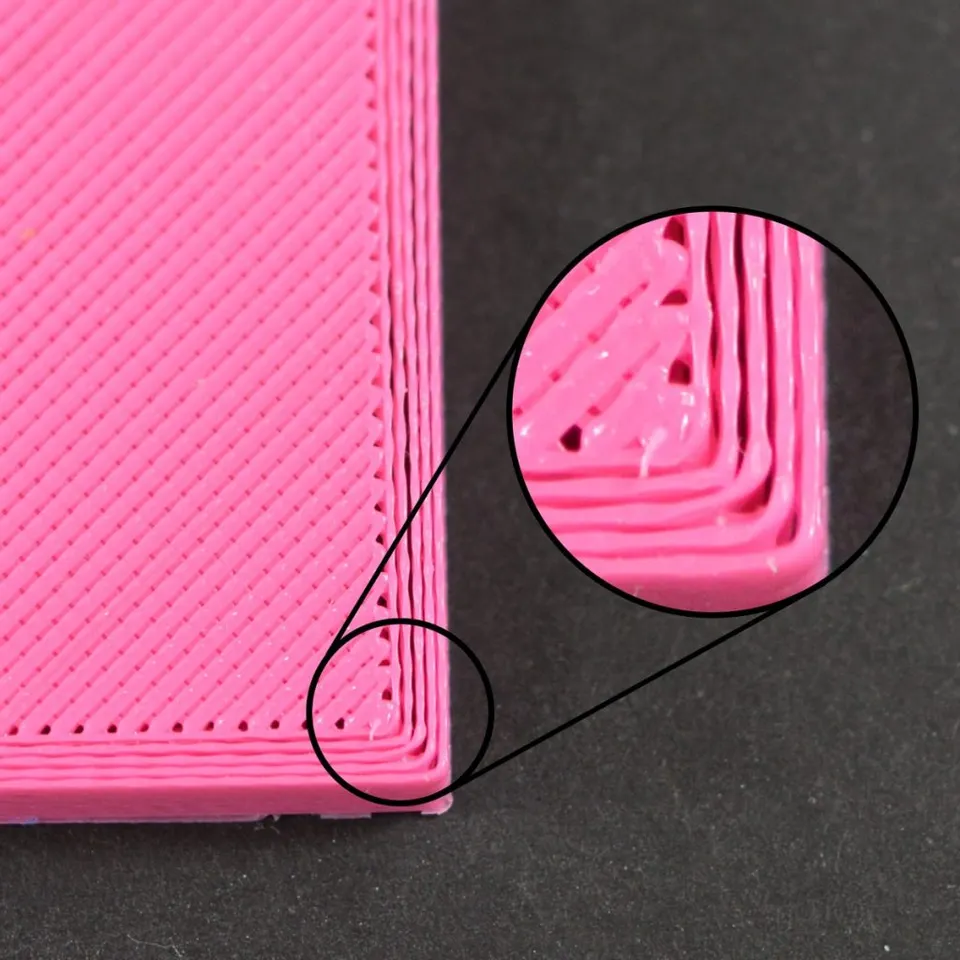
Under-extrusion means that the printer extrudes less plastic than it should. You can recognize it by gaps between perimeters, sparse top layers, interrupted lines, brittle walls, or extruder clicking.
Work from the simple to the complex. Check that the spool unwinds freely and that the filament is not crossed. Inspect the extruder's drive gear to see whether it is clogged with filament dust. Verify that the filament passes through the guide without resistance and that the PTFE tube is not damaged.
The nozzle is another possible culprit. A partially clogged nozzle may print normally for a while and then produce thin or interrupted lines. Cleaning, a cold pull, or replacing the nozzle can help. If you print abrasive materials such as carbon-filled or glow-effect filaments, a standard brass nozzle can wear out quickly.
Also check the slicer. A temperature that is too low, a speed that is too high, an excessively large layer height, or an unrealistic flow rate for the hotend will prevent the printer from melting the material fast enough. With a standard 0.4 mm nozzle, keep the extrusion width and layer height within reasonable limits. If you want to print faster, increase the temperature carefully and monitor the surface quality.
Over-extrusion is the opposite problem: there is too much material. The surface is rough, the corners are swollen, the top layers have grooves, and the first layer may spread to the sides. A typical symptom is elephant's foot, meaning an expanded bottom edge of the model.
First, check whether the first layer is being compressed too much. People often lower Z to make the print stick better, but this creates deformed bottom dimensions. Then check the flow in the slicer. With a new filament, it is worth printing a simple flow test and adjusting the flow multiplier in small steps.
Elephant's foot can be reduced with a lower bed temperature after the first layers, proper cooling, and elephant-foot compensation in the slicer. For technical parts that are meant to fit together, remember to design clearances. FDM printing is not machining, and an overly tight model will bind even on a well-tuned printer.
A layer shift looks dramatic: from a certain height, part of the model is printed to one side. The cause is usually a mechanical problem, the nozzle hitting the print, a speed that is too high, or incorrectly tensioned belts.
First, determine which axis the shift occurred on. If the model shifted left or right, look for a problem on the X axis. If it shifted forward or backward, inspect the Y axis. Check the belts, the tightness of the pulleys on the shafts, the free movement of the axis, and any cables that may be rubbing. Both the print head and the bed must move smoothly along their entire paths.
A nozzle collision with the print is also a common cause. When model corners lift or supports warp, the nozzle hits them during a travel move and the motor skips steps. In that case, simply tightening the belts is not enough; you need to solve the warping, cooling, Z-hop, or support issue.
If you print very quickly, reduce accelerations and speeds for the problematic material. The printer may handle high speeds on a simple test, but a complex model with sharp changes in direction is more demanding.
When layers do not bond properly, the model is brittle and cracks along horizontal lines. Most often, the nozzle temperature is too low, cooling is too strong, or there is a draft around the printer.
Increase the nozzle temperature in small steps and observe whether the strength improves. With materials such as ABS, ASA, or nylon, limit the fan and use an enclosure. With PLA, cooling is necessary, but not always at 100%. Small parts and overhangs need more cooling, while the strength of large technical parts often benefits from a slightly higher temperature and less airflow.
The model's orientation is also important. An FDM print is usually weakest between layers. If the part must bear a load, orient it so that the load is not directed straight against the layer bonds.
Small zits on the surface can occur at the beginning and end of a perimeter, due to moist filament, incorrect retraction, high temperature, or unstable flow. A visible seam is not necessarily an error, but it can be hidden more effectively.
In the slicer, set the seam position to a corner or the back of the model. On round models, try a random seam if spreading out small marks is preferable to having one prominent line. Properly configured retraction, pressure advance, or linear advance can also help if the printer supports them.
If the zits are accompanied by cracking and dull spots, address moist filament. If they appear mainly after longer travel moves, adjust retraction and temperature. If material is leaking around the nozzle thread or heatbreak, stop printing and inspect the hotend, because a plastic leak can damage the entire print head.
Bridges sag when the material does not have enough support, is too hot, or does not cool quickly enough. Overhangs, meanwhile, deform when the angle is too steep for the material and cooling.
Try lowering the temperature, increasing cooling, and slowing down bridges. For long bridges, changing the model's orientation or adding supports can help. For overhangs, it is often better to rotate the model in the slicer than to try to save impossible geometry through settings.
Supports are nothing to be ashamed of. The important thing is to set a reasonable distance between the support and the model. A gap that is too small will make the supports impossible to remove. A gap that is too large will worsen the underside surface of the model.
When the printer keeps running but no material comes out of the nozzle, it may be a clog, a feeding problem, or heat creep. Heat creep occurs when heat travels too far up into the cold section of the hotend and the filament softens earlier than it should.
Check the hotend fan, temperature, retraction, and filament path. Too many retractions on a small detail can repeatedly heat and deform the material. With PLA in an enclosure that is too warm, the problem becomes worse.
When dealing with a clog, do not try to force cold filament through. Heat the hotend to the correct temperature, try manual extrusion, clean the nozzle with a needle of a suitable diameter, or perform a cold pull. If the problem keeps returning, replace the nozzle and check that you are not using an unsuitable temperature or excessively poor-quality filament.
If you do not know where to start, use this order:
Save a profile for each filament. Record the brand, material, color, nozzle, temperature, bed, cooling, and a note about what worked. The same PETG from two manufacturers can behave differently, and black filament may print better than transparent filament.
Before a long print, a quick check is worthwhile:
Most 3D printing problems are not random. They result from a combination of adhesion, temperature, flow, cooling, mechanics, and filament. When you work through the individual causes instead of changing settings randomly, you will save material, time, and frustration.


