Free shipping from 1 999 Kč
Fast shipping
Verified store
Thousands of customers




Free shipping from 1 999 Kč
Instructions for performing flow dynamics calibration in Bambu Studio
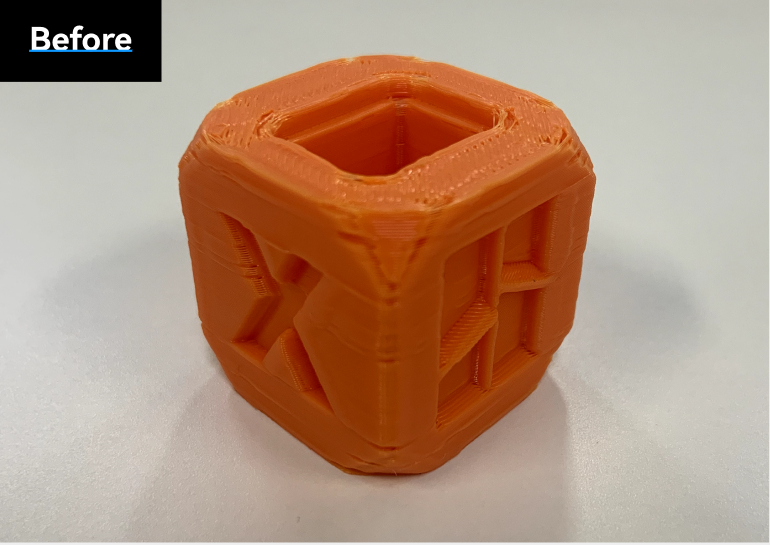
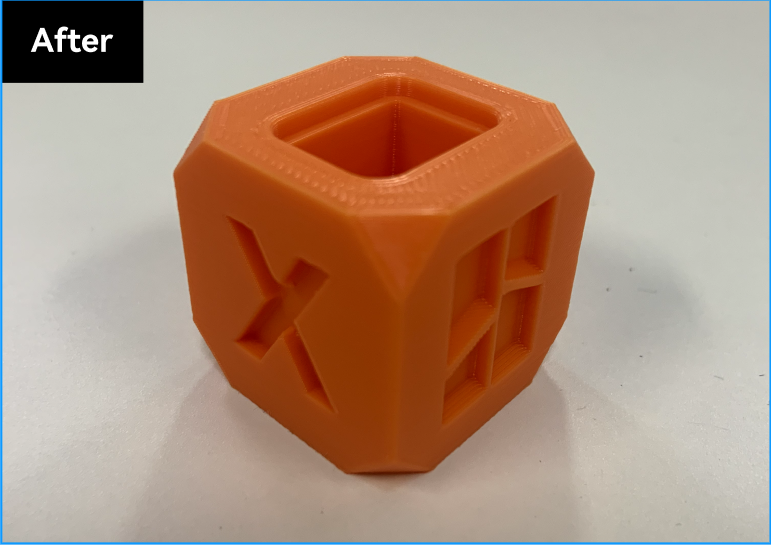
What is flow dynamics calibration?
From fluid mechanics, we know that when a Newtonian fluid flows through an opening, it requires pressure, and the pressure is proportional to the flow rate.
Filament, which is not a rigid body, will be compressed during extrusion to create the necessary pressure. This compression process causes a delay in the response of the actual flow rate, because the extruder supplies only the amount of filament needed for extrusion, without any excess.
Therefore, we implemented flow dynamics control to address this issue, similar to „Pressure advance“ in Klipper or „Linear advance“ in Marlin, with the addition of compensation for nonlinear effects. When executing the flow adjustment command, the printer performs a quick additional extrusion to create the necessary pressure as quickly as possible, thus ensuring that the flow response reacts to tool movement.
However, how much additional extrusion is needed for a specific filament? Since different filaments have different stiffness and viscosity, they require different amounts of extrusion at a given flow rate. Therefore, flow dynamics calibration is essential.
Previously, we performed calibration before every print, but encountered several problems:
When should flow dynamics calibration be performed?
We have now added automatic calibration for different filaments, which is fully automated, and the result will be saved to the printer for future use.
Flow dynamics calibration should be performed in the following cases:
What happens if we do not perform calibration?
There are two scenarios:
Is calibration reliable?
The reliability of the calibration depends on several factors:
Apart from these cases, the calibration result was reliable in our tests.
Why do my calibration results differ each time I calibrate?
In our tests, we observed fluctuations of around 10% in the calibration results. We are still investigating the causes of this variation.
Two Calibration Modes
Flow dynamics calibration has two modes – manual and automatic.
Automatic mode: the user only starts the calibration, and the printer returns the calibration results after the print is completed.
Manual mode: the user must determine which parameter to use by observing the quality of the calibration line on the printed plate.
How to start calibration?
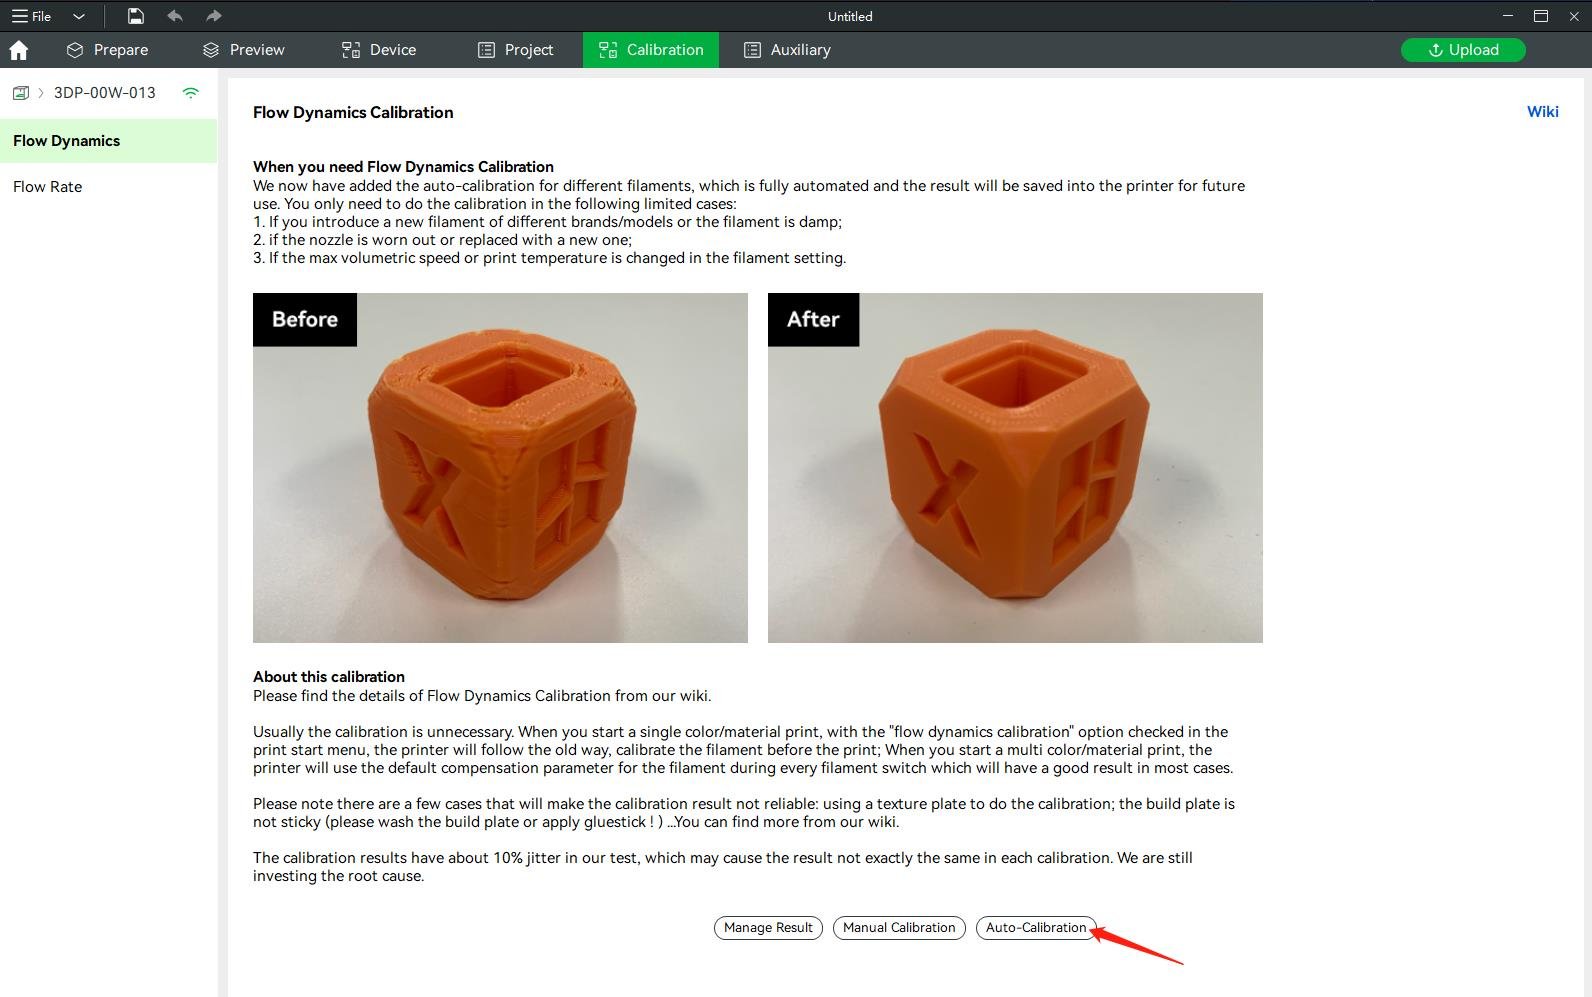
The printer must be connected before performing calibration.
(2) Select the material to calibrate
By default, we select all the necessary parameter information, but you can also adjust some parameters according to your situation.
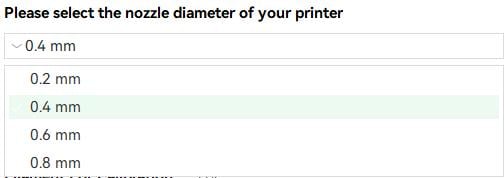
Select the nozzle diameter of your printer.
(Note: Calibration for different nozzle sizes requires support from the printer firmware. For OTA version 01.06.00.00, only a nozzle with a diameter of 0.4 mm is supported)
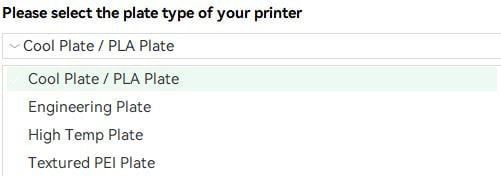
Select the build plate type of your printer.
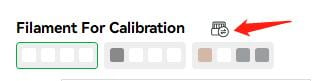
Synchronize filament list information from AMS.
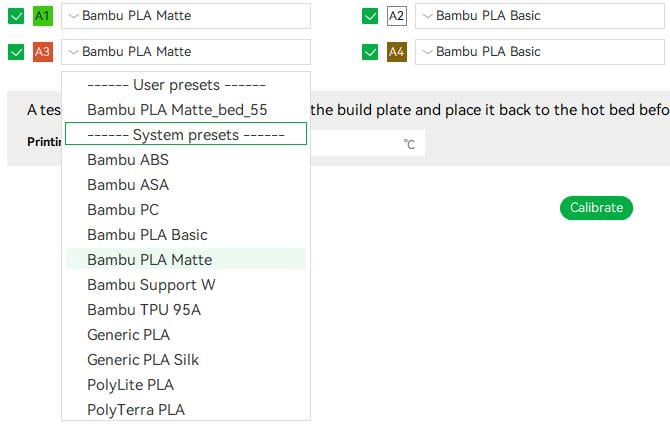
Select the filament you want to calibrate, and you can select a filament preset for printing using the filament drop-down list.
Once you have entered the necessary information, you can start the calibration by clicking the „calibration“ button.
(3) Calibration print in progress.
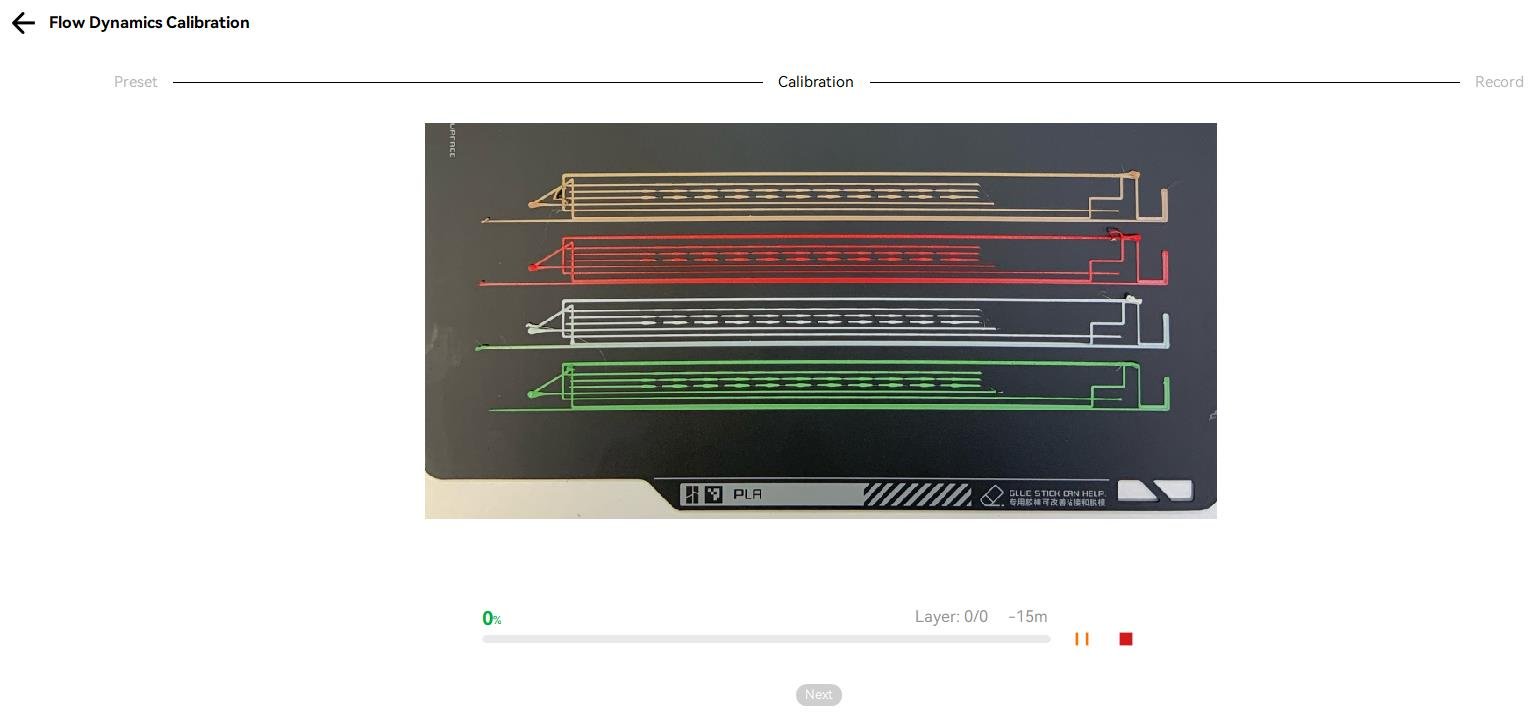
After the print is complete, you can click the „Next“ button to continue to the next step.
(4) Save calibration results
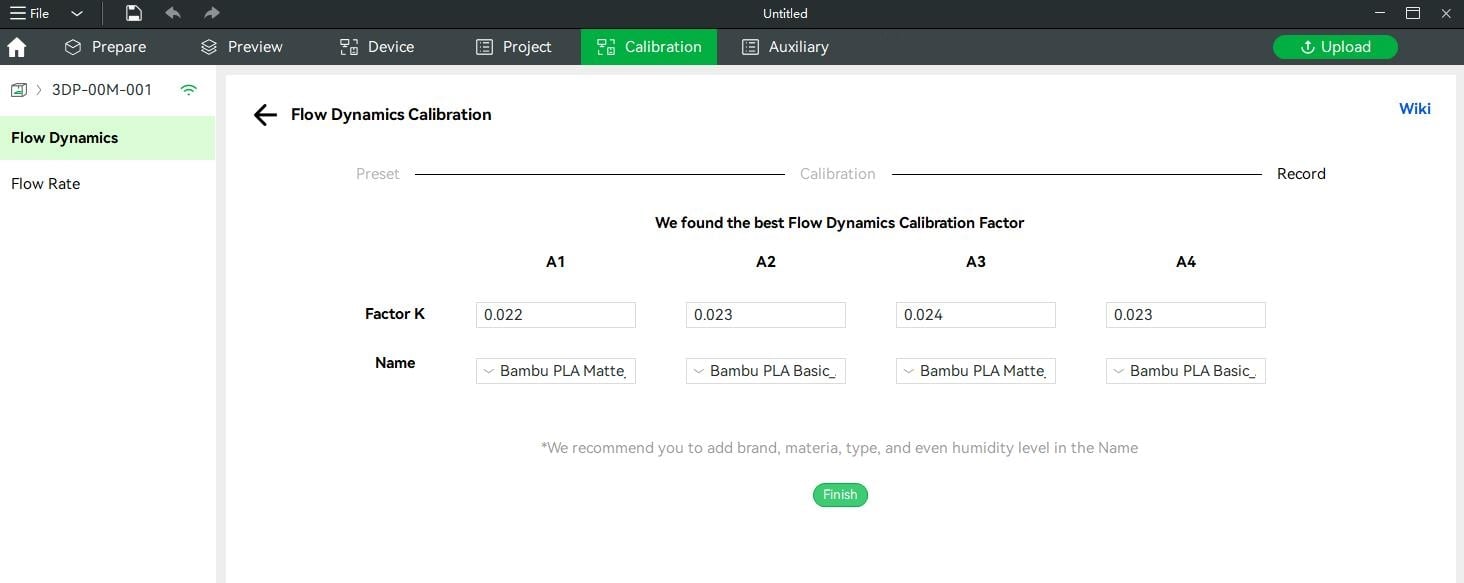
After the print is complete, the machine will return the results, which you can save. Each parameter file can be named, and this name can be edited.
All saved results can be viewed by clicking the „Manage Results“ button on the home page,
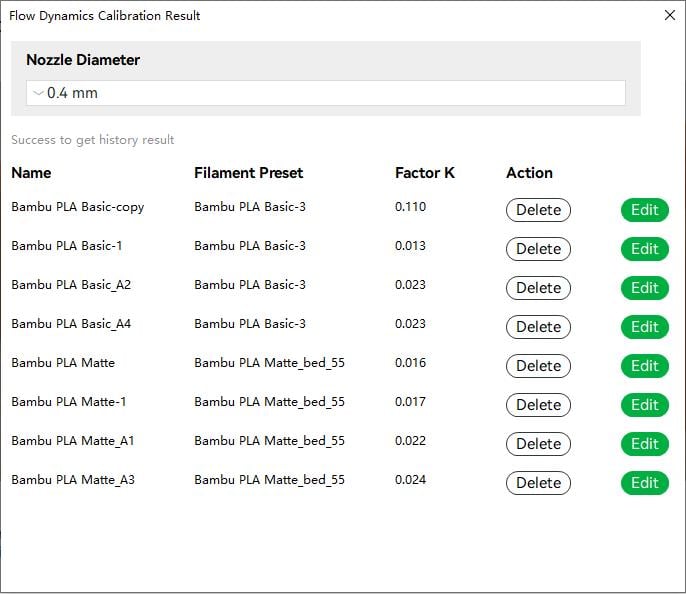
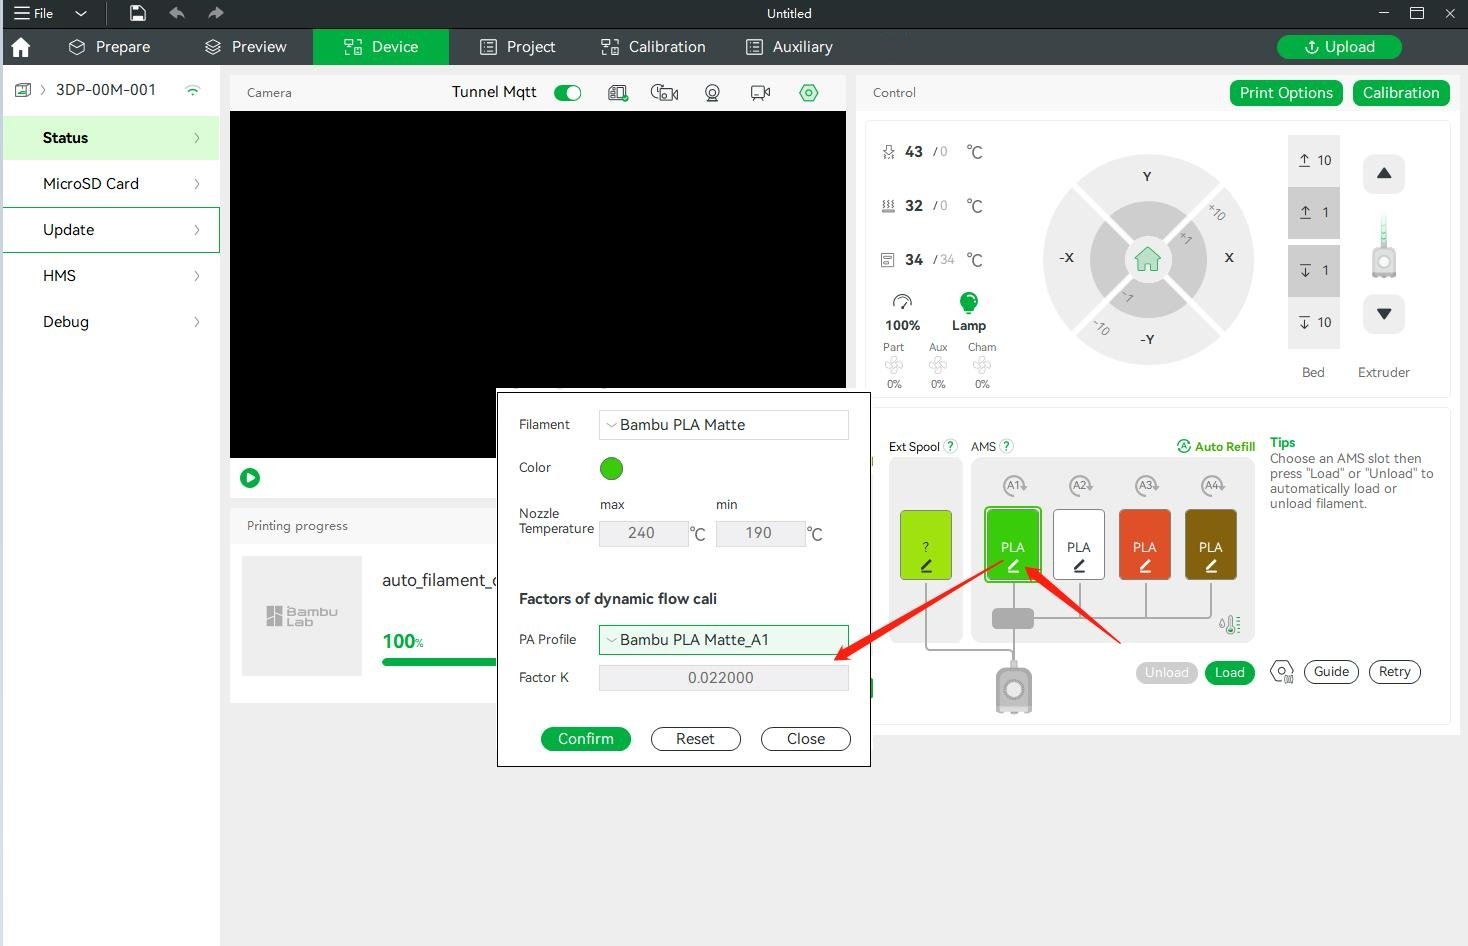
and you can set the K value you want to use for each slot in the material dialog on the device page.
(2) Select the material to calibrate
As in automatic mode, but in manual mode you can calibrate only one material at a time.
(3) Calibration print in progress
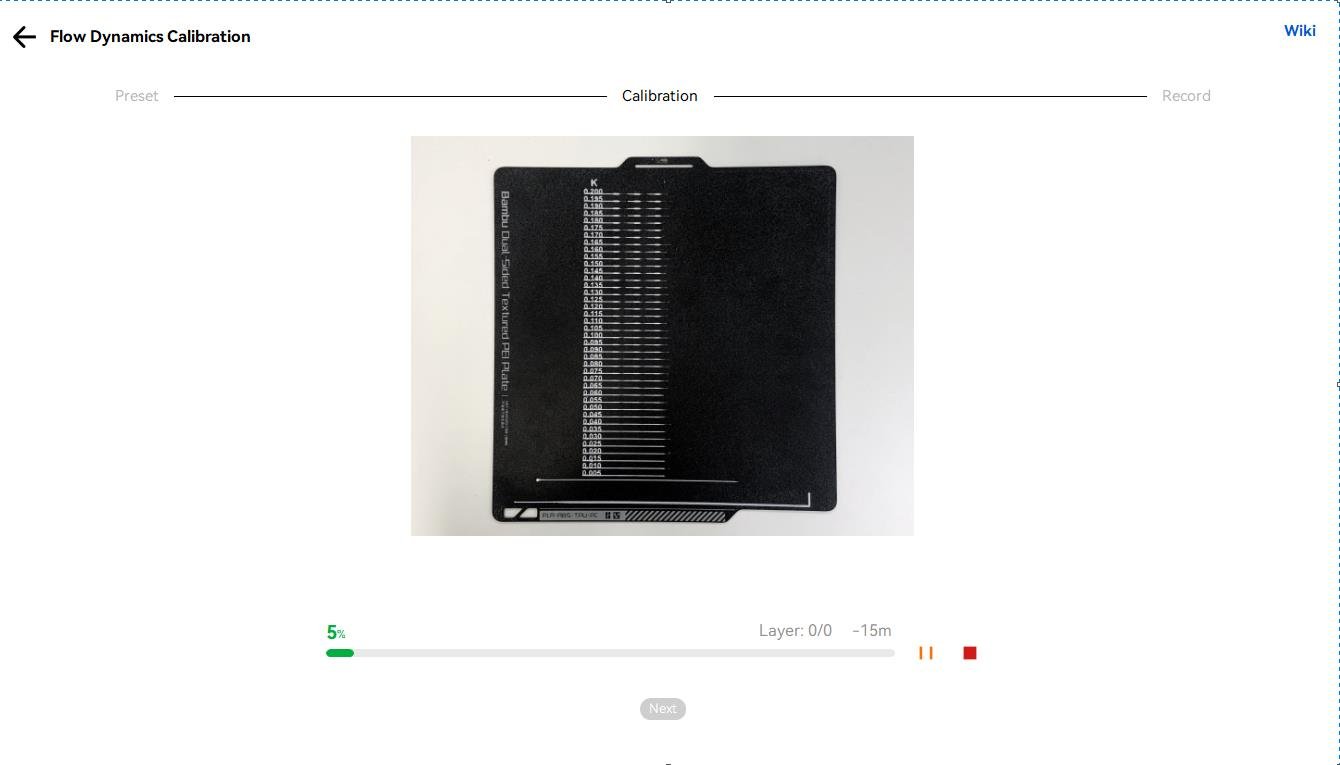
(4) Save calibration results
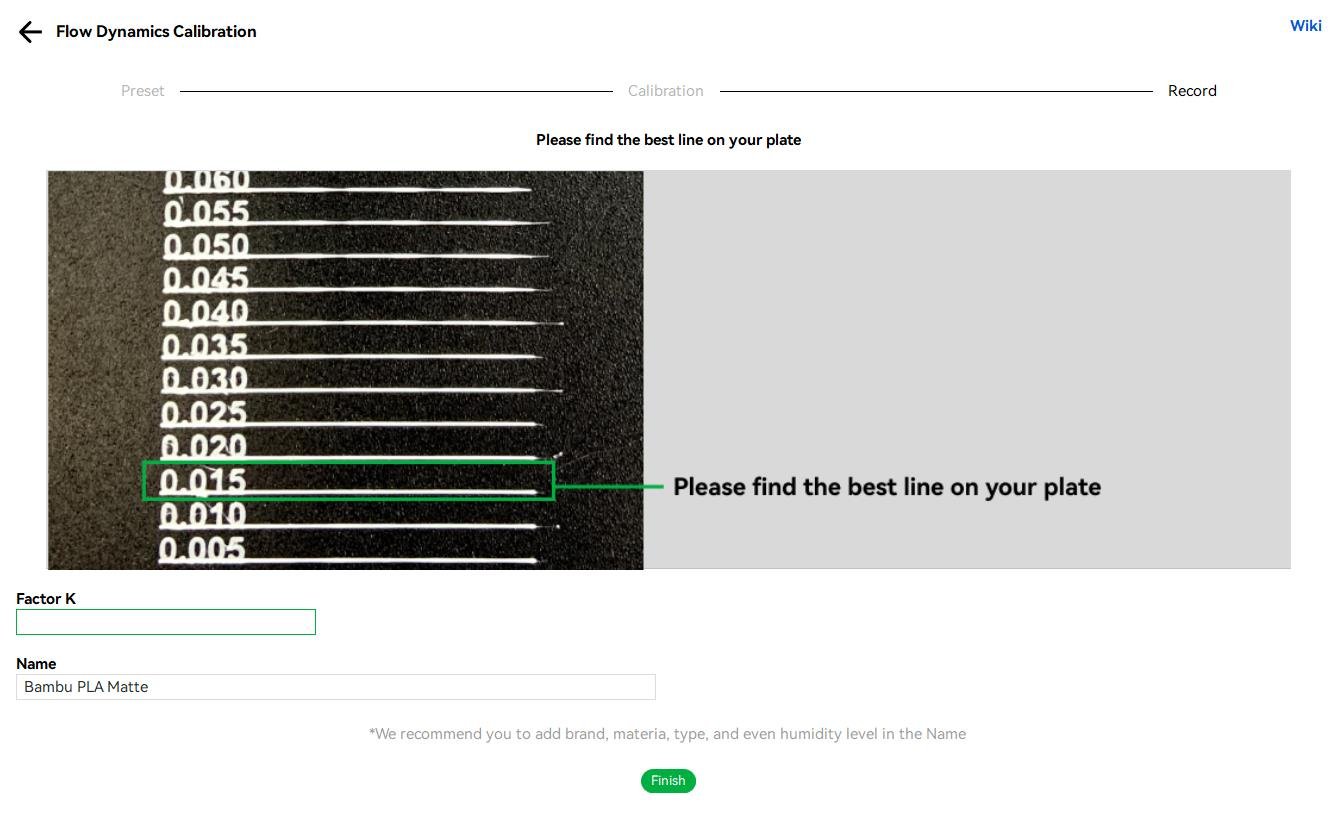
By observing the calibration line, select the number corresponding to the calibration line with the best printing effect. Then enter the K value in the numbered edit field, and after saving, you can view the history of the displayed data in the history dialog.


