Doprava zdarma od 1 999 Kč
Rychlá expedice
Ověřený obchod
Tisíce zákazníků




Doprava zdarma od 1 999 Kč
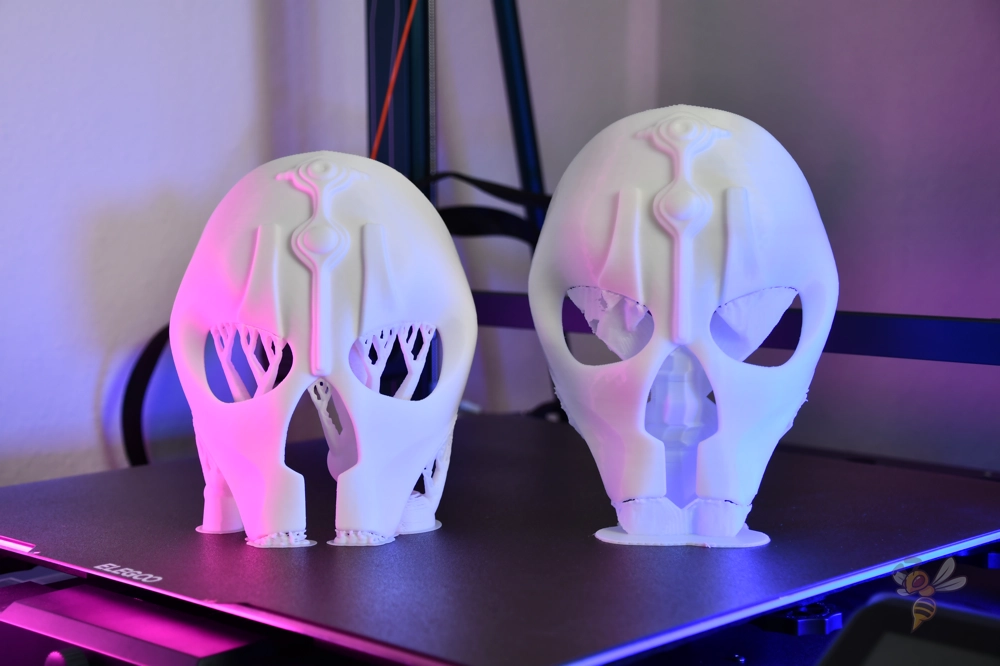
Supports are temporary structures that hold parts of a model beneath which there would otherwise be no material during printing. Without them, some overhangs would sag, strands would fall into the air, and details would end up as a tangle of plastic. At the same time, every support extends the print time, consumes filament, and can leave a mark on the surface after removal.
The goal, therefore, is not to enable supports every time. The goal is to use only as many as the model really needs and set them up so they hold the shape during printing but can be removed cleanly after cooling.
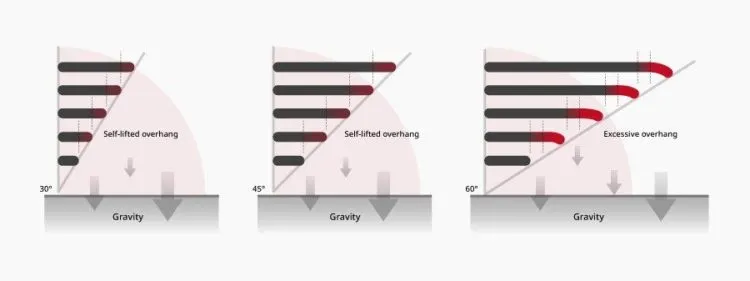
An FDM printer lays down material in layers. A new layer must rest at least partially on the layer beneath it. As soon as a model contains a section that starts in mid-air, a long overhang, or a detail with a small contact area, the slicer suggests a support.
Typical situations where supports make sense:
A value of 45 degrees is a safe starting point. A well-tuned printer with PLA, a lower layer height, and strong cooling can often handle 55 or 60 degrees as well. PETG, ABS, ASA, and ible materials tend to be more demanding and often require more cautious settings.
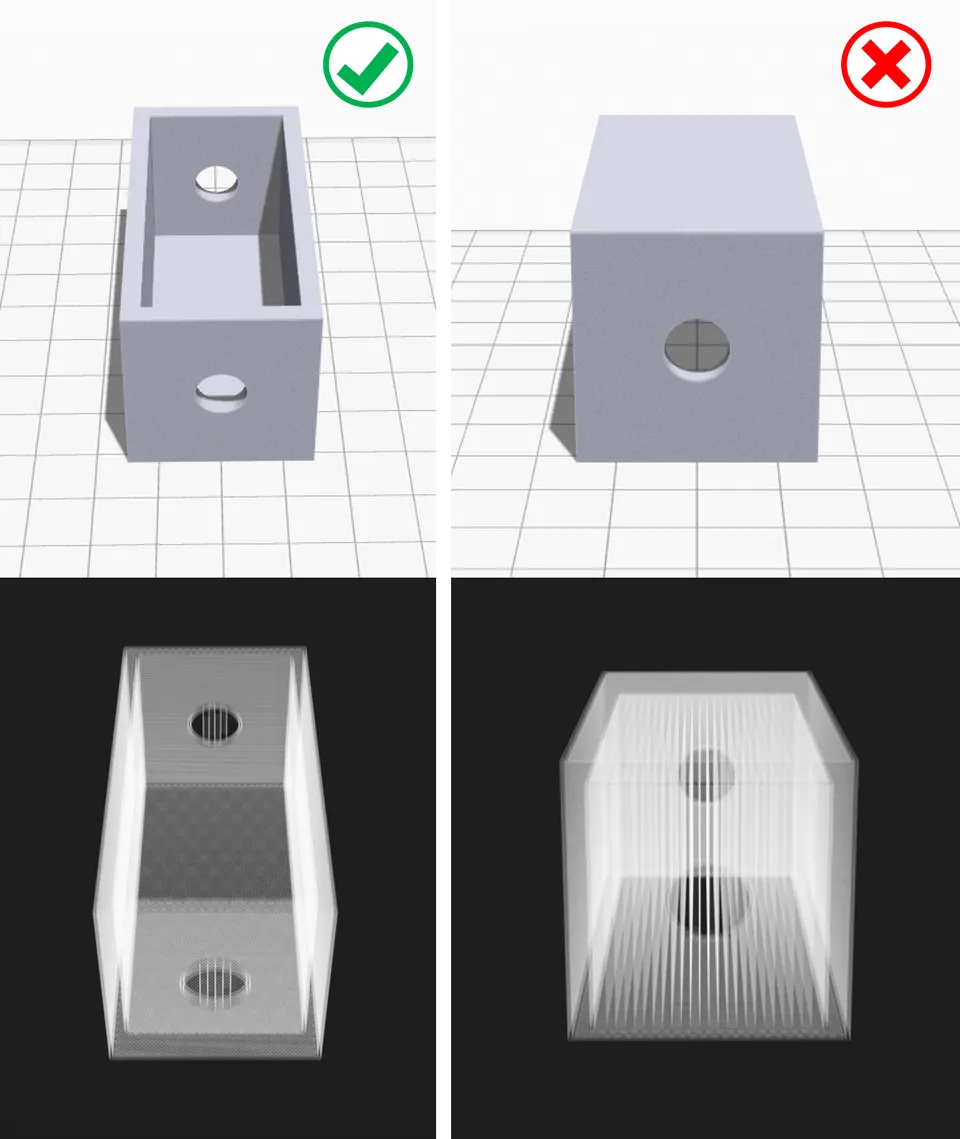
The best support is the one you do not have to print at all. Before slicing, inspect the model and try to find an orientation in which the important visible surfaces are on top or on the side and the problematic overhangs are reduced.
Practical procedure:
This step can save tens of minutes of printing and a lot of subsequent sanding.
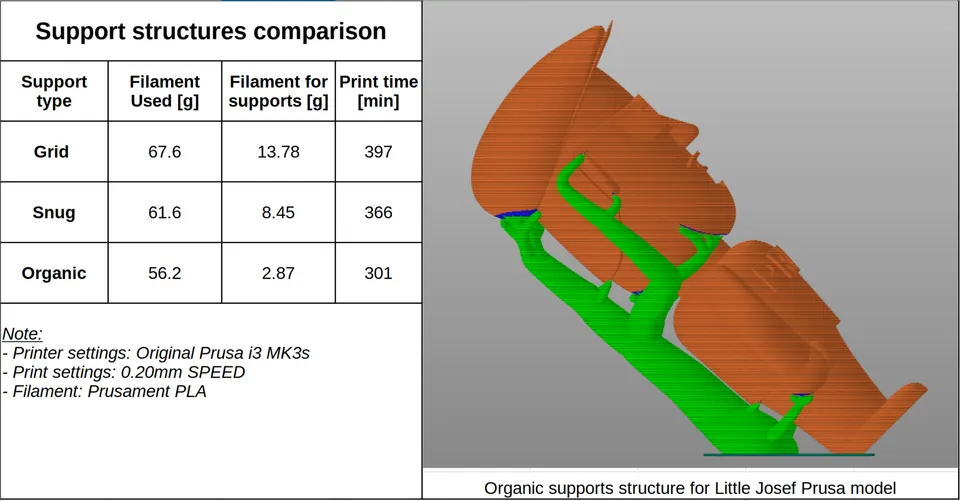
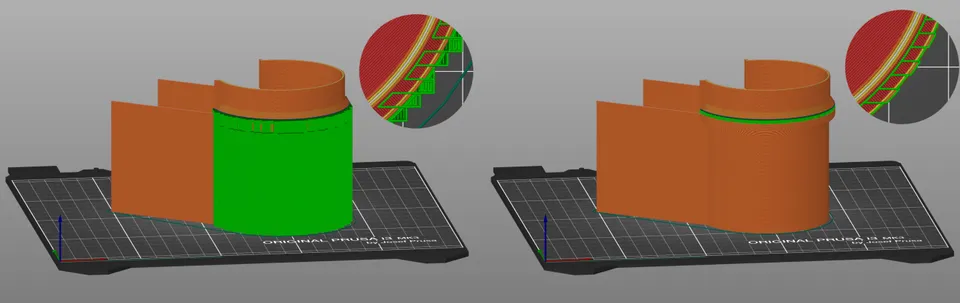
Slicers offer several support styles. The names vary, but the principle is similar.
Classic Supports form a regular grid or columns beneath the overhang. They are stable and suitable for larger flat surfaces, technical parts, and situations where the support has to carry more weight. The disadvantage is greater contact with the model and more frequent marks after removal.
Tree or Organic Supports grow like branches and touch the model only where needed. They are excellent for figurines, statues, decorations, and organic shapes. They usually use less material and are easier to remove, but stability should be checked for very heavy overhangs.
Supports from the Build Plate Only start only on the build surface. This is gentler on the model because the supports do not start on an already printed part. However, they do not always reach all overhangs.
Supports Everywhere can also grow from an already printed model. They can handle complex geometry, but leave more marks and are harder to clean.
Painted Supports, Enforcers, and Blockers are the best choice when automation adds unnecessarily large amounts of material. You can force a support only beneath a critical area or, conversely, block supports where they would be difficult to remove.
Every printer, nozzle, and filament brand behaves slightly differently. Treat the following values as a practical starting point for a 0.4 mm nozzle, a 0.2 mm layer height, and standard PLA.
| Setting | Recommended Starting Point | What to Change When the Result Is Not Good |
|---|---|---|
| Overhang Angle | 50 degrees | Lower to 45 degrees for greater reliability, or increase to 55 to 60 degrees for fewer supports |
| Support Placement | From the build plate, if sufficient | Switch to everywhere only for truly complex geometry |
| Support Density | 10 to 15% | Increase for heavy overhangs, decrease for easier removal |
| Support Interface | On, 2 to 4 layers | More layers improve the underside surface but can make removal more difficult |
| Top Z Distance | Approximately 1 layer height | Increase if the support fuses to the model, decrease if the overhang sags |
| XY Distance | 0.35 to 0.6 mm | Increase when supports stick to the walls, decrease for small details |
| Support Pattern | Rectilinear, zig-zag, or tree style | Stronger patterns hold better but are usually harder to break away |
The most important values are Z distance, support interface, and density. If a support is difficult to remove, do not start by randomly switching all the options. First increase the top Z distance or XY distance, then reduce the density, and only afterward change the entire support type.
PLA is the most forgiving. It cools well, handles decent overhangs, and supports usually break away cleanly. With PLA, a starting Z distance of around one layer often works.
PETG is tough and likes to stick to supports. Use a larger distance, lower support density, and preferably organic or tree supports if the model allows it. An overly dense interface can behave like a permanently welded surface with PETG.
ABS and ASA require a stable temperature and less aggressive cooling. Supports must be strong enough not to detach during shrinkage. Expect the surface above the supports to be rougher than with PLA.
TPU and Other Flexible Materials are difficult to use with supports. Supports bend instead of breaking and cleanup is slow. With ible parts, it is worth reorienting the model or modifying the design so that supports are kept to a minimum.
Soluble or Separation Materials make sense for multimaterial printing. The support interface can be made from a material that does not bond with the main model or dissolves away. The result is cleaner, but printing takes longer, requires more material changes, and creates more waste when cleaning the nozzle.
After slicing, do not look only at the time estimate. Open the layer preview and slowly go through the critical areas.
Check especially:
For a complex model, it is worth printing a small section or a reduced test version. You will save filament and frustration.
Do not rush support removal. Let the print cool down. Warm plastic is softer, deforms more easily, and small details can bend.
Recommended procedure:
When working with a knife, always cut away from your hand and from the detail you want to preserve. Support pieces can spring away when they break, so safety glasses are useful when working with hard and brittle materials.
Supports are fused to the model. Increase the top Z distance, increase the XY distance, reduce the support density, or reduce the number of interface layers. Also check the print temperature and flow, as overextrusion of support material makes this worse.
The underside of the overhang is ugly and sagging. Reduce the Z distance, enable or strengthen the support interface, reduce the layer height, and improve cooling. For long bridges, a lower speed and correctly configured bridge flow can help.
Supports break during printing. Increase the density, add a brim, use a stronger pattern, or switch to classic supports. For tree supports, reduce aggressive branch angles and check that they have sufficient contact with the build plate.
Supports leave marks on visible surfaces. Rotate the model, use supports from the build plate only, or manually block contact in visible areas. Organic style often helps with decorative models.
The slicer generates unnecessarily many supports. Increase the overhang angle, enable supports from the build plate only, use blockers, or paint supports manually only in critical areas.
A figurine with a chin, arms, and hair. Start with organic supports from the build plate. Manually add support beneath the chin and the fingertips. Keep the visible part of the face free of contact with supports if the geometry allows it.
A technical bracket with a horizontal arm. If strength is more important than appearance, use classic supports with an interface. Set the density to around 15 to 20% and expect to lightly clean the underside after printing.
A box with holes and internal fittings. First try changing the orientation. Supports inside a small box are often difficult to remove. If they are necessary, use blockers in places that you will not be able to reach with a tool after printing.
A long bridge between two walls. The printer can often handle a short bridge without supports. For a longer bridge, it is better to add one narrow support in the middle, turning one long bridge into two shorter ones.
Supports are not a sign of a bad model. They are a tool that makes it possible to print shapes that an FDM printer would otherwise be unable to handle. The best results, however, come from combining the correct model orientation, a reasonable amount of support, properly configured spacing, and checking the layer preview.
Start with a simple rule: use supports only where the plastic has no foundation beneath it, and always consider how you will remove them after printing. The better you solve this in the slicer, the less work you will have to do on the finished print.


